How Many Inputs Do I Need on an Audio Interface? Vocals, Bands and Drums
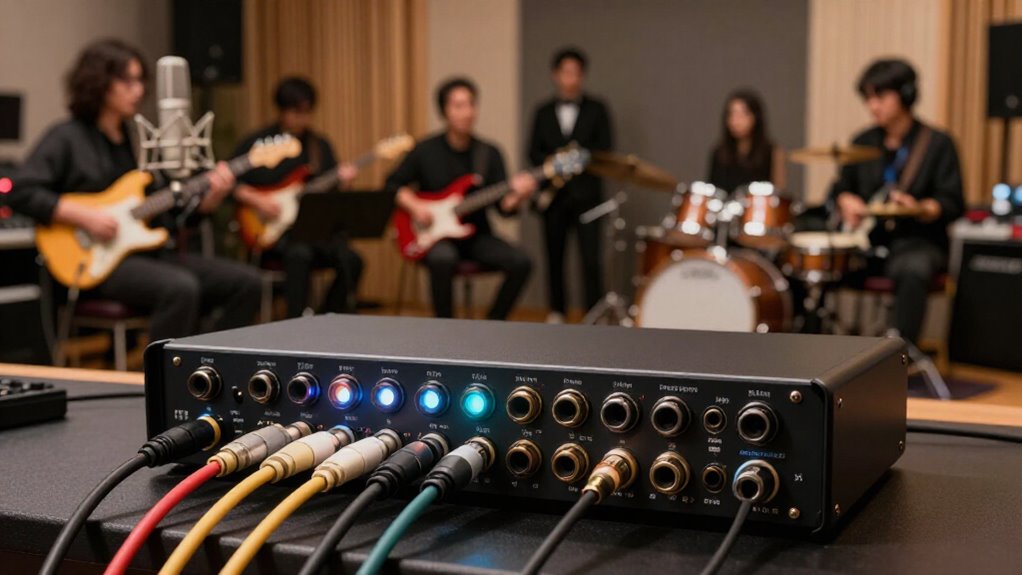
Choose one interface input for every microphone, DI, or mono line source you’ll record simultaneously, and reserve two for each true stereo device.
You’ll need two mic preamps for vocal duos, four for small rehearsals, and usually eight preamps for a fully miked drum kit. Plan future growth: an ADAT input can add eight channels at 44.1/48 kHz with an external preamp.
Next, confirm phantom power, Hi-Z, computer compatibility, and headphone routing before you buy carefully.
Count Simultaneous Recording Sources
Start by counting every source you’ll record at the same time, not every instrument you might record later. An interface’s input count determines concurrent tracks, so map the largest realistic session you expect. List each vocal mic, guitar, bass, keyboard, and line feed running simultaneously.
Count each mono source as one input: one microphone, one direct guitar or bass connection, or one mono line device. Count genuine stereo as two inputs; a synth with separate left and right analogue outputs needs two line inputs to retain its image. Then check compatibility, not socket totals. Each microphone requires a suitable preamp, condensers need 48 V phantom power, and guitars or basses need Hi-Z instrument inputs. Confirm those modes can operate together, because four physical sockets may not support your complete session.
Plan for Future Channel Growth
Once you’ve mapped your largest likely session, allow room for the sources you’ll add next. Count each future mono source as one channel: an extra vocal mic, snare mic, or DI guitar. Reserve two channels for every true stereo device, such as a keyboard using separate left and right outputs. If you need two inputs today but expect occasional duos, stereo keys, or additional mics, a four-input interface usually costs less than replacing a two-input unit soon.
For drum or full-band growth, choose an interface with ADAT optical expansion. At 44.1 or 48 kHz, ADAT can accept up to eight added channels from ADAT hardware. Check specifications in order: simultaneous analogue inputs, instrument/Hi-Z connections, ADAT or S/PDIF inputs, then loopback. Verify all total-input claims.
Available Mic Preamps
Choose an interface with enough microphone preamps for every mic you’ll record at the same time, because each microphone needs its own preamp. Count simultaneous sources, not the interface’s headline input total; that number can include line, instrument, digital, or loopback channels. A two-person podcast needs two preamps, while a four-person roundtable needs four.
| Recording setup | Preamps needed | What you capture |
|---|---|---|
| Podcast duo | 2 | Two simultaneous voices |
| Drum kit | 8 | Close mics and overheads |
A compact rehearsal can work with four preamps. Proper drum miking can require eight: kick, snare, toms, overheads, and room mics quickly consume channels. Verify the specifications list actual mic preamps, not merely combo sockets or total inputs. You’ll then track every planned microphone independently without compromise during a session.
ADAT Expansion Versus Built-In Inputs
Choose enough built-in mic preamps for your largest likely session, because they’re ready to use without extra hardware. Add ADAT expansion when future drum or band tracking may need more channels, remembering that it requires a compatible external preamp and carries up to eight channels at 44.1 or 48 kHz. Check built-in preamp counts separately from advertised total inputs, and budget for expansion hardware and reduced ADAT capacity at higher sample rates.
When ADAT Makes Sense
ADAT expansion makes sense when your largest realistic session needs more simultaneous inputs than your interface provides, such as close-miking a full drum kit or recording a band live. At 44.1 or 48 kHz, a standard ADAT optical connection can carry up to eight additional channels from a compatible external preamp. That can let you add tom, overhead, room, and extra performer microphones while keeping the same interface.
Before you buy, verify that your interface includes an ADAT input, not only an optical output. Also confirm that the expander provides the input types you require, especially microphone preamps rather than line-only connections. Check its sample-rate mode as well: ADAT carries fewer channels at higher rates, commonly using S/MUX. Match channel count to recording needs.
Built-In Inputs First
Start with the number of sources you need to record at the same time, then select an interface that provides those inputs and microphone preamps out of the box.
For typical sessions, count analogue inputs and mic preamps separately. A Scarlett 18i8 supplies four preamps; an 18i20 supplies eight, so choose according to the microphones you’ll connect today. ADAT can add up to eight digital channels at 44.1 or 48 kHz through a compatible external preamp, such as a Scarlett OctoPre, on compatible interfaces. It doesn’t create additional built-in analogue sockets or preamps. Treat ADAT as a future option after meeting immediate needs, and verify channel availability at your intended sample rate, since higher rates can reduce ADAT channel count before you buy.
Expansion Costs And Limits
Built-in preamps cost more upfront when you need many microphone channels, but they give you a self-contained setup without an external preamp, optical cable, or additional power connection. ADAT offers a lower-cost way to add inputs later, but expansion is not free: you must purchase a compatible external preamp or converter, such as a Scarlett OctoPre.
At 44.1 or 48 kHz, one ADAT optical connection can carry up to eight input channels. Higher sample rates reduce that capacity, so confirm the supported ADAT channel count on both the interface and expander at the rate you’ll record. When comparing prices, count simultaneous microphone preamps, not interface’s headline input total. That total can include line inputs, digital returns, and loopback channels that don’t accept microphones directly.
Planning Future Channels
Plan for the largest session you’re likely to record in the near future, then decide whether you need those microphone channels built in now or can add them later through ADAT. Built-in inputs suit sessions you expect immediately: they’re ready without an external preamp, extra cables, or additional setup. ADAT gives a compatible interface a practical upgrade path.
At 44.1 or 48 kHz, a conventional ADAT connection can carry up to eight channels from an external preamp. Don’t mistake an interface’s total input figure for its mic-preamp count; confirm how many expansion channels actually provide preamps. At higher sample rates, ADAT capacity may fall, so check both units’ specifications at your target settings. Compare expansion cost against an interface with more built-in inputs before recording bands or multimiked drums.
Eight Inputs for Drum Kits
For a typical eight-mic drum setup, you can assign inputs to kick, snare, toms, hi-hat, and overheads, with each microphone recorded to its own track. Verify that all eight channels include the required mic preamps and provide phantom power where condenser microphones need it. If you also track a band or need more drum mics, expand through ADAT with a compatible external preamp.
Typical Eight-Mic Layouts
Eight mic preamps let you record a typical drum kit to eight separate tracks: kick, snare, three toms, hi-hat, and a stereo pair of overheads. Use one input for each microphone so you can record and mix every source independently. Before connecting anything, verify that your interface actually supplies eight microphone preamps. Some models advertise eight total inputs but reserve some for line-level or digital sources.
Count every mic you plan to use at the same time. If you add a room microphone, second snare mic, or another close mic, you’ll need a ninth preamp or you’ll need to replace one channel in this layout. Label inputs and tracks before recording to keep setup and mixing organized. You can adjust balance and processing later.
Essential Drum Microphones
A fully miked drum kit can use eight simultaneous microphone inputs, with each mic recorded to its own channel for independent level, EQ, and dynamics control. Start with kick, snare, and a matched overhead pair: four inputs that capture the sound. Add individual microphones for high tom, floor tom, hi-hat, and a second snare position when you need tighter editing and mix balance.
Each mono microphone occupies one input, so list every source before choosing an interface. Don’t assume a six-input band setup covers drums; kick and two overheads already consume three channels. If you record vocals, guitar, and bass simultaneously, those sources use the other three, leaving no channels for additional drum microphones. Plan the session around what must be captured at once.
Preamps And Phantom Power
When you record a fully miked drum kit, each microphone needs its own mic preamp, so plan for up to eight simultaneous preamp channels. Count every microphone you want to capture at once, including kick, snare, toms, overheads, and room mics. Each channel raises one low-level microphone signal to a usable recording level.
Check the interface’s built-in microphone preamp count, rather than its advertised total input count. Line, instrument, and digital inputs may not accept microphones directly. If you use condenser mics for overheads or room capture, make sure 48 V phantom power is available on their connected channels. Enable phantom power only after connecting compatible microphones, and mute monitors while plugging or unplugging mics to prevent pops and protect your speakers and hearing during sessions.
Expansion Options For Drums
For a fully miked drum kit, plan for up to eight simultaneous microphone inputs: kick, snare, toms, overheads, and possibly room mics. Count every microphone you’ll record at the same time at once, because each close mic and stereo pair needs its own input. Choose an interface with eight built-in mic preamps, or one that supports expansion through ADAT optical.
At 44.1 or 48 kHz, ADAT can add up to eight channels from a compatible multichannel preamp, such as a Scarlett OctoPre. Higher sample rates reduce ADAT channel capacity, so verify the exact supported channel count on both units before committing. Don’t rely on a headline input total: confirm it includes the mic preamps and expansion channels you need for your planned drum setup.
Computer Ports and Driver Support
Your computer’s ports and driver support determine whether an audio interface will connect reliably and deliver the low-latency performance your recording software needs. USB and USB-C handle most home studios, even when your interface provides several input channels. Confirm which ports your computer actually has, then verify that the interface uses a directly supported connection; don’t assume every USB-C-shaped port offers identical compatibility.
Thunderbolt can be appropriate when you need extensive I/O or exceptionally low latency in a high-end system. However, Thunderbolt interfaces usually cost more and may not work across as many computers. Before ordering, check the manufacturer’s current driver downloads for your exact operating-system version. Install supported drivers and confirm compatibility with your DAW, particularly if you monitor through software while recording.
Budget for XLR Cables
Budget one XLR cable for every microphone you’ll connect at the same time, based on the largest session you expect to record. If you expect to track four vocalists, buy four cables. If your largest setup includes a drum kit, count every drum microphone too, even if you don’t use those mics for smaller sessions.
Match each cable length to the distance between the microphone and your interface or stage box. Short runs reduce clutter, while longer runs let you position singers, amps, and drum microphones where they belong. XLR cables carry balanced microphone signals into XLR mic-preamp inputs; they don’t create additional interface inputs or preamps. Add at least one spare cable when possible. A spare lets you replace a faulty cable without stopping recording.
After you’ve planned your cable runs, check how your interface handles 48 V phantom power. Condenser microphones need this voltage through the interface’s mic inputs, but control layouts vary. Some interfaces use one switch for several channels, so enabling it for a single condenser also powers every mic input in that group.
- Read the manual or panel labels to identify each phantom-power group.
- Map condenser mics to groups that you can power safely.
- Check every other connected microphone before engaging the shared switch.
- Confirm the manufacturer’s guidance for dynamic microphones, which generally don’t require phantom power.
If a session needs settings across microphones, shared switching can limit choices. Plan assignments before plugging in mics, engaging 48 V after verifying group.
Confirm Independent Headphone Mixes
Headphone monitoring needs can affect your interface choice as much as input count. Before buying, confirm how many headphone feeds you’ll actually need during recording.
- Count listeners: One headphone output suits a solo performer; two can cover you and a guest.
- Check level controls: Each output should have its own volume knob, letting both listeners set safe, comfortable levels.
- Verify routing: Two headphone sockets don’t automatically provide two independent mixes. Confirm the control software can assign a separate cue mix to each output.
- Plan balances: Independent mixes let a singer raise vocals while a drummer emphasizes instruments or backing tracks.
Add required headphone outputs, individual level controls, and cue-routing flexibility to your input-planning checklist. This prevents monitoring limits from disrupting otherwise adequate recording sessions.
Conclusion
Choose an interface by counting the sources you’ll record at the same time, then add channels for growth. For vocals, one or two preamps may suffice; for bands and drums, eight mic inputs is a starting point. Check whether ADAT expansion, computer ports, and drivers meet your workflow. Budget for XLR cables, verify phantom-power grouping, and make sure you can create independent headphone mixes. Buy enough inputs now so you won’t outgrow the interface session.
Audio Interface Buffer Size & Latency Calculator
Convert audio interface buffer size and sample rate to milliseconds, estimate round-trip delay with your own overhead, and view a latency chart.
Recording Storage & Session Length Calculator
Estimate uncompressed recording size per hour and per session, and how many hours fit on a card, from sample rate, bit depth and track count.
Recording Software Finder: Free & Paid DAWs and Recording Apps
Filter 23 verified recording apps and DAWs by price, license, platform, use case and feature, plus free DAWs bundled with interfaces.