Acoustic Diffuser vs Absorber: Which Treatment Does Your Room Need?
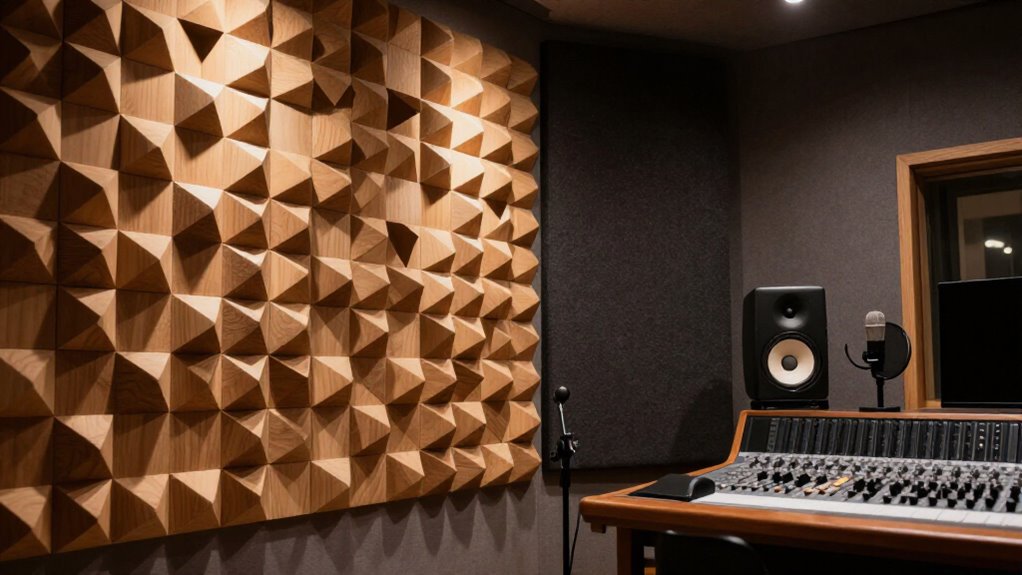
Choose absorbers when you’re trying to reduce early reflections, midrange smear, and RT60, especially in small booths or when your seat sits close to the rear wall. Choose diffusers when your room has enough volume and listening distance for scattered wavefronts to develop, preserving liveliness without focused echoes.
Treat bass separately below 200 Hz with traps. Measure decay across bands and positions before committing; the following placement, geometry, mounting, and budget factors determine your balance.
Scatter Reflections, Tame Reverberation
Diffusers scatter sound reflections across multiple directions instead of absorbing them, which helps break up focused flutter echoes and smooth the room’s sound field without making it feel acoustically dead. You should distinguish reflection control from overall decay control. At early reflection paths, excessive energy can blur stereo imaging and add brightness or grit.
Absorption reduces reflected energy and shortens reverberation; diffusion redistributes it. Use the former where direct-path clarity is critical, then preserve spatial liveliness with carefully placed scattering where adequate listening distance lets its wavefronts develop.
| Objective | Treatment action | Audible result |
|---|---|---|
| Flutter control | Scatter reflections | Less focused echo |
| Decay control | Reduce reflection energy | Shorter reverberation |
| Imaging | Limit early energy | Clearer localization |
Your measurements and listening tests should confirm the balance before placement.
Diffuser Wells vs Porous Panels
Quadratic-residue diffuser wells and porous panels solve different acoustic problems: wells scatter incident sound back into the room, whereas porous panels dissipate part of that energy as heat and reduce reflected sound. When you select a QRD, its geometry determines bandwidth. Well depth follows a quarter-wavelength relationship, while well width follows a half-wavelength relationship.
Its prime-number sequence—7, 11, 13, or 17—also indicates the intended frequency range; higher values cover broader bands. For example, a QD13 operates from roughly 275 Hz to 3,400 Hz, with adequate listening distance. Choose porous fiberglass, polyester, cellulose, or acoustic-foam panels when you need to attenuate mid- and high-frequency reflections rather than redirect them. They don’t require QRD-style well geometry, but their thickness, density, and placement determine absorption performance.
Midrange Clarity and Decay
Midrange decay largely determines whether voices and instruments sound articulate or smeared by lingering reflections. If your room retains too much midrange energy, absorption converts part of it to heat, shortening reverberation and reducing coloration, blur, and excessive sustain. You’ll usually prefer absorbers when dialogue lacks definition or musical transients merge.
Diffusion instead scatters reflections, retaining energy while breaking up focused echoes. Use it when you need a livelier field but want less reflection directionality. A hybrid strategy often works best: apply absorption at problematic reflection zones, then use diffusion to distribute remaining energy. For quadratic residue designs, verify the rated frequency range: well depth governs the lower operating limit, while well width relates to wavelength. You must allow listening distance for midrange scattering.
Mounting Hardware and Alignment
Mounting quality directly affects both safety and acoustic performance. Choose hardware rated for each panel’s weight and matched to the wall’s construction; anchors, screws, and brackets must resist static load without loosening. You’ll verify fastener capacity in drywall, masonry, or stud-backed assemblies before installation.
Mount absorbers flat against the target surface, particularly at side-wall and ceiling first-reflection points. Gaps or tilted edges can alter their intended broadband absorption behavior. For QRD diffusers, orient wells upright and preserve their specified sequence; well widths and depths follow wavelength-based geometry. Level adjacent diffuser panels precisely and retain the manufacturer’s designed spacing. Misalignment changes boundary relationships between wells and panels, compromising the calculated scattering distribution and creating inconsistent reflections across the treated surface during normal operation conditions.
Room Volume and Listening Distance
After you align and secure the panels, evaluate the room’s width, length, and height, along with the listener’s distance from the rear wall. Room volume and intended use determine whether diffusion or absorption will produce the more reliable result. Measure every dimension before selecting treatment, because compact spaces place speakers and listeners only a few feet from boundaries.
A rear-wall diffuser requires sufficient travel distance for its scattered energy to develop before it reaches you. Compare your listening distance with the diffuser’s lowest stated octave band. If you sit too close, phase-related interference can undermine its intended effect. In that position, absorption usually controls the returning reflection more predictably and efficiently. This avoids forcing a diffuser into geometry that can’t support its operating range.
Fabric Replacement vs Wood Refinishing
Inspect the treatment’s core before addressing its finish: replace an absorber’s fabric when it’s torn, stained, or acoustically restrictive, but refinish a wooden diffuser only when its wells and scattering geometry remain intact. First, you confirm the absorber’s core remains structurally sound.
A replacement covering must be acoustically transparent: select breathable fabric that admits sound rather than dense vinyl, laminated textiles, or other impermeable materials that reduce access to the porous core. For a diffuser, confirm structural soundness, then inspect wells and joints before cosmetic work. Refinish scratched or worn wood only if sanding and repairs won’t alter well widths, depths, or edge profiles; these dimensions govern scattering. Use thin coatings. Thick paint or pooled varnish inside wells changes reflections and potentially compromises performance.
Low-Frequency Buildup Below 200 Hz
Below 200 Hz, your room’s dimensions and boundary surfaces can create resonances that produce localized bass peaks, nulls, and persistent muddiness. Ordinary diffusion does little to reduce this stored low-frequency energy; you’ll usually need absorption designed for bass control. Corner bass traps work because corners concentrate pressure from multiple boundary interactions, allowing the treatment to address modal buildup more effectively than thin foam or standard mid/high-frequency panels.
Identify the problem before treating it. Measure the response at your listening position, or use familiar bass material to locate frequencies that boom, disappear, or decay too slowly. Room dimensions and seat placement determine where modal peaks and cancellations occur, so don’t apply absorption uniformly. Instead, place low-frequency-rated traps where measurements reveal excess energy, then reassess response.
Visual Footprint and Budget
You must account for each treatment’s visual footprint, placement depth, and coverage before comparing prices. Absorbers can use low-cost soft materials, while wood or QRD diffusers often require a higher upfront investment and more wall clearance. Compare installed coverage and finish costs to determine which option provides the better long-term value for your room.
Room Presence And Placement
Room presence depends on more than acoustic performance: diffusers preserve reflected energy and create a visually substantial wall treatment, while absorbers produce a more controlled acoustic character with a different aesthetic footprint. Choose treatment according to room use, dimensions, and available wall area. Diffusion works best when your listening position sits far enough away for scattered reflections to develop before reaching you.
In a mix room, install a rear-wall diffuser only if adequate distance exists behind your chair; at short distances, absorption more reliably limits early rear-wall reflections. Assess installation as an architectural element, not merely panel count. A documented listening room used six AQD1 diffusers, each 47.5 by 23.5 by 6 inches, behind the seat, demonstrating diffusion’s substantial depth and coverage requirement.
Costs And Long-Term Value
Budget decisions should account for both acoustic function and visual footprint: flat absorbers typically occupy less depth, while diffusers such as the 47.5 × 23.5 × 6-inch AQD1 project farther from the wall and read as a stronger architectural feature. Two unpainted AQD1 pairs cost $160, versus $200 for custom-painted pairs. If decor integration affects whether you’ll keep the treatment installed, the $40 finish premium can deliver practical long-term value.
Recording Booths vs Media Rooms
In a recording booth, you’ll prioritize porous absorbers to control early reflections without overdamping the small space. In a media room, you can combine first-reflection absorption with diffusion to preserve spaciousness, improve dialogue clarity, and limit flutter echo. Choose based on room volume and listening distance, since diffusers need adequate space while absorption suits compact rooms.
Recording Booth Treatment Priorities
Because a recording booth places the microphone close to multiple boundaries, you should prioritize targeted absorption at first-reflection points to limit echo and room coloration. Place porous acoustic foam, fiberglass, or polyester panels where sidewall, ceiling, and rear-wall reflections reach the microphone. This reduces reflections in the mid and high frequencies, improving vocal clarity and maintaining a close, controlled capture.
Add corner bass traps when low-frequency buildup muddies the signal; porous wall panels alone won’t control modal energy. Don’t blanket every surface: excessive absorption produces an unnaturally dead response and can remove useful liveliness from the performer’s monitoring environment. Diffusers scatter energy, but a compact booth rarely provides the path length required for their patterns to develop before reaching the microphone. Use them only if your booth’s dimensions provide adequate spacing. Verify results by recording test phrases and comparing spectral decay.
Media Room Acoustic Balance
Unlike a recording booth, which prioritizes targeted absorption to suppress room coloration around the microphone, a media room needs a controlled balance of absorption and diffusion. You’re optimizing playback rather than isolating a source: dialogue and effects need clear localization, but the room should retain spatial openness. Use absorbers at speaker-side boundaries and first-reflection points to limit early reflections, excessive reverberation, harshness, and image blur.
Don’t blanket every surface; overabsorption removes useful late energy and makes playback sound acoustically dead. Leave hard surfaces entirely untreated, however, and echo and comb filtering can obscure detail. Where the rear wall sits far enough behind your seat, diffusion can scatter returning energy and support a broader, more natural soundfield. If close, reflections won’t develop there; use absorption.
Choosing Diffusion or Absorption
Choose absorption when you need to minimize room coloration at the source, as in a recording booth where reflections can compromise a vocal or instrument capture. Porous panels convert acoustic energy to heat, lowering early reflections and giving your microphone a cleaner, more trustworthy signal.
In a media room, don’t absorb every surface: pair first-reflection absorption with diffusion to preserve envelopment. Diffusers scatter energy rather than eliminate it, but they need adequate listener distance to develop.
- For vocal tracking: prioritize absorption; you’ll hear less boxiness and detail.
- For critical mixing: favor clarity, decay, and reliable decisions.
- For cinema: add diffusion beyond reflection points; you’ll retain a spacious, engaging field.
- For small rooms: don’t place a diffuser behind your seat; insufficient distance can undermine the pattern.
Measure RT60 Before Choosing
Before you add diffusers or absorbers, measure RT60—the time sound takes to decay by 60 dB—to establish how reverberant the room is. Measure at several listening positions and across frequency bands, because a single RT60 value can conceal frequency-specific problems. Long decay suggests excess reverberation; targeted absorption may help.
Conversely, short decay cautions against indiscriminate absorption; further damping can deaden the room.
Interpret RT60 with the room’s dimensions, surface distribution, and intended use. It guides your choice, but it can’t alone determine whether diffusion, absorption, or a combination will produce the required response. After installing treatment, repeat the measurements at the same positions and bands. Compare results with targets to verify intended decay changes and identify remaining frequency-specific imbalance before making further treatment adjustments.
Conclusion
Choose diffusion when your room already has controlled decay but needs broader, less specular reflections at the listening position. Choose absorption when measurements show excessive RT60, flutter echo, or muddy midrange persistence. You’ll often combine both: porous panels reduce energy, while correctly aligned diffusers preserve useful spatial detail. Treat bass separately below 200 Hz with substantial trapping. Measure first, account for room volume and seating distance, then prioritize performance, mounting constraints, appearance, and budget limits.
Home Studio Room Calculator: Acoustic Treatment & Monitor Placement
Enter room size and finishes to get room modes, RT60 per octave, a panel count, monitor triangle, SBIR null and first-reflection points.