Do I Need an Audio Interface? When Your Computer’s Built-In Audio Falls Short
You need an audio interface when your computer can’t accept XLR microphones, provide mic preamps or phantom power, handle separate simultaneous sources, or monitor with low latency.
Choose XLR inputs for mics, Hi-Z for guitar, and enough channels for every source. An interface also helps digitize vinyl through suitable line inputs and may drive demanding headphones better.
On Windows, use its manufacturer ASIO driver. The details below help you match inputs, monitoring, and connections correctly.
Needed for XLR Microphones
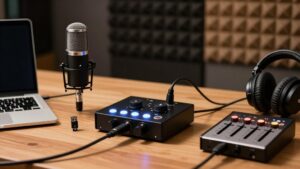
If you use an XLR microphone, you’ll usually need an audio interface because most computers don’t include XLR inputs or suitable microphone preamps. The interface’s XLR socket accepts studio dynamic and condenser microphones, while its preamp raises the mic’s low-level output to a usable recording level before analog-to-digital conversion. You set input gain with the interface’s control, watching your meter and leaving headroom below clipping; distortion created at this stage can’t be repaired cleanly later.
For a condenser microphone, enable 48-volt phantom power only when the interface supports it and the microphone requires it. A USB microphone connects directly because it includes conversion, but an interface gives you XLR compatibility and room to add microphones for interviews, sessions, or multi-person recordings without extra adapters.
Why Low-Latency Monitoring Matters
Low-latency monitoring matters because even a short delay between your voice or instrument and the sound in your headphones can disrupt timing and performance.
Latency is the delay as audio travels into your computer, is processed, and returns to your headphones or speakers. When you monitor a microphone through software, your own voice may arrive late, which distracts you and weakens performance.
| Monitoring path | What you hear |
|---|---|
| Computer return | Processed signal, potentially delayed |
| Direct monitoring | Input immediately |
| Low-latency mode | Near-real-time return |
| Interface check | Direct monitor control |
Choose an interface with a direct-monitor switch, knob, or mixer control. It routes your input straight to headphones, bypassing computer processing. You’ll hear yourself in real time while retaining a separate computer path for recording and playback.
Recording Podcast Vocals and Guitar
Recording podcast vocals and guitar simultaneously requires an interface with at least two inputs: an XLR microphone input with a preamp and a Hi-Z quarter-inch input for the guitar. Connect your microphone to the XLR socket and guitar to the instrument input; don’t plug a guitar into a line-level jack, which can load its pickups and thin the tone. The preamp raises your mic’s low output to usable recording level, while the Hi-Z circuit matches your guitar’s characteristics.
Record each source to its own track, so you can adjust voice, guitar, and processing independently during editing. Enable direct monitoring to hear sources in headphones without computer-monitoring delay. Set your to 24-bit, 44.1 kHz for podcasts or 48 kHz when you’ll pair the with video.
USB vs. Thunderbolt Interfaces
USB and Thunderbolt both transfer audio data between your interface and recording software, but Thunderbolt typically provides greater bandwidth for high-channel-count sessions. You’ll want to evaluate driver performance and round-trip latency, then match the interface to your computer’s available ports. USB models offer broad availability at every price level, while dual-connection units such as the MOTU 8pre ES give you USB, Thunderbolt, and AVB Ethernet options.
Connection Speed Differences
Although USB and Thunderbolt both connect audio interfaces to computers, Thunderbolt provides more data-transfer capacity for high channel counts and demanding multitrack sessions. If you record a singer and guitar through one or two inputs, USB carries the required audio streams comfortably. When you need large simultaneous I/O counts, Thunderbolt’s added capacity can better accommodate dense recording and playback projects.
| Setup | Practical choice | Why |
|---|---|---|
| 1–2 inputs | USB | Enough capacity |
| Many channels | Thunderbolt | More transfer headroom |
Before buying, confirm that your computer has the matching port. Connection speed alone won’t improve sound quality; converters and preamps shape your results. A dual-connection model, such as the MOTU 8pre ES, lets you use either USB or Thunderbolt as your system requires. Choose channel count and features first.
Latency and Performance
Latency is the delay between sending audio into your computer and hearing it back, and it can distract you when you monitor vocals or instruments through software. Direct monitoring sends an interface’s input directly to your headphones, bypassing computer processing and avoiding that monitoring delay. This feature can matter more during tracking than headline connection type.
USB and Thunderbolt both connect interfaces to computers, but you shouldn’t assume either one guarantees a specific latency result. Driver quality, buffer settings, project load, and monitoring design affect real-world performance. On Windows, look for interfaces with manufacturer-optimized ASIO drivers, which reduce monitoring latency.
macOS uses Core Audio natively. Choose a connection your computer supports, then prioritize reliable drivers and direct-monitoring controls if you need responsive recording performance.
Device Compatibility Considerations
Before choosing an interface, check your computer’s physical ports and operating-system support, because USB and Thunderbolt models aren’t universally interchangeable. USB interfaces work with the broadest range of computers, while Thunderbolt units require a compatible Thunderbolt port; a USB-C-shaped connector alone doesn’t guarantee Thunderbolt support. Don’t assume an adapter solves the mismatch: your computer, adapter, cable, and interface must all support the required protocol.
Verify the manufacturer’s OS compatibility list and driver requirements before ordering. On Windows, you’ll commonly install the maker’s ASIO driver for recording performance; macOS often uses Core Audio, though some products still need software. Check the cable’s connector type. If you need flexibility, consider a multi-connection model such as the MOTU 8pre ES, which supports USB, Thunderbolt, and AVB Ethernet.
Number of Simultaneous Sources
Count the microphones, instruments, and other sources you need to record at once, then choose an interface with at least that many appropriate inputs. You’ll usually need one or two inputs for solo vocals, guitar, or voice-over work, but band tracking, multi-miked drums, and group podcasts often require four to eight or more. Match each input to the session: XLR for microphones, Hi-Z for guitar or bass, and line inputs for keyboards or synths.
Recording Multiple Mics
An audio interface must provide at least as many mic inputs and preamps as the microphones you plan to record at one time. Each microphone needs a dedicated preamp to raise its weak signal to recording level, so connector count alone isn’t enough. For a solo musician or podcaster, one or two inputs usually handle one or two sources.
Several speakers or a drum kit may require four to eight or more inputs. Count microphones rather than advertised channels: some interfaces add line-only inputs, which won’t directly amplify mics. If guests need separate cue mixes, select an interface with multiple headphone feeds. Verify the specifications before buying: they should state how many microphone preamps the unit includes, rather than only its analog input count.
Tracking Instruments Simultaneously
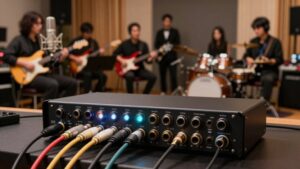
Your interface needs enough simultaneous inputs to capture every source in the same take. Count sources, not performers: a singer playing acoustic guitar needs two inputs if you want separate tracks, while a drummer using eight microphones needs eight mic channels. Built-in computer audio rarely supports this kind of multitrack capture reliably.
For solo overdubs, one or two inputs usually work. Choose four, eight, or more inputs when you record vocal-and-guitar performances, several podcast guests, rehearsals, or full bands live. Each channel must convert and send audio independently, so an interface cannot create extra recording paths through software alone. Leave headroom for future sessions. If you may add drum mics, guest musicians, or outboard preamps, select more inputs than you need today, or choose digital expansion.
Matching Inputs To Sessions
Match an interface’s simultaneous input count to the largest session you plan to record, because each microphone, instrument, or line-level device needs its own input and recording path. You can’t split one input between sources you’re capturing at once.
For solo vocals, one instrument, or a one- or two-person podcast, one or two inputs usually work. A band, several guests, or a multi-miked drum kit may require four, eight, or more inputs. Count every microphone, guitar, bass, and keyboard separately, then verify the available connectors support mic, instrument, or line-level signals as needed. If your sessions may grow, buy capacity for planned additions; an interface sized only for today’s setup can force awkward workarounds or replacement later when recording demands expand over time.
Digitizing Vinyl Records
When digitizing vinyl, an audio interface converts your turntable’s analog signal into a digital file your computer can record and store. Connect the turntable’s output to the interface’s line input, then capture it in your recording software. If your turntable has a built-in phono preamp, you can usually connect it directly.
Without one, place a separate phono preamp between the turntable and interface; a cartridge-level signal needs RIAA equalization and amplification first. Confirm the interface provides compatible inputs and sufficient channels for stereo recording. Set gain so loud passages stay below clipping. Record at 24-bit, 44.1 or 48 kHz for practical listening and archiving. Higher rates consume more storage and rarely help. Use the interface’s headphone or speaker outputs to monitor the transfer cleanly.
Windows ASIO Driver Compatibility
For recording and monitoring on Windows, an interface’s ASIO driver determines how efficiently your DAW communicates with its inputs and outputs. You’ll get best results when you install the manufacturer’s Windows ASIO driver, then choose that interface for input and output inside your DAW.
This direct path supports recording and playback while reducing round-trip latency. That matters when you monitor a microphone through the computer: delay makes your voice late in headphones.
| Check | Why it matters |
|---|---|
| Supported Windows version | Confirms the driver can run on your system. |
| DAW ASIO selection | Routes recording and playback through the interface. |
Before buying, verify the manufacturer supplies a current driver for your Windows version. Don’t assume generic audio support provides ASIO compatibility; it won’t deliver comparable low-latency monitoring.
Phantom Power Isn’t Universal
Phantom power sends DC voltage, typically 48 volts, through an XLR cable to power many condenser microphones, but not every audio interface includes it. If you plan to use a condenser microphone, inspect the interface’s specifications before buying it.
- Confirm that it supplies 48-volt phantom power, not merely XLR inputs.
- Check which input channels receive it; some interfaces power only selected preamps.
- Remember that dynamic microphones generally don’t need phantom power, while many condensers do.
- Enable the switch only when your connected microphone requires it. Follow both manufacturers’ instructions before connecting or disconnecting equipment, because correct sequencing helps you avoid operational mistakes.
If your setup uses multiple microphones, verify each model’s requirements and channel assignment individually; one powered input doesn’t guarantee phantom power reaches every source.
Measure Your Headphone Impedance
Before choosing an interface, check your headphones’ nominal impedance, listed in ohms (Ω) on their specifications or product label. Impedance describes the electrical load your headphones place on an output, and you can’t judge it reliably by size or appearance. Low-impedance models, commonly 16 to 32 Ω, require relatively little voltage, so a computer’s built-in jack can often drive them adequately.
High-impedance designs, typically 250 to 600 Ω, need greater voltage swing. If your laptop cannot supply it, you may hear insufficient volume or lose headroom on dynamic material. Don’t treat impedance as a loudness rating, however. Sensitivity determines how efficiently headphones convert electrical power into sound, so compare both the impedance and sensitivity specifications. If either figure suggests a demanding load, choose an interface with sufficient output.
Conclusion
You need an audio interface when your computer can’t supply the inputs, drivers, monitoring speed, or power your workflow requires. Choose XLR preamps and phantom power for condenser mics, low-latency ASIO support for recording, and enough inputs for every simultaneous source. Match headphone output capability to your headphones’ impedance, use suitable USB or Thunderbolt connectivity, and add line inputs when digitizing vinyl. If you only use USB mics or casual playback, built-in audio may suffice.