Do I Need an Audio Interface for a Podcast? USB Mic, Interface or Mixer
Do I Need an Audio Interface for a Podcast? USB Mic, Interface or Mixer
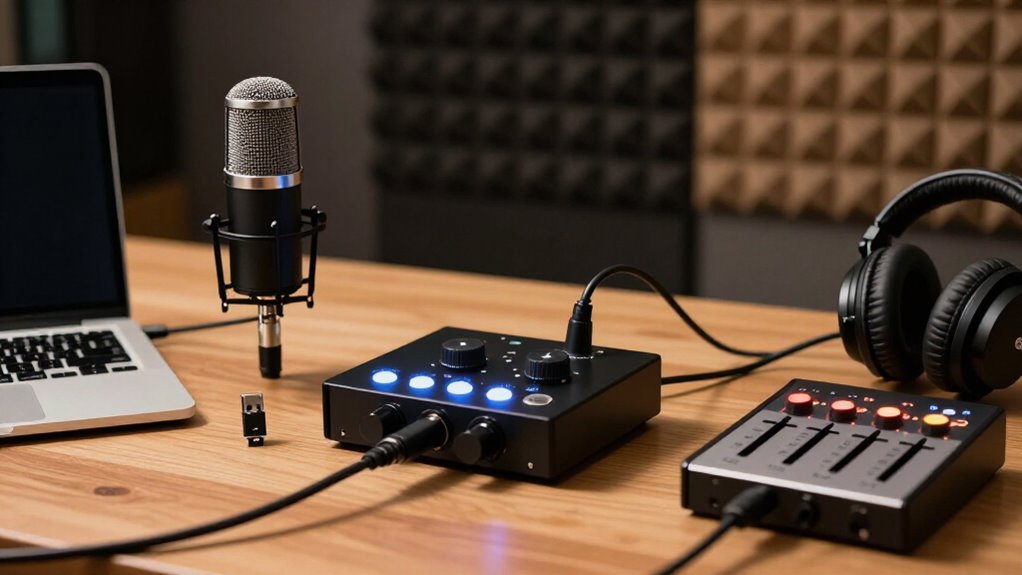
You don’t need an audio interface for a solo podcast when you use a USB microphone: it already contains a preamp and analog-to-digital converter. You need an interface or multitrack mixer for XLR microphones, phantom power, multiple local hosts, or flexible remote-call routing. Choose enough preamp-equipped inputs and headphone outputs for your setup, and confirm 48 kHz support. A mixer must record isolated tracks if you’ll edit voices separately. Below, match hardware to your workflow.
Solo USB Mic Podcasting
For a solo podcast, you can connect a USB microphone directly to your computer and record in your preferred software, so you generally don’t need a separate audio interface or mixer. This configuration keeps the signal path simple: microphone, USB connection, recording application. You select the mic as the input device, set recording levels, monitor through its headphone jack, and capture a single voice track.
For a budget-conscious setup, a large-diaphragm condenser USB model can provide vocal detail; the Samson C01U, at roughly $80, illustrates entry cost. If you don’t conduct phone interviews or record additional in-person speakers, this approach meets requirements. Its limitation is expansion: you can’t add multiple microphones, route several sources, or gain the control that an interface provides in comparison.
Built-In Preamps and Conversion
An audio interface handles two essential stages between a microphone and your recording software: its preamp raises the mic’s low-level signal to a usable level, and its analog-to-digital converter changes that signal into digital audio.
This gain-and-conversion path determines how an analog microphone reaches your DAW. A dedicated interface places XLR inputs, preamps, converters, and often 48V phantom power in one unit. You select it when your microphone needs XLR connection or phantom power. USB microphones integrate the same core stages internally, so you connect them directly to your computer.
| Device | Signal path |
|---|---|
| USB microphone | Internal preamp and converter |
| Audio interface | XLR preamp and converter |
| Interface mixer | Preamps, conversion, hands-on mixing |
Evaluate preamp-equipped inputs before buying: they define how many signals hardware converts independently.
Recording Two XLR Hosts
Recording two XLR hosts requires an audio interface or USB mixer with two microphone preamps, so each mic receives its own gain control and input channel. Choose a unit with at least two XLR inputs. The Focusrite Scarlett 2i2 records two microphones simultaneously and provides a straightforward interface path. If either host uses a condenser mic, verify phantom-power availability; confirm which inputs receive it.
Plan monitoring before recording: you need two headphone outputs or a compatible splitter that preserves practical listening levels. A mixer with an integrated interface gives you channel controls for gain and mute adjustments. However, confirm its USB recording mode. Some mixers transmit separate microphone tracks, while others send only a combined stereo mix, limiting independent editing, level repair, and post-production processing.
USB, XLR, and Hybrid Setups
A USB microphone simplifies your setup because its built-in preamp and analog-to-digital converter connect directly to your computer. XLR microphones require an interface or mixer, but they give you flexible input expansion, preamp control, and phantom power for condensers. If you need several mics, headphones, or standalone recording, a hybrid unit such as the RØDECaster Pro can consolidate those functions.
USB Microphone Simplicity
For a solo podcast, a USB microphone offers the most direct recording path: it connects to your computer and contains its own preamp and analog-to-digital converter, so you don’t need a separate audio interface. That integrated signal chain reduces cabling and setup variables, which helps you begin recording quickly and keeps the desktop workflow focused on one device. Many USB models also provide a headphone output for direct monitoring, allowing you to hear your voice without relying on a separate monitoring device.
This arrangement suits straightforward podcasting, gaming, and video calls when you record one person. You should select a model whose headphone monitoring behavior and computer compatibility match your recording software and operating system. It won’t require external preamps or conversion hardware at all.
XLR Interface Flexibility
When you need to connect standard XLR microphones, an audio interface supplies the microphone preamps and analog-to-digital conversion that send clean digital audio to your computer. You gain scalable inputs, monitoring control, and routing for studio monitors or headphones. Select capacity by simultaneous speakers: a Scarlett Solo handles one, a 2i2 handles two, and an 18i8 handles four. Compatible line-level instruments can also enter the interface.
| Setup | Inputs | What you feel |
|---|---|---|
| USB microphone | One built-in path | Calm simplicity |
| XLR interface | Scalable mic inputs | Confident control |
| USB mixer | XLR plus USB | Reassured hands-on routing |
Some mixers integrate XLR channels, tactile controls, and USB interfacing; the RØDECaster Pro can record directly to an SD card, giving you backup assurance during sessions when computers fail unexpectedly today.
Hybrid Setup Considerations
Hybrid podcast rigs let you combine USB microphones for direct computer capture with XLR microphones connected through an interface or mixer. A USB mic contains its own preamp and analog-to-digital converter, so it doesn’t require an interface. Each XLR mic needs a preamp, and condensers require phantom power.
Before mixing device types, verify that your computer and recording software can select, synchronize, and manage audio devices. For several XLR sources, match interface capacity to your channel count: a Scarlett 2i2 accepts two microphone inputs, whereas an 18i8 accepts four. Also map routing and monitoring. Some USB mixers send only a stereo mix to your computer, limiting post-production separation; others record multichannel audio. Confirm sufficient headphone outputs, or add an external amplifier for each participant.
Remote Guest Recording
When you record remote guests through Zoom, Skype, FaceTime, or Slack, route their call audio into your local mix without compromising microphone quality. For phone interviews, use a mix-minus device such as the RØDECaster Pro or Zoom LiveTrak L-8 to prevent the guest from hearing their own delayed return signal. You can also record directly to SD card and, where supported, isolate call and local sources on separate tracks for cleaner editing.
Recording Remote Guests
Remote recording adds a routing requirement: you need to capture the guest’s return audio while sending them a mix that excludes their own voice. This mix-minus path prevents the guest from receiving a delayed copy of themselves. Your interface or mixer must accept the call source, route it to your recording, and provide sufficient microphone and headphone connections for everyone in the room.
For computer-based calls through Zoom, Skype, FaceTime, Hangouts, or Slack, you can route the service’s audio through compatible hardware. For phone guests, the RØDECaster Pro accepts Bluetooth or a TRRS connection and provides mix-minus. The Zoom LiveTrak L-8 offers the same function. Both units can record directly to SD cards, letting you run fully standalone or mobile sessions without a nearby computer.
Capturing Clean Call Audio
Clean call audio depends on routing the guest’s return feed correctly. Use mix-minus when you connect a phone guest by Bluetooth or TRRS to a podcast mixer such as the RØDECaster Pro. This routing sends the caller your hosts’ microphones and other program audio, but excludes the caller’s incoming signal. As a result, the guest doesn’t hear a delayed version of their own voice, which reduces echo and feedback.
The Zoom LiveTrak L-8 provides the same function while adding six microphone inputs, four headphone outputs, and SD-card recording. For Zoom, Skype, FaceTime, or Slack calls, route the service audio into your recording setup. Before you begin, verify that the caller hears hosts clearly and that their voice reaches the recording mix at stable level.
Separate Track Options
Although you can host a guest through Zoom, Skype, FaceTime, Hangouts, or Slack, record each participant to a separate track whenever possible. Your host track remains local, while the guest arrives through the call service. Separate files let you correct gain, EQ, noise, and timing independently, rather than compromising both voices with one stereo recording.
Verify that a USB mixer or interface sends individual inputs to your computer; some devices output only a combined stereo mix, eliminating isolated editing. For computer-free sessions, RØDECaster Pro and Zoom LiveTrak L-8 record multitrack audio to SD cards. Both provide mix-minus to prevent phone-guest echo. The RØDECaster supports Bluetooth or TRRS calls, while the L-8 adds six microphone inputs. This matters most in interviews with variable room acoustics.
Four-Person Roundtable Recording
A four-person roundtable requires at least four microphone inputs, since each in-room speaker needs a dedicated channel for proper level control and isolated recording. Choose a four-input interface, such as the Focusrite Scarlett 18i8, when four recorded microphones and two headphone outputs meet your workflow. Splitters can distribute monitoring to four listeners, but they can’t create independent cue mixes.
If every participant requires a separate headphone balance, select hardware with four discrete headphone outputs. The Zoom LiveTrak L-8 supplies six mic inputs, four headphone outputs, and standalone SD-card recording, so you retain guest capacity. Verify phantom-power availability on every required input before choosing condenser microphones; some units limit phantom power to selected channels.
| Requirement | Practical choice |
|---|---|
| Four mic channels | Interface |
| Independent headphone mixes | Mixer |
USB Bus Power Constraints
Power also affects whether an interface suits a portable podcast setup. A USB bus-powered interface draws operating current from your computer, eliminating the need for a separate wall adapter. That design reduces the equipment you carry and speeds deployment when you record away from a studio. It also ties the interface’s power to the computer port and connection path.
Before relying on bus power, verify the interface’s stated requirements and confirm that your computer’s USB port can supply them reliably. This check matters when you use hubs, adapters, or a battery-powered laptop on mobile sessions. Insufficient or unavailable USB power can prevent operation. Some bus-powered interfaces include a power supply, so you can use that alternative when the USB connection cannot provide power.
Confusing Headphone Jacks With Inputs
Don’t mistake a headphone jack for a recording input: it sends audio to headphones and can’t accept a microphone signal. It is an output stage, often useful for monitoring, not a path that captures your voice. Connector count can mislead you; two headphone sockets don’t mean you can record two microphones.
- Find XLR inputs; they typically include microphone preamps.
- Identify line inputs separately; they expect stronger line-level sources.
- Treat headphone outputs as monitoring feeds, even when they carry the incoming mix.
- Read labels and specifications before connecting equipment.
Picture signal flow as a one-way route: microphone into an input, preamp into the recorder, then recorded mix out to headphones. Plugging a microphone into a headphone socket won’t create gain, conversion, or a recordable channel.
Choose 48 kHz Before Buying
Beyond identifying the right inputs, confirm that the interface or mixer records at 48 kHz before you buy it, especially if your podcast includes video. 48 kHz is a common video-audio sample rate, so it simplifies synchronization with camera footage and post-production workflows.
At this rate, the device captures 48,000 audio samples each second, providing appropriate temporal resolution for spoken-word podcast recording. Before ordering, inspect the manufacturer’s specifications rather than assuming every model supports it. Then configure both your interface and recording software to 48 kHz. Matching sample rates prevents project conflicts, unnecessary sample-rate conversion, and timing errors during editing or video export. If you record at another rate and convert later, you add a processing step that can complicate an otherwise controlled workflow.
Conclusion
You don’t need an audio interface for a simple solo podcast: a USB microphone handles preamplification, conversion, and computer connection. You do need an interface or mixer when you record multiple XLR microphones, require independent gain and monitoring, or expand to roundtables. For remote guests, prioritize separate tracks and reliable routing. Check USB bus-power limits, distinguish headphone outputs from inputs, and select 48 kHz capability before buying so your system matches your recording workflow and plans.