How to Store Microphones: Humidity, Dust and Case Tips That Protect Your Mics
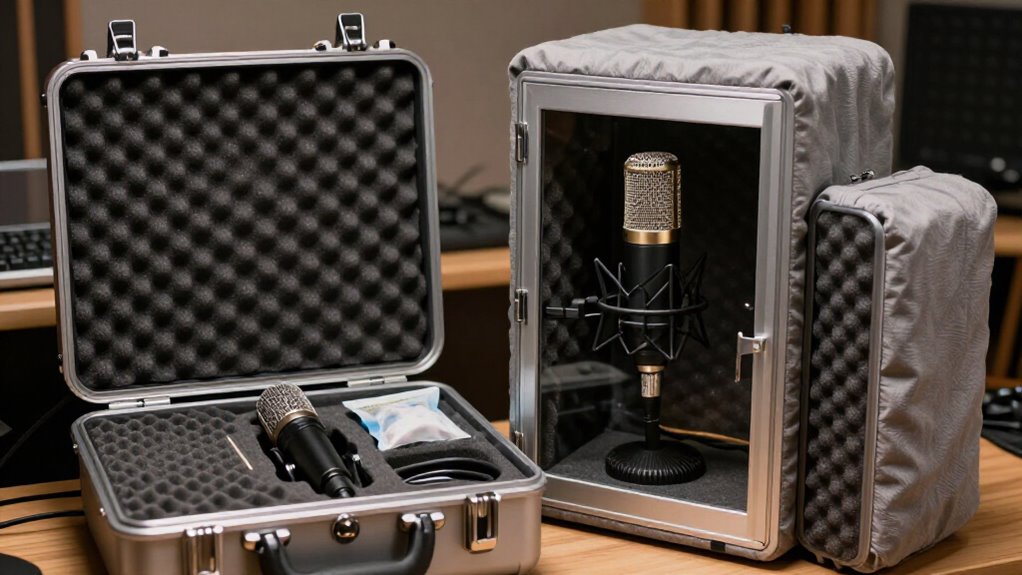
Store your microphones at stable room temperature in a clean, closed, padded case, away from HVAC vents, dust, and direct sun. Keep relative humidity near 50% (within 40 to 60%) and check a hygrometer monthly.
After use, let condensers air-dry before bagging them with fresh silica gel and an indicator card.
Inspect case seals, latches, foam, connectors, and cables regularly. In coastal climates, use sealed containers and replace desiccant sooner. Next, you’ll find moisture, shutdown, and protection.
Condenser Capsule Protection Goals
Condenser capsule protection starts with controlling moisture, dust, and contamination between sessions. After recording, let breath moisture dissipate for several hours before sealing the microphone in a bag or container with fresh desiccant.
Use a pop filter and maintain six inches between your mouth and grille; this reduces saliva deposits and plosive pressure on the capsule. Keep storage near 40–60 percent relative humidity.
In humid locations, use a gasketed dry box charged with 20–30 g of desiccant, and renew the desiccant every 6–12 months. Store mic in its bag or case whenever it’s idle, since a cloth over a stand won’t block dust. Don’t clean the capsule yourself. Wipe exterior only with a lightly alcohol-dampened microfiber cloth; get professional service for contamination or damage.
Silica-Gel Indicator Cards
Silica-gel indicator cards give you a quick visual check on the humidity inside a microphone case or dry box. Place one beside silica gel or molecular-sieve desiccant in an airtight enclosure. Its color shift tells you when moisture control needs attention, protecting your microphone from the anxious surprise of a damp storage environment.
- Check the card periodically, especially after frequent opening.
- Watch it closely if you’ve stored a microphone before it’s fully dry.
- Replace desiccant when the card no longer shows dry conditions.
- Refresh desiccant every 6 to 12 months as a general baseline.
Keep unused cards and desiccant sealed. Just 30 minutes in humid air can consume roughly half a molecular-sieve pouch’s drying capacity. That loss can leave your valuable capsule vulnerable when most needed.
Weekly Case Seal Inspection
Each week, inspect your microphone case’s gasket or seal for dirt, compression, tears, or sections that don’t sit evenly against the lid. Wipe away loose debris with a clean, dry lint-free cloth, then trace the seal’s full perimeter. Check lid corners and cable openings for cracks, gaps, or worn material.
| Check | Pass condition | Action |
|---|---|---|
| Gasket | Clean, even, intact | Clean or replace |
| Lid | Closes flush, holds securely | Repair case |
Close the case and verify the lid aligns and holds securely; misalignment weakens even a dry box’s protection. Keep this check brief, particularly in humid rooms, because open exposure can quickly burden desiccant. If the seal fails anywhere, repair or replace the case before relying on it for storage. Keep the container closed between uses consistently.
Unplug, Bag, Latch Case
Power down the microphone and connected equipment before you disconnect cables; with tube condensers, connect the mic before you switch on its power supply. Remove the mic from its mount, place it in a clean, dry protective bag, and secure padding so it can’t shift inside the case. Close and latch the case, then check its seals to block dust and limit moisture exposure.
Power Down First
Shut down your recording chain before you unplug cables or remove the microphone to prevent electrical stress and accidental damage. Turn off preamps, interfaces, mixers, and phantom-powered channels, then allow indicators and supply voltages to settle. This sequence prevents powered equipment from seeing abrupt changes while you prepare the mic for storage.
For a tube condenser, connect the microphone to its power supply before switching that supply on; never attach it to a live supply, because a shock can damage the tube. After shutdown, remove the microphone and place it in its cloth bag or a plastic bag. Return the bagged mic to its original case or manufacturer-provided container. Close and latch the case, and don’t leave it exposed on its stand between sessions.
Disconnect Cables Carefully
Once the equipment has fully powered down, unplug the microphone cable by gripping the connector body—not the cable—and releasing any latch before pulling it straight out. Keep the plug aligned with its socket and use only light, steady force. Don’t twist the connector or tug the cable, because either action can stress the pins, jack, or internal termination.
Disconnect the cable before removing the microphone from its mount. Then place the microphone in its cloth bag or a clean plastic bag and return it to its case. Confirm that the microphone, cable, and accessories sit securely in their assigned positions. Close and latch the case so it stays protected during storage and transport. Check the latch engagement before you lift or move the case.
Use Protective Microphone Bags
After recording, turn off the equipment, disconnect the cable, and remove the microphone from its mount before storage. Place it in its original protective bag before returning it to the wooden case or manufacturer-provided container. The bag forms a first barrier against airborne dust and keeps the microphone separated from loose accessories or interior surfaces.
If the original bag is missing, use a clean, dry, soft pouch that doesn’t shed fibers. Add stable padding around the bagged microphone so it can’t shift during transport or storage.
For condenser microphones, choose a dry, room-temperature location. In humid conditions, place fresh desiccant in the sealed storage container and replace it when its indicator shows saturation. Keep the container closed between sessions to limit dust exposure further.
Secure Case Latches
Power down and unplug the microphone, disconnect its cable, and remove it from the stand or shock mount before packing it away. If you’ve used a vocal condenser, let it air-dry for several hours first, particularly when breath moisture may have reached the grille. Place the dry microphone in a clean cloth or plastic bag, then set it in its case. The bag keeps dust away and prevents contact with degrading foam.
Arrange cables, clips, accessories in their positions so they can’t shift against the microphone. Confirm microphone is supported and no loose item rests above it. Close the lid without forcing it, then engage every latch firmly. Latch it securely to limit movement, dust, and moisture. Periodically inspect case and latches for damage.
Check Case Seals
Before closing the case, inspect its gasket or seal for dust, cracks, compression, or loose sections that could admit humid air and airborne debris. Wipe the sealing surface with a clean, dry cloth, and replace damaged gaskets before relying on the case for storage. Unplug the microphone, place it in a clean plastic bag, and set it in its case.
The bag limits dust and moisture exposure while keeping the microphone off aging foam that can shed or degrade. Add fresh desiccant to the sealed case; replace it every 6 to 12 months, or sooner when you open the case frequently or store it in a humid room. Seat the lid evenly, then engage every latch fully. Keep it closed between uses to preserve its barrier.
Coastal Climate Storage Tweaks
In coastal climates, you should monitor your dry box with a hygrometer and keep relative humidity low enough to protect condenser capsules. Use rechargeable silica gel or molecular-sieve desiccants, regenerating them as specified before they saturate. Seal the microphone in a plastic bag inside its case to block salt air, and keep it off case foam and away from damp, temperature-variable areas.
Monitor Relative Humidity
Track relative humidity with a hygrometer and keep your microphone storage area near 50% RH—ideally above 40% and below 60%. In coastal or persistently humid locations, check the reading regularly, not just when you first set up storage.
A climate-controlled room can still sit above 50% RH, especially during wet seasons or when doors open. Measure near the microphone case, not across the room, and note daily changes. If humidity remains high, run a dehumidifier when you’re not recording and limit unnecessary case opening.
Don’t overcorrect: excessive dryness can also affect condenser microphones. Keep storage above 40% RH; some users consider 35% the minimum for condenser storage or use. A small digital hygrometer with logged minimum and maximum values makes trends easier to identify.
Use Rechargeable Desiccants
For humid or coastal storage, place each condenser microphone in a sealed bag or case with fresh silica gel or molecular-sieve desiccant to limit moisture exposure between sessions. Choose rechargeable packs with a visible indicator, such as beads that shift from blue when dry to pink when saturated. This lets you inspect their condition without opening storage environment.
Keep desiccant in an airtight container: just 30 minutes in humid air can consume half its drying capacity. Replace packs every 6 to 12 months, and replace them earlier when you open the case or store equipment in humid rooms. Recharge only by the manufacturer’s instructions. Don’t use an oven or microwave if instructions are unclear; uncertain heating can reduce performance and create serious safety risks.
Prevent Salt Air Exposure
Salt-laden coastal air can accelerate corrosion, so keep each microphone sealed in a clean, dry container whenever it isn’t in use. Before placing it in its padded case, slip the microphone into a plastic bag to reduce humid-air contact and isolate it from potentially deteriorating foam.
Use 20 to 30 g of silica gel or molecular-sieve desiccant in a gasketed storage box. Replace it every 6 to 12 months, or sooner if you open the box frequently or live in persistently humid conditions. Keep the box closed except when you retrieve or return a mic; exposure to humid air quickly consumes desiccant capacity. Inspect the microphone, grille, connector, and cable connections periodically for moisture or corrosion. If found, improve storage conditions; don’t assume salt-air cleaning is automatically prescribed.
Stable Self-Noise at Startup
Before you judge startup self-noise, let a condenser microphone dry for several hours after use, then store it in a sealed bag or container with fresh desiccant. This routine lets breath moisture evaporate before enclosure, reducing the moisture-related conditions that can affect noise and performance. Keep the storage environment steady near 50% relative humidity, a practical studio target, rather than exposing the mic to damp air or large heat and cold swings.
Replace desiccant every six to 12 months, sooner when you open the container often or your room stays humid. A sealed container works only if its desiccant remains active. Check it on your regular storage schedule and renew it before it becomes saturated. Stable storage conditions support predictable startup behavior over time.
Crackling Output: Stop Using
Stable storage can prevent many moisture-related issues, but crackling output calls for immediate action. Stop using the microphone immediately: moisture or debris on a condenser capsule can create noise and compromise performance.
Disconnect it, then inspect the exterior, connector, and cable for visible moisture, corrosion, or loose connections. Let any breath moisture evaporate naturally before storage; don’t seal a damp microphone.
Once dry to the touch, place it in a clean, dry, sealed container with fresh desiccant. Keep the container away from humidity, dust, and temperature extremes that can worsen capsule or electrical faults.
Don’t spray cleaner into the grille or attempt internal capsule cleaning. If crackling remains after drying and connection checks, arrange inspection by a qualified technician before returning the mic to service.
Never Store Near HVAC Vents
Keep microphones away from HVAC vents, since direct blasts of hot or cold air can cause rapid temperature and humidity swings. A vent may seem harmless, but repeated airflow stresses a condenser capsule and can encourage condensation when conditions shift quickly. Protect your mic from these avoidable failures:
- Prevent the cold shock: Don’t place it beside an air-conditioning register.
- Avoid heat exposure: Keep it clear of furnace outlets and radiant airflow.
- Choose stability: Store it in a closed drawer or padded case at room temperature.
- Defend against dampness: In humid areas, use a sealed container with fresh desiccant, not vent airflow.
Leave clearance around supply and return vents, including overhead registers. You’ll reduce moisture risk and help preserve sensitive internal components for years ahead.
Log Humidity Readings Monthly
Check the relative humidity in your microphone storage area with a hygrometer once each month, and record the date, RH reading, and any climate-control or dehumidifier changes. Measure beside stored microphones; don’t use readings from another room or a regional weather report. Target 50% RH.
One studio held that level year-round; a practical range stays above 40% and below 60%. Flag results outside those limits. Below 40%, dry air may affect certain microphones or capsules; above 60%, persistent moisture creates different risks. Compare entries monthly to identify seasonal shifts, recurring dampness, or ineffective control settings. When you adjust heating, air conditioning, or dehumidifier operation, enter it immediately. Your log connects RH trends to specific actions, helping you correct conditions before they persist too long.
Conclusion
Protect your microphones by keeping capsules clean, dry, and thermally stable. Store each mic unplugged in a sealed, padded case with a bag and silica-gel indicator card. Check the case seal weekly, inspect indicators, and log humidity monthly. Keep cases away from HVAC vents and adjust desiccant more often in coastal climates. If startup self-noise changes or output crackles, stop using the mic and troubleshoot before storage. These habits preserve sensitivity, noise performance, and life.