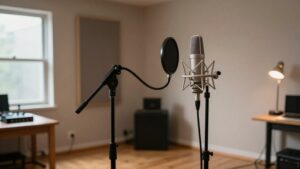
Dynamic vs Condenser Microphone: Which Is Better for Home Recording?
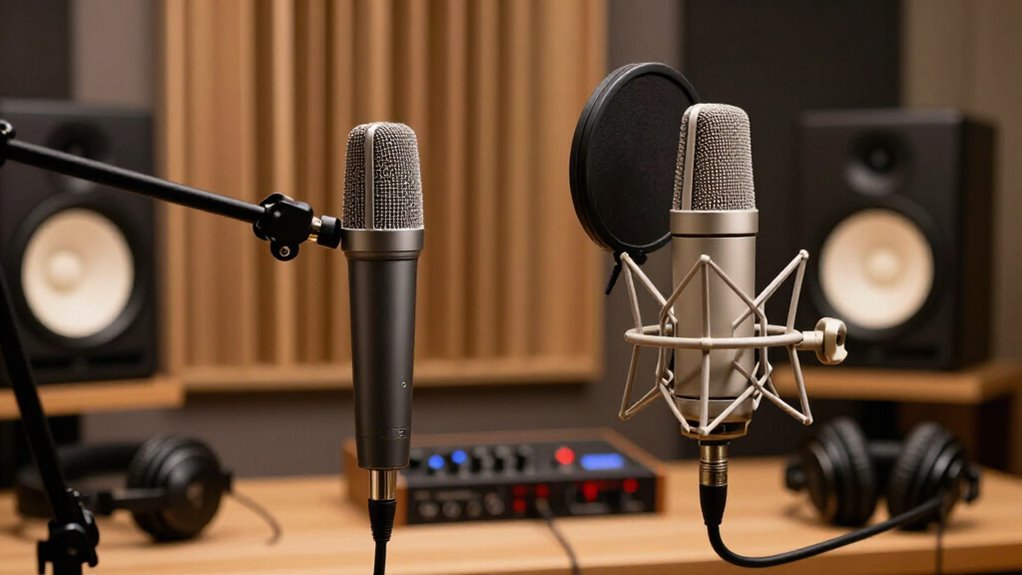
For most home recording, choose a dynamic mic if your room is untreated or noisy: it captures less fan noise, keyboard bleed, and early reflections while handling close, loud vocals easily. Choose a condenser when you have a quiet, treated space and want faster transients, brighter air, and detailed acoustic guitar.
Condensers need 48V phantom power; standard dynamics don’t. Set peaks around -12 to -6 dB, then compare polar patterns, placement, and off-axis tone below.
Phantom Power Needs Compared
Condenser microphones typically need +48V phantom power from your audio interface or mixer, while standard dynamic models such as the Shure SM58 or SM7B work without it. Phantom power travels through the same balanced XLR cable as your audio, so you won’t change cables or routing. If you forget to enable it for a condenser, you’ll hear no signal or low output.
A standard dynamic still records normally with 48V disabled. While enabled phantom power generally won’t harm typical dynamics, turn it off when no condenser is connected; you’ll reduce troubleshooting variables. Check the documentation before connecting an active dynamic or hybrid microphone, since these exceptions can require power.
| Microphone | 48V | Outcome |
|---|---|---|
| Condenser | On | Normal |
| Condenser | Off | Low-output |
| Dynamic | Off | Normal |
| Active-dynamic | Check | Manual |
Moving-Coil and Capacitor Capsules
At the capsule level, dynamic and condenser microphones convert sound into voltage in fundamentally different ways. A moving-coil dynamic capsule couples its diaphragm to a wire coil suspended in a permanent magnet’s field. When you speak or play, the coil moves and induces voltage. This passive design usually produces a lower-output signal and tolerates close, loud sources well.
A condenser capsule places a diaphragm opposite a fixed backplate, forming a capacitor. Sound changes their spacing, altering capacitance and the electrical charge to create your signal. Its internal electronics need phantom power, typically +48V, to charge the capsule and buffer its tiny output. Choose a dynamic for robust close-miking; choose a condenser for more detailed capture when your room and source suit it equally well in your setup.
Transient Response and Noise Rejection
Those capsule designs also shape how each mic captures fast detail and rejects unwanted sound. Condensers respond faster to consonants, pick attacks cleanly, and preserve more high-frequency “air.” That precision can benefit acoustic guitar or detailed vocals, but it also reveals keyboard clicks, fan bursts, and early room reflections.
Dynamics sound rounder on sharp attacks, yet their lower sensitivity and close-use practicality help you keep more of the room out of a vocal track. Use this comparison when choosing:
- Condensers expose fine transient detail and reverb tails.
- Dynamics reduce HVAC rumble and nearby mechanical noise.
- Close dynamic placement improves direct-to-room balance for loud singers.
- In an untreated space, choose the mic that captures less overall environment, not merely more detail.
Preamp Gain and Setup Speed
How quickly you can set a clean recording level depends on mic sensitivity, singer volume, distance, and your interface’s available gain. For a fast starting point, record loud phrases and adjust the preamp until peaks land around -12 to -6 dB. A condenser usually reaches that range with fewer gain adjustments, so setup feels quicker.
Its sensitivity, however, makes precise distance and gain staging important: loud peaks can clip or sound harsh before you expect it. A dynamic may require more gain steps, yet it often feels more forgiving on interfaces with limited clean headroom. You can raise its preamp setting without the same gain panic, then refine placement and level. If you want plug-and-record speed, use meters rather than guessing, and leave peak margin.
Untreated Rooms and Loud Sources
In an untreated or noisy room, a dynamic mic usually gives you a cleaner vocal track because its lower sensitivity and stronger off-axis rejection capture less fan noise, street sound, keyboard bleed, and early wall reflections. Place it close and use a cardioid or supercardioid pattern to maximize direct sound and shorten the audible reflection tail. For loud sources, dynamics also tolerate close placement reliably:
- Use one on drums, shouted vocals, or brass; high SPL won’t easily overload it.
- A condenser needs careful gain staging and positioning near loud performers to prevent distortion, harshness, and heavy de-essing.
- Aim the rejection zone toward fans or keyboards.
- Keep the singer close, but manage proximity effect with angle or distance.
This setup reduces room problems before mixing.
Capsule Repair Costs
Capsule damage changes the cost equation: condenser capsules often require manufacturer or approved-service repair because their diaphragm and backplate tolerances are delicate and calibrated, while a dynamic’s moving-coil assembly is generally tougher and simpler to replace.
For you, that usually means higher diagnostic, parts, labor charges for a condenser. A technician may need to install and test a replacement capsule, and non-standard designs can make service especially expensive. On affordable condensers, the bill can approach the microphone’s used-market value. Before authorizing work, check whether your model supports a standard swappable capsule or has a direct replacement program. If it doesn’t, expect a full service and delay. Dynamic capsules are often less costly to replace, but you should compare the quote with buying another mic.
Humidity, Shock, and Storage
Durability between repairs also depends on what your home recording environment puts a mic through. Dynamics usually handle humidity and routine knocks better than condensers, whose thin diaphragms and internal assemblies need gentler treatment. Extreme moisture can corrode either mic’s contacts, however.
- Keep both microphones dry, away from direct sun and heat, with grilles covered.
- In humid rooms, provide airflow or use desiccant packs; stable conditions reduce condenser condensation risk.
- Put condensers in shock mounts and don’t bump stands, since vibration and handling create thumps.
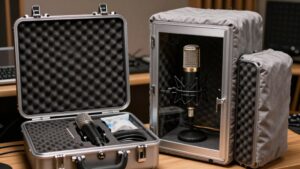
- During travel, use a padded case and immobilize the mic. Disconnect and unpower condensers when idle; repeated rattling can affect capsule alignment. Store every microphone where temperature changes remain gradual, and let cold gear acclimate before you power it.
Multi-Pattern Pickup Options
Multi-pattern condensers give you more polar-pattern flexibility than most dynamic mics, letting you tailor front, side, and rear pickup to your room and source. In an untreated space, you’ll usually get cleaner vocal isolation with cardioid or supercardioid, while omni and figure-8 make room acoustics matter more.
Test each pattern at the same close distance, since pattern changes can alter bass buildup, clarity, and room bleed.
Polar Pattern Flexibility
Polar-pattern flexibility matters because it lets you control how much of your room enters the recording. A multi-pattern condenser gives you more options than a fixed-pattern dynamic or condenser, letting you adapt pickup behavior without moving rooms. Choose according to the noise and reflections around you:
- Cardioid: Focuses on the front and reduces side-wall reflections, making vocals tighter in untreated rooms.
- Supercardioid: Delivers stronger side and rear rejection; use it when a fan or keyboard sits beside you or speakers are behind you.
- Omni: Captures sound from all directions, so use it only in a controlled room when you want natural ambience.
- Figure-8: Captures front and rear equally while rejecting the sides, which suits two-person interviews.
Tighter patterns increase proximity effect, controlling off-axis tone.
When Patterns Matter
When your room adds fan noise, keyboard clicks, or strong reflections, selectable pickup patterns can make a multi-pattern condenser more useful than a fixed-pattern mic. Choose cardioid for one voice: it favors front sound and limits room pickup. Omni hears every direction, preserving natural space but capturing reflections.
Supercardioid patterns tighten side and rear rejection, reducing fan/keyboard bleed if you can’t stay positioned consistently. Figure-8 captures front and back, suiting two-person or call-and-response work, but rear-wall reflections hurt solo vocals. Directional modes also increase proximity effect, letting close placement add bass warmth; omni keeps it subtler.
Before recording, clap or play sound beside and behind the mic in each mode. Select the pattern that rejects noise most effectively without making your vocal sound unnatural.
Podcast Vocals, Acoustic Guitar
For podcast vocals in an untreated room, you’ll usually get cleaner clarity with a dynamic cardioid, which rejects more fan noise and reflections than a sensitive condenser. Place it 2 to 6 inches from your mouth to add warmth through proximity effect, while a condenser demands more damping and placement care.
For acoustic guitar, choose a condenser for airy detail in a controlled room or a dynamic for a drier sound with tighter room-noise control.
Podcast Vocal Clarity
In an untreated home room, a cardioid dynamic such as the Shure SM7B usually delivers cleaner podcast vocals because its lower sensitivity rejects more fan noise, keyboard clicks, and early wall reflections. You can work close to the grille, maintain consistent level, and capture a direct, controlled voice without overemphasizing the space.
- Choose a cardioid or supercardioid pattern to improve rejection.
- Position the mic close, slightly off-axis, to control plosives.
- Use a condenser only when your room is quiet and treated.
- Supply +48V phantom power for condensers and expect more de-essing.
A condenser’s faster transient response can add air and articulation, but it also exposes reflections and sharp sibilance. Ultimately, placement and polar pattern determine clarity more reliably than microphone type in your recordings.
Acoustic Guitar Detail
That same room control matters when you add acoustic guitar: a cardioid dynamic usually gives you a more focused voice-and-guitar recording in an untreated space, while a condenser captures more string shimmer and transient detail along with reflections, pick harshness, and vocal bleed. For simultaneous takes, its lower sensitivity limits guitar-to-mic leakage, room-to-mic spill, and the corrective EQ and de-essing you’ll need.
Place either mic 6 to 12 inches (15 to 30 cm) from the guitar, then angle it off-axis to soften pick bite. A large-diaphragm condenser can deliver fuller body and wider frequency detail, but manage gain carefully: a hot input can distort even without capsule damage. In an untreated room, start with the dynamic; use the condenser only when placement minimizes reflections, then compare both.
Room Noise Control
When room noise limits your recording options, a cardioid dynamic mic gives podcast vocals and acoustic guitar a cleaner starting point than a condenser. In untreated rooms, lower sensitivity reduces HVAC noise and reflections, so you don’t need silent takes. A condenser’s high frequency sensitivity can make space sound lively, diffuse, and difficult to edit.
- Place it 4 to 6 inches from your vocal source; proximity effect maintains fullness and raises direct to room ratio.
- For acoustic guitar, position it near the soundboard and aim its null toward surfaces or noise sources.
- Choose supercardioid when you need tighter rejection, then monitor pickup carefully.
- Use a condenser only after treatment; it captures air and detail, but exposes early reflections as reverb.
Off-Axis Coloration: Final Choice
Off-axis behavior should guide your final choice as much as on-axis tone: in an untreated or reflective home room, choose the mic that stays most neutral as you move slightly off center, often a dynamic or a tight-pattern condenser, because it captures fewer bright room reflections and produces a more consistent vocal sound. A cardioid condenser can shift its frequency balance when you turn just 10 to 30°, making sibilance more obvious and increasing de-essing needs. Tighter supercardioid patterns improve rejection in either design, but they’re especially useful for condensers.
In a quiet, treated space, you can accept the condenser’s detailed, open capture if you maintain position. Otherwise, test each mic while singing slightly off center; choose the one whose tonal shift remains least distracting during real takes.
Conclusion
You’ll get better home-recording results by matching the microphone to your room, source, and interface. Choose a dynamic when your space is untreated, your source is loud, or your preamp can supply clean gain; it rejects more room noise and handles abuse. Choose a condenser when you need faster transients, higher detail, or multiple patterns for controlled sessions.
Check phantom power, off-axis tone, humidity, and storage. Neither is universally better; your setup determines the winner clearly.