What to Buy First for a Home Studio: Priorities That Save You Money
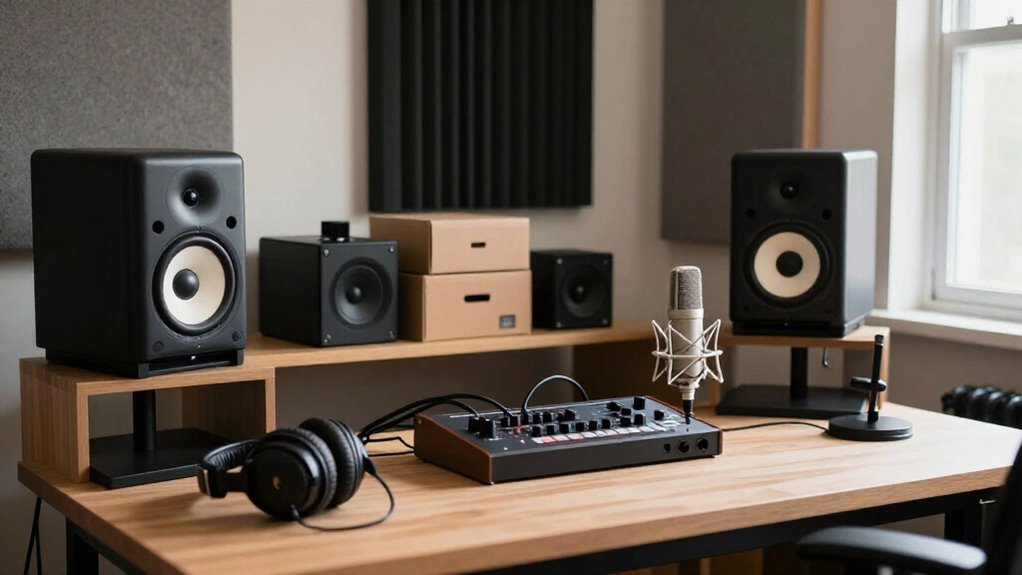
Start with a setup under $350, buying only what supports your main recording task. Choose a compatible DAW, an interface with enough simultaneous inputs, a suitable microphone, and closed-back headphones for untreated rooms. Use USB for solo recording or XLR for interchangeable mics and routing. Confirm OS and driver compatibility, budget for XLR cables and replacement pads, and skip plugins, monitors, and accessories until your workflow works. The next steps help you avoid upgrades later.
Start With $350 Setup
You can build a capable home studio for under $350 by buying only the gear needed to record and monitor: an audio interface, DAW, microphone, and headphones or speakers. Treat that list as your spending limit, not a prompt to add accessories. Put the largest share into a reliable interface with clean preamps, stable drivers, and the inputs you actually need.
Select a DAW you can learn quickly; a free or entry-level version handles editing, routing, and basic mixing. Buy one dependable microphone and closed-back headphones if room noise makes speakers impractical. Check the setup guide’s recommendations, prices, and compatibility before ordering. Skip monitor controllers, hardware processors, premium cables, and bundles that duplicate software. Learn gain staging before buying features you won’t use later.
Vocals, Beats, or Full Bands
Once the core $350 setup is covered, spend based on what you’ll record most: vocals, beats, or a full band.
For vocals, buy a dependable DAW, an interface with a clean mic preamp, and one suitable microphone. A budget USB mic—or even your phone—can get you started.
For beats, use your laptop, DAW, royalty-free samples, and step sequencing. Add a MIDI controller later only if it speeds your workflow.
For bands, map your tracking plan to the room and gear you already own. Limited bedroom space makes isolation and placement difficult, so capture arrangements strategically. Buy essential recording and monitoring tools for your main work first. Better performances, placement, and mixing practice will improve results more than plugin bundles or expensive upgrades today.
Number of Simultaneous Inputs
Count the sources you’ll record at the same time before choosing an audio interface. Buy for concurrent channels, not every device you own. A solo vocal or mono instrument usually needs one input, while stereo recording needs two matched channels. Four mic preamps handle simple stereo tracking and leave useful headroom.
| Session | Inputs needed | Practical choice |
|---|---|---|
| Vocal plus guitar | 2 | Two-preamp interface |
| Stereo pair plus vocal | 3 | Four-preamp interface |
For a band, count every microphone used simultaneously, then budget for the matching preamps, converter channels, stands, and cables. If sessions may expand, compare actual simultaneous-input limits and routing options now. A slightly larger interface or channel-expansion path can cost less than replacing an undersized unit after your first multitrack project and avoids downtime.
USB Microphones vs. XLR Flexibility
A USB microphone lets you record straight into your computer with minimal cost and setup, making it practical for solo vocals. An XLR microphone needs an interface or preamp, but you can upgrade mics, add instruments, and use better headphone monitoring later. Don’t assume either format guarantees better sound; choose USB for simplicity or XLR if you expect your studio to grow.
Plug-And-Play USB Convenience
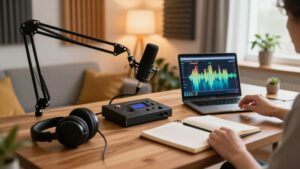
For the fastest, lowest-clutter start, choose a USB microphone: it connects directly to your computer and eliminates the immediate cost of an audio interface or preamp. You’ll get a compact signal chain for voiceovers, streaming, podcasts, or demos: plug in, select the mic in your recording software, set input gain, and monitor levels.
This approach keeps your initial purchase focused and leaves more of your budget for headphones, a stand, or acoustic treatment. It’s especially sensible when you record one person at a desk and need no extra inputs. Before buying, check computer compatibility, headphone monitoring, and available controls. If you expect to record multiple sources or connect other gear, weigh that need against USB’s convenience now. Match the connection to your setup.
XLR Gear Upgrade Paths
USB keeps startup costs low, but XLR gives you a clearer path to expand when your recording needs outgrow a single desk mic. An XLR microphone needs an audio interface or preamp to raise its low-level signal, so the initial purchase costs more than a direct-to-computer USB model.
That extra box isn’t disposable: it handles microphone preamps, conversion, headphone output, and routing as your setup develops. Choose XLR when you expect to add microphones or capture several sources. Interfaces with multiple preamps let you grow incrementally, while a four-preamp model supports stereo-tracking sessions.
If your work only needs one vocal, start with USB and keep the budget tight. You can move to an interface and XLR microphone later. Buy for today’s sessions, not requirements.
Sound Quality Considerations
Sound quality doesn’t depend on the connector alone: a well-chosen USB mic can produce clean vocal recordings at minimal cost, while an XLR setup gives you more control over preamp gain, inputs, and later upgrades.
USB models include conversion and a preamp, so you avoid the cost of an interface and reduce setup errors. With XLR, an interface preamp boosts the mic’s low-level output to recording level; a solid unit delivers transparent gain and headroom. That separation lets you replace components instead of the whole chain.
Don’t mistake added hardware for automatic improvement, though. Your room’s reflections, noise, and placement can shape a vocal more than a pricier microphone. Spend first on basic acoustic control, then make sure gain staging stays clean and conservative.
Choosing For Your Needs
Your workflow and upgrade plans should guide the USB-versus-XLR choice. Choose a USB microphone when you need a compact, direct-to-computer setup without buying an audio interface. Its built-in electronics handle the preamp function, so you can record quickly and keep the desk clear. For the lowest cost, your phone or an inexpensive USB mic gets you started.
Choose XLR if you expect to expand. XLR mics require a preamp because their output is low, and an interface supplies it. Budget roughly $150–300 extra for that interface. You gain interchangeable mics, preamps, and routing as your setup evolves. If you record vocals and instruments, choose a versatile, neutral microphone first; it handles varied sources before you spend more on specialized options for one specific source.
Headphones for Untreated Rooms
In an untreated room, start with closed-back headphones: they isolate you from room reflections and keep playback from leaking into microphones, while open-back models suit quieter, controlled spaces. Choose a reasonably neutral pair with comfortable pads, an adjustable headband, and low fatigue for long sessions. Learn their sound with familiar reference tracks, then check important mixes on car and home speakers before you trust final decisions.
Closed-Back Versus Open-Back
For an untreated room, buy closed-back headphones first: they isolate you from household noise and keep cue mixes from bleeding into a vocal or instrument microphone. Use them when you track vocals, acoustic guitar, or any source near a live microphone. Their sealed cups make them the sensible first purchase: you can monitor clearly without adding expensive treatment or creating avoidable spill in the take.
Open-back models vent sound outward and provide little separation, so reserve them for quiet listening or later mixing work. They can feel more natural, but they’re not the best recording tool in a busy home.
Neither design corrects room acoustics or guarantees a mix will translate. Compare your work with familiar reference tracks and audition it on car speakers.
Why Isolation Matters
Headphones give you a cleaner monitoring baseline in an untreated room because they bypass the reflections and bass buildup that can mislead you through speakers. That makes a dependable pair a smarter first monitoring purchase than studio monitors when you haven’t treated the space. You hear the recording rather than a mix of direct sound, wall bounce, and room resonances, so EQ, balance, and low-end decisions start from more useful information.
Headphones aren’t a complete substitute for other playback checks. Learn their tonal character with familiar, well-mixed reference tracks, then compare your work on a home stereo or car system. Those checks expose translation problems that one setup can hide. Until you can budget for treatment and monitors, headphones offer low-cost, repeatable monitoring.
Essential Comfort Features
Comfort determines whether you can use one pair of closed-back headphones long enough to make consistent mix decisions. In an untreated room, closed backs bypass much of the reflections and resonances that can mislead speaker monitoring, making them a sensible first monitoring purchase on a tight budget.
Prioritize moderate clamping force, padded earcups that fully surround your ears, a stable headband, and replaceable pads. Heat buildup, pressure points, and poor fit shorten sessions and reduce concentration, so try pairs on when possible or buy from a retailer with returns. Use the same pair regularly to learn its bass, midrange, and treble balance. Don’t assume headphones reveal everything: check balance, low-end, and stereo decisions on a car system or home stereo before finalizing your mix.
Mixing With Reference Tracks
In an untreated room, make a reliable pair of headphones your primary mixing reference and compare your work against commercially released tracks you know well. Speakers interact with walls, desks, and corners, so their bass and stereo image can mislead you before you’ve treated the space. Use your references to judge low-end weight, vocal level, brightness, and overall density. Level-match them to your mix before switching; louder playback usually sounds fuller and more exciting, not necessarily better.
Don’t buy several monitoring options. Instead, learn one dependable headphone pair. Then test mixes on a car stereo, home system, earbuds, or phone speaker. Those checks reveal translation problems—boomy bass, harsh highs, buried vocals—that headphones can mask. Consistency helps you compensate for their limits without expensive treatment.
DAW Operating-System Compatibility
Before you buy a DAW, confirm that it supports your computer’s operating system and exact version, since updates can change compatibility. Check the developer’s current minimum OS and hardware requirements against your laptop’s processor, memory, storage, and available ports. A DAW that looks inexpensive can cost more if it runs poorly or forces a computer upgrade.
Also verify plug-in support: your OS and DAW must handle the formats used by the free or paid tools you plan to install. If you use an audio interface or MIDI controller, confirm its drivers and control software support the same OS version. Reaper can be a cost-effective starting point, but check its current compatibility and requirements before you purchase or install it for your planned recording workflow.
Factor in Replacement Ear Pads
Inspect a headphone model’s replacement-pad options alongside its price. Pads are wear items, not permanent accessories: heat, sweat, and daily sessions compress foam, crack coverings, and eventually reduce comfort. Before you buy, confirm that the pads detach without damaging the cups and that official or reputable compatible replacements are easy to find. Compare current pad prices, shipping, and likely availability over several years. A low-cost headset with proprietary, scarce cushions can cost more than a better-supported model once maintenance begins.
If possible, wear the headphones with stock pads before committing. Pad thickness, shape, clamp interaction, and material affect seal, fit, and long-session fatigue. Include one or two future pad sets in your ownership estimate. Available replacement pads prevent premature headphone disposal when cushions deteriorate.
Forgetting XLR Cable Costs
A durable microphone also needs the cable that carries its signal: if you buy an XLR mic, budget for an XLR cable to connect it to your interface or preamp.
Many microphones and interfaces ship without one, so check the box contents before you finalize your budget. A modest cable expense can still break a tightly planned starter purchase.
- Count one cable per XLR microphone; shared cables don’t let you record both sources.
- Measure the route from mic to interface, including stand placement and safe floor clearance.
- Choose enough length to avoid tension, but not so much that slack becomes clutter.
A reliable, appropriately sized cable prevents an unusable mic purchase and keeps your first recording session moving without an unplanned store run today.
Monitor Isolation Pads
Monitor isolation pads sit between your speakers and a desk or stands, reducing vibration that can color bass and low-mid playback. They limit surface-borne resonance, so a lively desk contributes less boom and smear to what you hear.
- Buy them after your DAW, interface, and monitors are reliable.
- Match pad dimensions to each monitor’s footprint and verify the rated weight capacity.
- Use included wedges to aim tweeters at ear level, then check stability.
Affordable dense-foam pads are a useful refinement, not room treatment: they won’t solve modal bass buildup, reflections, or poor placement. If your desk vibrates, though, they’re a low-cost upgrade worth testing.
Skip them if your setup already sits on heavy, nonresonant stands. Spend that money on acoustic treatment first.
Conclusion
Build your studio around the recordings you’ll make, not the gear you wish you owned. Start with a $350 signal chain, then match interface inputs, microphone type, and DAW support to your workflow. In an untreated room, prioritize reliable headphones over monitors.
Budget for XLR cables, replacement ear pads, and isolation pads before checkout. Add channels and monitors only when your projects require them. This avoids repeat purchases, preserves upgrade paths, and keeps dollars producing audio.
For practical guidance on this related topic, see our guide to how mix headphones your songs translate.