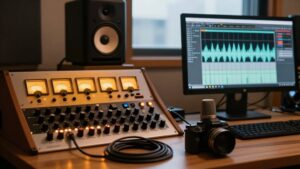
Home Studio Maintenance Checklist: Weekly, Monthly and Yearly Tasks
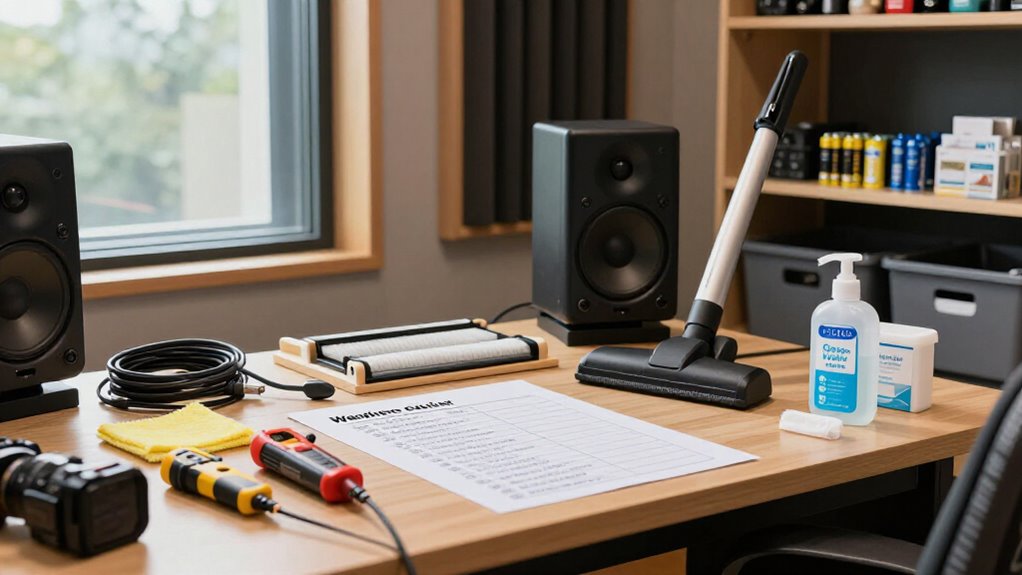
Weekly, you’ll clear floors and exits, dust and vacuum, inspect cables and microphones, wipe displays, and check humidity near equipment; keep RH at 40–50%.
Monthly, test alarms and GFCIs, inspect for leaks, clean vents, examine strain relief, and document firmware checks.
Yearly, service HVAC, clean dryer exhaust, inspect weather sealing, and verify symmetrical monitor placement and output.
Always power down before work, isolate faults, and maintain logs. The steps below refine each routine in detail.
Session-Ready Care for Home Studios
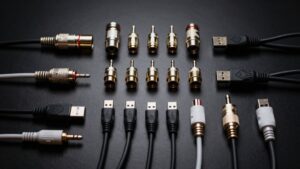
Keeping your home studio session-ready requires a simple maintenance schedule that protects equipment, preserves comfort, and reduces safety risks. Each week, clear floors, walkways, and exits before use. Inspect cables, connectors, headphones, and microphones for fraying, bent contacts, cracked housings, or other visible damage.
Route and secure loose leads to eliminate trip hazards, and remove faulty equipment from service. Monthly, inspect HVAC filters and replace them when dirt restricts airflow. Test smoke and carbon-monoxide alarms. Confirm fire extinguishers and emergency lighting remain accessible and functional.
Each year, schedule qualified HVAC and electrical servicing. Inspect windows, doors, and weatherstripping for drafts, moisture intrusion, or physical damage. Record findings, corrective actions, and service dates so you can track recurring faults and maintain consistent operating conditions year-round.
Gather Microfiber Cloths and Labels
Keep a dedicated supply of clean, lint-free microfiber cloths for dusting studio equipment, desks, and other surfaces. Store them where you can reach them before handling sensitive gear. Assign each cloth category a defined purpose, and use labels to maintain separation and prevent residue transfer.
- Mark electronics cloths for consoles, interfaces, and monitors; don’t use them on furniture.
- Reserve lens cloths for optics, filters, and camera surfaces, keeping abrasive particles away.
- Label bins or drawers “clean” and “used” so contaminated cloths can’t reenter service.
- Identify every cleaning bottle with its contents and approved application; avoid unmarked liquids near equipment.
Wash reusable cloths separately from towels or other lint-producing fabrics. Follow care labels, dry cloths completely, then return them to the clean, labeled storage area.
Weekly, Monthly, Annual Tasks
With labeled cleaning supplies in place, use a recurring maintenance schedule to protect studio gear and the room around it. Weekly, dust surfaces and equipment, vacuum floors, and examine cables and walkways for wear or trip hazards.
| Interval | Required checks |
|---|---|
| Weekly | Dust, vacuum, cable inspection |
| Monthly | Alarms, GFCIs, moisture, HVAC filter |
| Annual | HVAC, dryer vent, exterior review |
Monthly, test smoke and carbon-monoxide alarms, verify GFCI outlets near sinks, and inspect leaks, drafts, and moisture. Check HVAC filters; clean or replace dirty media at its rated interval, from 30 days to several months. Annually, schedule HVAC service, clean any dryer exhaust, inspect roof, gutters, and exterior drainage, then document equipment and building repairs. Set maintenance spending near one to three percent of your home’s purchase price.
Power Down Equipment First
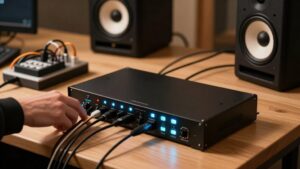
Before cleaning, inspecting, or reconnecting gear, power down the system in order: turn off amplifiers and speakers before your mixer or interface. Unplug each relevant power supply, confirm all status lights are off, and let hot components cool before handling them. When you restart, secure every connection first, then power source devices on before amplifiers and speakers.
Prevent Electrical Hazards
Power down and unplug every piece of studio equipment before you clean, inspect, move, or reconnect it. For hard-wired units, have a qualified electrician isolate the circuit. Keep liquids away from outlets, power strips, and energized gear, and never touch plugs or cables with wet hands.
With equipment unplugged, examine each cord, plug, and power strip for fraying, cracks, scorch marks, or loose connections. Remove damaged items from service and replace them. Don’t overload outlets or daisy-chain strips; keep ventilation openings clear. If you detect sparks, burning odors, unusual heat, or recurring breaker trips, stop using the affected circuit and arrange a qualified professional to diagnose the fault. Record findings in your maintenance log, including location, date, and corrective action, before safely restoring power.
Protect Sensitive Components
Shut down each device using its manufacturer’s recommended sequence, save active sessions, and mute or lower monitor levels before you switch off computers, audio interfaces, and powered speakers. Then unplug the equipment before you clean, move cables, or inspect connections. This isolates sensitive circuits and reduces the chance of electric shock and accidental component damage.
Allow hot units to cool before you touch ventilation grilles or service adjacent hardware. Remove dust with a dry, lint-free cloth, brush, or electronics-safe tool. Don’t spray liquid onto chassis, ports, controls, or circuit openings; keep moisture and loose debris out of connectors. When maintenance is finished, confirm that cleaned surfaces are fully dry and that cables, plugs, and components sit securely. Reconnect power only after inspection is complete.
Follow Proper Shutdown Order
Start by stopping playback and saving all active sessions, then shut down your computer and DAW through their normal procedures. This prevents file corruption and guarantees the system closes cleanly. Next, power down audio sources, including microphones, instruments, and preamps.
Then switch off monitors and amplifiers, keeping speaker outputs silent before their power stages disengage. This sequence minimizes transient pops that can stress drivers. Turn off the audio interface and remaining connected equipment only after the computer has fully shut down.
Check manufacturer documentation for devices with prescribed sequences, standby modes, or cooling requirements. When restarting, reverse the order: activate source and processing gear first, then power monitors and amplifiers last. Confirm volume controls are low before restoring signal paths and resume normal operation.
Unplug Before Cleaning
Before cleaning any studio component, switch it off and unplug it to reduce electrical-shock and equipment-damage risks. Follow the manufacturer’s cleaning instructions, as some interfaces, mixers, speakers, and display monitors require specific disconnection procedures. After switching each unit off, remove its power cable by gripping the plug body rather than pulling the cord.
Disconnect attached audio, USB, network, and control cables carefully; use labels or photos when routing is complex, so you can restore connections accurately. Keep sprays, liquid cleaners, and damp cloths clear of wall outlets, power strips, plugs, ventilation slots, and other equipment openings. Apply cleaner to a cloth away from the workstation, then clean surfaces only as directed. Allow cleaned surfaces to dry completely before you reconnect cables or restore power.
Verify Complete Power Down
Make sure every studio device has fully powered down before you clean, inspect, or service it. Shut down your system in sequence: turn off instruments and source devices first, then mixers or audio interfaces, and finally powered monitors or amplifiers. This order minimizes transient pops and helps protect connected circuitry. Unplug each unit from its outlet after shutdown; a front-panel switch or standby indicator doesn’t prove isolation.
Check that computers, monitor speakers, amplifiers, and peripheral gear are fully off before touching connectors or panels. Let heat-producing components, including amplifiers and power supplies, cool completely. Never open a chassis while it remains connected to mains power. For hard-wired equipment or uncertain isolation steps, follow the manufacturer’s instructions or contact a qualified technician for safe service.
Humidity Control for Analog Gear
Keep your studio at 40 to 50% relative humidity to protect analog gear from corrosion, mold, and excessive dryness. Check a hygrometer regularly near the equipment, away from vents, windows, and direct sunlight, and run a dehumidifier if readings remain above 60%. During seasonal shifts, stabilize storage conditions for tapes and records, using a humidifier cautiously and avoiding abrupt humidity changes.
Ideal Humidity Ranges
Aim for 40–50% relative humidity (RH) in your home studio to protect analog gear from moisture-related corrosion and overly dry, static-prone air. This target supports stable conditions for tape stock, metal contacts, potentiometers, transformers, and other analog components. Keep RH below about 60% whenever practical; extended dampness encourages corrosion and mold, which can affect equipment surfaces and stored media.
Also avoid conditions below roughly 30% RH. Excessively dry air raises static-electricity risk around sensitive electronics and can make handling less predictable. Treat the 40–50% band as an operating target, not a one-time setting.
Maintain gradual, consistent room conditions across seasons and avoid abrupt humidity swings that stress materials and assemblies. Pay particular attention to tape storage, exposed metalwork, and vintage units with aging insulation materials.
Monitoring and Dehumidification
A hygrometer lets you verify that your studio actually remains within the 40–50% RH target rather than relying on how the room feels. Place it near your analog equipment, but away from sunlight, windows, HVAC vents, and dehumidifier discharge. Check and log the reading at least weekly; seasonal weather, HVAC cycling, and your room’s location can shift RH substantially.
If readings remain above 60%, run a correctly sized dehumidifier and set its humidistat for the target range. Empty its reservoir on schedule or connect a reliable drain. Each month, inspect equipment, cables, and nearby storage areas for condensation, musty odors, corrosion, or mold. Investigate recurring elevations immediately: correct leaks, inadequate ventilation, or equipment faults before moisture damages valuable contacts, metalwork, or vulnerable wooden components.
Seasonal Storage Precautions
Before seasonal storage, clean and dry analog gear, cables, cases, and accessories thoroughly so trapped moisture and dust don’t promote corrosion or mold. Store equipment in a cool, stable room, away from damp basements, hot attics, radiators, and exterior walls. These locations create temperature swings that can form condensation.
Place a hygrometer in the storage area and keep relative humidity near 40–50 percent; don’t allow readings above 60 percent for extended periods. If humidity rises, run a dehumidifier or install replaceable desiccant packs. Inspect reservoirs or replace packs on schedule so moisture control doesn’t fail after saturation.
Keep instruments, tapes, and other analog media in closed cases or sealed containers. After moving packed gear from cold storage into warmth, let it acclimate before opening.
Consistent Monitor Output Clarity
Clear, stable monitor output depends on routine screen care, airflow checks, and secure signal connections. Each week, wipe every display with a clean, dry microfiber cloth. For stubborn marks, apply screen-safe cleaner to the cloth, never directly to the panel.
Monthly, inspect vent openings and remove accumulated dust that restricts airflow and can contribute to unstable performance. Check each cable and connector for strain, looseness, or poor seating; reseat connections to prevent flickering, signal dropouts, and intermittent images. Log any recurring color casts, brightness variation, or other visual changes, noting the affected monitor and connection.
Once yearly, position both studio monitors symmetrically and verify left-right output levels. Balanced placement and matched levels preserve reliable stereo imaging while your records help isolate persistent display faults.
Burning Smell: Stop Immediately
If you notice a burning smell in your home studio, stop using the equipment immediately and switch it off. If conditions are safe, unplug the suspected device from its power source. Do not handle gear that is hot, sparking, visibly damaged, or difficult to access safely. Note which unit was operating, the approximate time, and any unusual sounds or performance changes before shutdown.
If you see smoke, flames, or continuing heat, leave the area at once and call emergency services. Don’t open housings, attempt repairs, or restart any affected equipment to test whether the odor returns. Isolate the device from your workflow and label it. Have a qualified technician identify the fault and complete inspection or repair before you return the unit to service.
Ignoring Cable Strain Relief
Ignoring cable strain relief puts repeated mechanical stress on plugs, jacks, and internal conductors, often causing intermittent audio, data, or power faults. Protect every connection by managing cable load and movement rather than letting connectors act as anchors.
- Install clamps, grommets, or ties at desk pass-throughs and racks, routing weight away from plugs and jacks.
- Leave a small service loop at microphones, instruments, monitors, and rack units so repositioning doesn’t create tension.
- Fasten bundles snugly, never tightly; avoid sharp bends, kinks, and tie pressure that can crush insulation or conductors.
- Inspect relief points monthly for loose clamps, worn grommets, fraying, or connector tugging. Grip plugs—not cables—when disconnecting, correct faults promptly, and replace damaged cables instead of taping them as a temporary repair measure.
Track Firmware Update Dates
Maintain a dated firmware log for every studio device to preserve a reliable record of its model, installed version, update date, and any post-installation issues. Before installing anything, record the current firmware version, then read the manufacturer’s release notes. Confirm the update applies to your exact hardware, works with your operating system and connected equipment, and resolves a relevant security, compatibility, or stability concern.
Check for updates monthly, but don’t install one immediately before tracking, mixing, or a live session. Choose a maintenance window with time for rollback or troubleshooting. After installation, test audio inputs, outputs, MIDI ports, clocking, and computer or network communication. Enter the test date, results, and any anomalies in your log. This history helps you identify version-related faults and report them.
Conclusion
Your home studio stays session-ready when you follow a documented maintenance rhythm. Each week, clean surfaces, inspect cables, confirm monitor output, and stabilize humidity. Each month, label connections, test backups, and record firmware versions.
Annually, service analog gear, replace worn strain relief, and review power protection. Always shut equipment down before cleaning, and stop immediately if you smell burning. These controlled checks reduce failures, preserve signal quality, and protect your investment for years ahead.
Headphone Drive Check: Will My Interface Power These?
Estimate whether an audio interface can drive your headphones: power in mW, maximum SPL and margin to your own target, with every step shown.
Home Studio Room Calculator: Acoustic Treatment & Monitor Placement
Enter room size and finishes to get room modes, RT60 per octave, a panel count, monitor triangle, SBIR null and first-reflection points.