Are Power Conditioners Worth It for Home Studios? When to Buy One
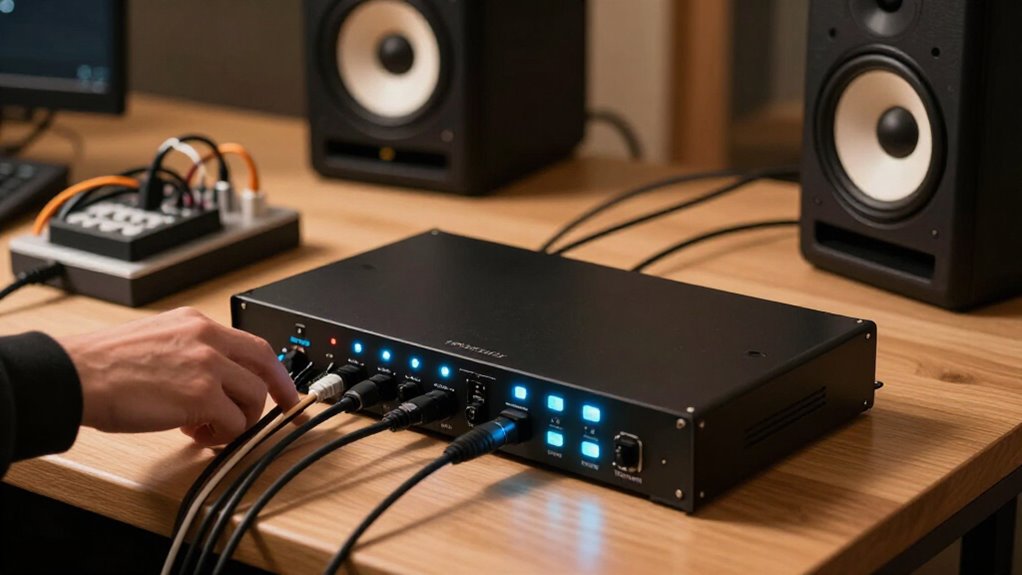
Power conditioners are worth it for your home studio if you need verified surge protection, organized power distribution, or voltage regulation.
They won’t reliably cure hum caused by ground loops, cables, or noisy preamps. Test outlet voltage under load, confirm 120V/15A capacity, and choose enough spaced outlets without daisy-chaining.
Compare MOV or series-mode protection, warranty terms, and replacement status. Rack space and your equipment load determine the best model; the details below help you choose.
Check for Hum and Surges
Start by listening for a persistent 50–60 Hz hum or buzz, particularly when multiple devices share the same circuit. This pattern can indicate power-line noise, and a conditioner’s filtering may reduce it. However, trace the source before you buy: unplug or isolate equipment methodically, because ground loops, cable routing, and external interference can produce similar symptoms that a conditioner won’t cure.
Also assess surge risk. Compared with inexpensive power strips, conditioners often provide more robust surge suppression, but no device absorbs unlimited energy. A major event can overwhelm a lower-cost protector, and some units lose protection without obvious audible warning. If your candidate includes status LEDs, inspect them regularly. Confirm that its protection indicator remains active; this verifies surge protection and filtering remain available.
Identify Available Rack Space
Measure your available rack space in rack units (U) before choosing a power conditioner, since rackmount models can consume significant room; for example, the Black Lion Audio PG-2R requires 2U. Count the open U positions in your rack, then reserve space for every processor, interface, drawer, or patch panel you keep installed. Also verify that the conditioner’s front panel remains reachable after installation. Meters, USB charging ports, convenience outlets, and lamp connectors are useful only if you can access them.
Compare outlet count and features with your equipment list, so you don’t sacrifice scarce rack capacity for unused functions. If your rack is near capacity, choose a portable model such as the Black Lion Audio PG-P. It can provide conditioning without displacing rack gear.
Measure Your Circuit’s Voltage Stability
Check your outlet’s voltage with a plug-in meter at several times of day, particularly while your studio equipment is operating. In the U.S., 120 V at 60 Hz is the nominal reference. Record repeated departures, not one brief fluctuation, and test again as demand changes.
| Test | Reading | Interpretation |
|---|---|---|
| Idle gear | Near 120 V | Baseline |
| Monitors/amplifiers on | Drops repeatedly | Load-related sag |
| Varies persistently | Outside target | Consider regulation |
Compare the idle and loaded results over multiple sessions. A conditioner that displays incoming voltage can simplify monitoring, but most conditioners don’t correct voltage. If you document persistent variation, choose a voltage regulator when needed rather than assuming any conditioner will solve it. For example, the PG-2R is designed to keep output at 120 V within ±2 V.
Series-Mode vs. MOV Protection
MOV protectors clamp spikes by diverting excess energy, but repeated or severe surges can degrade them, so you should check for a working protection-status indicator. Series-mode designs block surge energy in series and typically tolerate repeated events without the same consumable behavior, though they often cost more and may produce some heat. Compare surge ratings, noise performance, warranty, and replacement terms against your studio gear’s value, and follow the manufacturer’s grounding instructions.
How MOVs Handle Surges
Surge protectors that use metal-oxide varistors (MOVs) clamp excessive voltage during a surge and divert that energy away from your studio gear. They respond when line voltage rises above their threshold, limiting the voltage reaching connected equipment while absorbing part of the event’s energy.
That absorption capacity is finite. Repeated surges, or one large surge, can degrade an MOV. A worn protector may still power your rack but no longer provide effective surge protection. Check its protection-status indicator regularly; it can show whether the protective circuit remains active. Before buying, review the model’s specifications and verify that it includes a clear status indicator. Don’t assume every powered strip still protects your interface, monitors, computer, or outboard gear after it has taken surge damage internally.
How Series Mode Works
Unlike an MOV-based protector, a series-mode unit places a protective component in the power path and disconnects power when a surge exceeds its limits rather than shunting excess voltage to ground. For your studio, this architecture contrasts with an MOV, which clamps a surge by diverting excess energy away from connected gear. Repeated surges can degrade an MOV, potentially reducing its protection before it fails.
A series-mode design can avoid that gradual loss, but you shouldn’t assume every model performs identically. Compare published surge-protection specifications, including its stated limits, and verify its status indicators work. Neither design provides unlimited protection: an exceptionally large surge can overwhelm or damage it. Without comparable test data and model ratings, you can’t declare one universally superior in practice.
Noise, Heat, and Lifespan
Noise, heat, and service life depend on the specific unit and electrical conditions, not simply on whether it uses series-mode or MOV protection. You shouldn’t assume either design runs cooler, quieter, or longer because no temperature, acoustic-noise, or lifespan data establishes that conclusion. Check manufacturer’s specifications and protection-status features instead.
An MOV protector clamps spikes by diverting surge energy, so repeated events can degrade its components. A large surge may destroy a lower-cost unit while it absorbs the event. It can still pass power like a splitter without protecting your gear; check its status indicator regularly. A conditioner can filter interference that contributes to hum or buzz, but it won’t cure grounding faults or cable issues. Without power-related noise, you may hear no audible change.
Choosing Protection for Studios
How should you choose between series-mode and MOV-based protection for a home studio? Start with the surge risk and the replacement policy you can accept. A basic strip may handle small surges, but a larger spike can reach connected equipment.
MOV-based protectors absorb finite energy; after a major event, some may still power outlets while no longer protecting your gear. Series-mode designs generally avoid that sacrificial MOV approach, making them attractive where service continuity matters. Yet design and price matter: some roughly $200 conditioners provide strong protection, whereas cheaper units may save equipment by sacrificing themselves. Check protection-status indicators whenever available, and replace or repair any unit whose protection status has failed. Compare warranty terms, outlet count, and your local electrical exposure before buying.
Desktop Rigs: Compact Strip Units
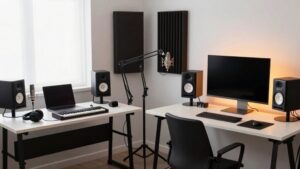
For a desktop rig, a compact conditioner strip saves space while adding surge protection, noise filtering, and outlets for your computer, interface, and monitors. Verify its wattage rating, outlet count, and plug spacing, especially if you use oversized power adapters; USB ports can simplify charging but don’t replace protected AC outlets. Check the status indicators after a surge, and choose a rack unit or a voltage-regulating model if your setup outgrows the strip or requires stable 120 V power.
Space-Saving Power Protection
A compact strip-style power conditioner gives a desktop studio surge protection and basic line filtering without consuming rack space. For a small interface, computer, displays, and powered monitors, choose a model whose outlet count and continuous wattage exceed your actual load. Plug the studio system into that unit, then connect it to one grounded outlet; this keeps protection centralized and avoids daisy-chaining strips.
Verify whether the model includes voltage regulation rather than assuming it does. Most compact conditioners don’t regulate voltage, and regulated versions cost more. Finally, treat surge suppression as a consumable protective function, not a permanent guarantee. Check the protection-status light or display regularly. If it indicates lost protection, replace the unit or have it serviced according to the manufacturer’s instructions promptly.
Noise Filtering for Desks
Beyond centralized protection, a compact strip-style conditioner may reduce hum or buzz by filtering interference on the AC line. In a desktop rig, that filtering can lessen noise linked to appliances cycling in your home, radio-frequency contamination, or several devices sharing one circuit. Results depend on the source: it can’t cure a ground loop, a damaged cable, a noisy interface preamp, or interference entering through an audio connection.
Before buying, isolate the problem. Listen with peripherals disconnected, move power supplies, and test whether noise changes when appliances run. If your system is quiet, you may hear no improvement. Also, don’t assume a compact conditioner stabilizes voltage. Most provide filtering and surge protection, not voltage regulation. Check specs if your equipment requires stable input voltage.
Outlet Counts and Spacing
Count every device in your desktop rig—including the computer, audio interface, monitors, external drives, and chargers—then choose a compact strip with spare outlets for planned additions. A desktop conditioner can centralize power for your core devices. Inspect the layout before buying.
Large wall-wart adapters, right-angle plugs, and transformer blocks can cover adjacent receptacles, reducing an eight-outlet unit to far fewer accessible connections. Map plug’s width and orientation for monitor supplies and laptop bricks. Leave at least two open outlets so you can add a drive, controller, or charger without daisy-chaining another strip. If the conditioner labels outlet groups for analog and digital equipment, follow those assignments. Keeping your interface and monitors in their intended group can support the unit’s filtering scheme and simplifies troubleshooting.
USB and Rack Alternatives
If your desktop rig needs only a few protected outlets, a compact conditioner preserves desk space while front-panel USB ports can charge compatible devices. Check each port’s output rating, charging standard, and device compatibility before relying on it for a laptop or interface accessory.
Move to a rackmount unit when you need centralized power for more equipment. For example, the PG-2R occupies 2RU and provides 12 switched, filtered, surge-protected outlets. Rack models may also add convenience outlets, meters, and USB charging.
Compare those functions against your actual workflow rather than buying features you won’t use. Prioritize the protection and filtering you need: many conditioners don’t regulate voltage, whereas the PG-2R is specified to hold 120 V within ±2 V under rated load conditions per its specifications.
Confirm 120V/15A Compatibility
Start with electrical compatibility: for a typical U.S. home studio, choose a power conditioner rated for 120 V operation and compatible with a 15 A branch circuit. Verify continuous current and wattage ratings, then total loads: interface, monitors, computer, displays, and outboard gear. Don’t treat it as added circuit capacity; keep load within its limits and circuit rating.
Check outlet count and ratings, especially for wall-wart adapters. A voltage display helps you observe line voltage, but it doesn’t mean the unit regulates it. Most only distribute, filter, and protect power. If your measurements show voltage variation and your equipment needs stable input, buy a model explicitly labeled as a voltage regulator. Some regulators hold output near 120 V, often within ±2 V, but cost more.
Ten-Year Warranty vs. Replacement Cost
Once you’ve confirmed the electrical rating, compare the conditioner’s 10-year warranty with its likely replacement cost. A decade of coverage can justify a higher purchase price when the manufacturer will repair or replace the unit after failures. However, don’t treat the term length as protection. Read the coverage limits, exclusions, claim requirements, responsibilities, and whether surge damage qualifies.
Lower-cost conditioners may sacrifice protection components during a surge. That can protect your interface, monitors, and computer, yet leave you paying to repair or replace the conditioner. Higher-priced designs may tolerate a wider range of surge events, reducing that potential replacement risk. Before buying, verify the model’s warranty terms and replacement price. You can then weigh its upfront premium against the cost of an uncovered failure.
Avoid Daisy-Chaining Power Conditioners
Plug your power conditioner directly into a properly grounded wall outlet, not into another conditioner or power strip. Daisy-chaining creates a series connection that can overload the upstream unit or branch circuit, raising conductor temperature and fire risk.
- Treat the conditioner as the final distribution point: connect studio equipment only to its outputs.
- Verify its rated current or wattage against your equipment’s combined maximum draw; don’t assume a second unit increases capacity.
- Expect limited benefit from stacking units: downstream filtering and surge protection may not improve materially, while fault conditions become harder to diagnose and manage.
If your system exceeds one conditioner’s rating, replace it with a single model designed for the required load. Confirm its rating matches the branch circuit and intended load.
Count Outlets for Wall Warts
Count every powered device in your studio before choosing a conditioner, including interface supplies, pedal adapters, USB hubs, and other wall warts. A unit advertised with eight outlets may not provide eight usable connections when oversized adapters block adjacent sockets. Measure plug widths or inspect outlet layout photos before buying.
- Choose widely spaced outlets or convenience sockets for large adapters.
- Reserve open connections for pedals, chargers, or expansion gear.
- Verify connected wattage or amperage stays below the conditioner’s rated capacity.
Outlet count covers fit; capacity covers safety. Add each device’s labeled draw; compare total load with the conditioner’s rating. Don’t solve blocked sockets by daisy-chaining strips or conditioners. If you need more usable outlets, choose a larger model or place low-voltage adapters outside the rack.
Conclusion
Buy a power conditioner when you’ve verified a real need: audible hum, recurring surges, unstable line voltage, or insufficient filtered outlets for your studio. Choose a unit that matches your 120V/15A circuit, fits your rack or desktop, and uses suitable protection: series-mode for longevity or MOV for lower cost. Don’t daisy-chain conditioners. Count wall-wart spacing, compare warranty terms with replacement cost, and remember that conditioning won’t fix grounding faults, bad cables, or major electrical problems alone.