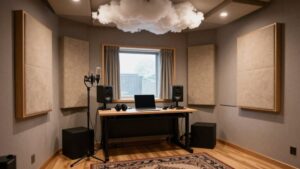
How Many Acoustic Panels Do I Need? Coverage by Room Size
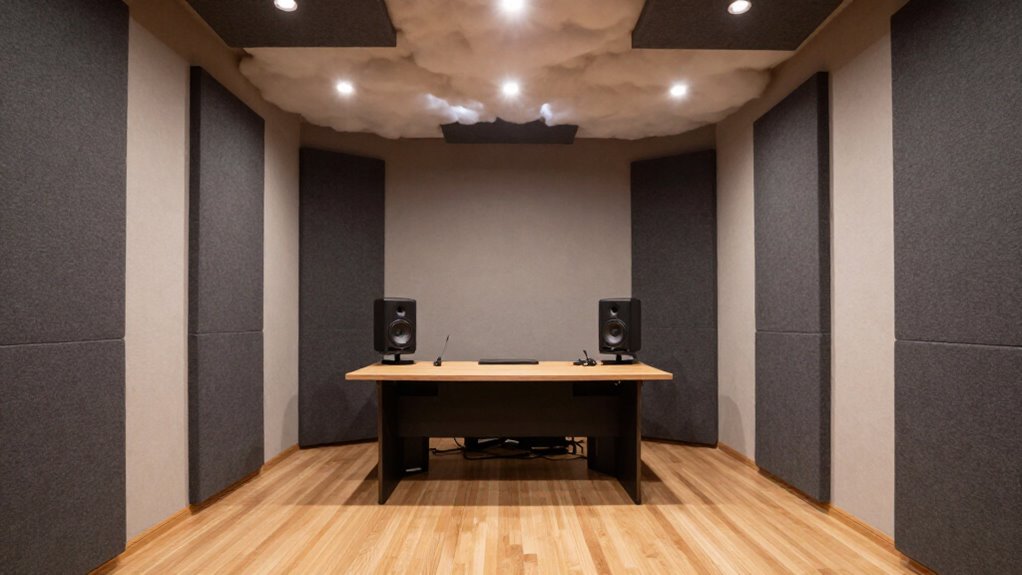
Start by covering 15 to 25% of your usable wall area with 1 to 2-inch broadband panels. Calculate net wall area after subtracting doors, windows, vents, and built-ins, then target 3 to 5% of room volume as a cross-check.
A 12×15×8-foot bedroom needs about 43 to 72 square feet, or 12 five-square-foot panels. Use more coverage for glass or concrete, add corner bass traps, and spread panels across walls and ceiling. Next, you’ll see how placement and codes refine the plan properly for you.
Start With 15–25% Coverage
Start With 15 to 25% Coverage
Start by covering roughly 15 to 25% of your room’s treatable wall area with acoustic panels. Calculate each wall’s gross area as width × height, then subtract doors, windows, built-ins, and any surfaces you won’t treat. Add the remaining wall areas and multiply the total by 0.15 to 0.25 to set your initial panel coverage target.
For classrooms, boardrooms, and open-plan offices, begin near 15 to 20%. Critical listening spaces may require 25% or more. If usable wall area is scarce, install ceiling clouds; an air gap above them can improve absorption of direct and reflected sound. Use this percentage as a planning baseline: glazing, furnishings, and existing absorptive finishes change the final requirement. Measure panel face area, not nominal package coverage, and revise the layout after installation as needed later.
Target Midrange Reverberation First
Target midrange reverberation first, because it most directly affects speech clarity in offices, hallways, and comparable spaces. Start with 2-inch panels; they’re the effective minimum for controlling midrange frequencies.
Calculate room volume as length × width × height, then target treatment equal to 3–5% of that volume. For a baseline, multiply cubic volume by 4%: a 24,000-cubic-foot room indicates 960 square feet of treatment.
Locate panels at early-reflection points on walls and ceilings. From the speaking or listening position, use the mirror trick to identify side-wall locations. Glass, concrete, tile, wood, and drywall may require more absorption; curtains, carpet, and upholstered furniture already contribute. Increase coverage toward the upper range when hard surfaces dominate, but verify placement before adding panels as needed.
12×15 Bedroom Example
For a 12 × 15 ft bedroom with an 8 ft ceiling, you’re treating a 1,440-cubic-foot space: a 3% to 5% room-volume guideline calls for roughly 43 to 72 sq ft of acoustic panels, with 58 sq ft as a practical 4% baseline.
Using 5-square-foot panels, you need 11.6 units, so specify 12 panels as the minimum layout quantity. Order 13 or 14 if cuts, door clearance, outlets, or uneven wall sections prevent full placement. Distribute coverage across reflective wall areas instead of concentrating every panel on one surface. Drywall, glass, and tile increase reflected energy, so move toward 72 sq ft when those finishes dominate. Curtains, carpet, and upholstered furniture add absorption; with substantial soft coverage, you may remain near 43 to 58 sq ft. Then confirm clearer speech.
Broadband, Bass, and Ceiling Panels
Use 1–2-inch broadband panels at first-reflection points, then match placement across opposite walls to control early reflections. Add thicker bass traps in corners to reduce modal low-frequency buildup, and suspend ceiling clouds with an air gap when reflective ceilings or limited wall space compromise clarity. For critical listening or recording, you’ll get more reliable results by combining all three treatments than by increasing wall-panel coverage alone.
Broadband Panels for Reflections
Broadband panels address the early reflections that blur speech and stereo imaging, so place them at first-reflection points on the side walls and the wall opposite your listening or speaking position. Use the mirror trick: from your seated listening or speaking position, have a helper slide a mirror along each side wall; mark every point where you can see the loudspeaker. Install one- to two-inch broadband panels at those marks; two inches is the effective minimum for improving speech clarity.
Treat the opposite wall with distributed panels, rather than covering one surface continuously, to reduce flutter echo while preserving a natural decay. Keep coverage symmetrical across opposing walls; don’t overabsorb the room. Reassess using speech tests and measurements after each installation stage for consistent results.
Bass Traps for Corners
Corners require dedicated bass traps because low-frequency pressure builds there and creates standing-wave peaks and nulls. Install traps in as many vertical corners as your layout permits, starting with all four. Choose thickness and depth according to the low-frequency control you need and the floor area you can spare.
Standard 1–2-inch panels mainly absorb speech and higher-frequency content; they won’t provide meaningful bass control. For a recording room, pair corner traps with broadband absorbers at first-reflection points to improve bass consistency and imaging. Avoid treating every surface with absorption: retain or add diffusion so you reduce echoes without making the room unnaturally dead or flat. If space permits, use thicker, deeper traps; increased material depth generally improves absorption at lower frequencies and produces an even low-end response.
Ceiling Panels for Clarity
Ceiling clouds improve clarity by intercepting early overhead reflections before they blur speech, music, or stereo imaging. Use them where ceilings are high, reflective, or where furniture and openings limit wall coverage. In large or open rooms, combine wall panels and clouds at an approximate 60:40 wall-to-ceiling coverage ratio, a balance proven in applications.
Specify 1–2-inch broadband panels for speech, conferencing, and music without bass energy. Choose thicker ceiling treatment when low-frequency control requires it; pair it with corner bass traps rather than expecting clouds alone to manage modal buildup. Suspend cloud below the deck, leaving an air gap that increases absorption of primary and secondary reflections. Position clouds with first-reflection-point wall panels, assess reverberation, and retain area so your room doesn’t sound dead.
Glass, Concrete, and Carpeting
Glass and concrete reflect a high proportion of incident sound, so you’ll often need treatment above the 15 to 25% wall-coverage starting range in rooms dominated by these surfaces. Carpet provides partial absorption, which can reduce the panel count compared with hard flooring. Include curtains and upholstered furniture in your estimate, then distribute panels across reflective walls or use ceiling panels where wall space is limited.
Glass Reflection Challenges
Hard, smooth finishes raise a room’s reflection load: large windows and exposed concrete return much more sound energy than porous materials, so they typically require additional panel coverage. Start with your room’s window area and its placement opposite other hard boundaries. Large, uncovered panes create strong early reflections, particularly at speech frequencies. Add panels near side-wall and ceiling reflection paths, then adjust the count for existing absorption.
| Condition | Adjustment | Placement |
|---|---|---|
| Large bare glass | Increase baseline coverage | Opposite reflection paths |
| Curtains or carpet | Reduce increment | Keep distributed |
| Upholstered furniture | Verify after testing | Treat ceiling paths |
| Speech-focused use | Target 3 to 5% volume | Measure room first |
Don’t cluster treatment on one wall; distribute it across glazed-wall, opposing-wall, and ceiling zones to shorten audible decay and improve speech clarity.
Concrete Surface Impact
Concrete surfaces compound the reflection issues created by large windows because both return a high proportion of incident sound energy. In a concrete-and-glass room, sound repeatedly strikes low-absorption boundaries, extending decay time and reducing speech definition. You should treat these surfaces as a coverage multiplier, not merely as background construction.
Begin with treatment equal to 3 to 5% of room volume for speech, then move toward the upper end when exposed concrete walls, slabs, or ceilings dominate. For recording spaces, plan 4 to 6% and increase coverage if reflections remain audible between parallel hard planes. Account for every finish: tile, wood, and drywall add reflectivity, whereas curtains and upholstered furniture moderate it. Prioritize panels at first-reflection zones and opposite major glass or concrete faces to interrupt repeated paths.
Carpet Absorption Benefits
Although carpet absorbs part of the sound energy that would otherwise reflect from the floor, its benefit depends on the percentage of floor area covered, pile thickness, and the room’s remaining finishes. You should count carpet as partial broadband absorption, not as a substitute for wall or ceiling treatment.
If carpet covers most of the floor, it can reduce early floor reflections and modestly lower the panel area required. However, glass and concrete maintain strong reflections, so you may still need panels at first-reflection points and across hard walls or ceilings. Estimate coverage after accounting for curtains and upholstered furniture. Balance floor absorption with distributed wall and ceiling panels to control echo without overdamping the room, especially at mid and high frequencies for speech.
Home Theater Rear-Wall Treatment
For a home theater, size rear-wall treatment as part of the entire acoustic plan, not as an isolated panel count. Start with roughly 25% or more total room-surface coverage for critical listening, then allocate rear-wall panels according to speaker interaction and the reflectivity of adjacent finishes. Measure rear-wall width times height, subtract door, window, or other untreated openings, and divide the net square footage by each panel’s face area; round the result up.
Use rear-wall absorption to reduce delayed reflections, but retain diffusion where possible so you don’t create an overly dead presentation. Select panel depth by frequency target: 1-2-inch absorbers primarily address speech and upper-frequency energy. If bass builds behind seating or rear corners, use thicker absorbers or bass traps in your plan.
Fire Ratings and Egress Codes
Before you calculate panel quantity, verify that every acoustic panel carries the fire rating and certification required by your local building and fire codes. Identify the room’s occupancy and use: schools, offices, restaurants, and assembly spaces may require defined flame-spread and smoke-development classifications. Specify the complete tested assembly, not only the panel: mounting hardware, fabric facings, adhesives, and backing must remain within the approved fire-rated configuration.
Substituting any component can void compliance. Maintain unobstructed exit doors, exit signs, emergency lighting, fire alarms, and sprinkler discharge patterns. Don’t place wall panels or ceiling clouds where they reduce required egress width or interfere with inspection and maintenance. Confirm layout, clearances, documentation, and installation details with the local building or fire official before ordering materials or mounting panels.
Confusing Absorption With Soundproofing
Acoustic panels control reflections within a room: they absorb incident sound energy, reduce echo, and can lower RT60, but they don’t meaningfully block sound transmission through walls, doors, windows, or ceilings.
If you add 1–2-inch panels, you can improve speech clarity by reducing reflected energy, not stop voices, traffic, or music crossing the building envelope. Coverage should target your RT60 and listening use; thicker panels and corner placement absorb more low-frequency energy.
- You’ll hear dialogue sharpen instead of fighting a fatiguing wash of reflections.
- You won’t get the privacy you’re counting on when exterior noise still enters.
- You’ll avoid costly disappointment by separating acoustic treatment from isolation.
For isolation, you usually need an airtight, higher-mass wall, door, window, or ceiling assembly, not surface absorption alone.
Photograph Wall Outlets and Vents
Photograph every outlet, switch, vent, return grille, and wall penetration straight on before you measure panel coverage, using a tape measure or laser reference accurate to ¼ inch in each image or note. Record distance from nearest corner and finished floor, plus opening width and height. Outlets rarely alter panel count because their footprints stay below 1 square foot, but they dictate cut placement.
| Feature | Record | Coverage action |
|---|---|---|
| Outlet | Coordinates, width, height | Cut panel; don’t subtract |
| Vent | Coordinates, width, height | Leave uncovered; subtract area |
| Penetration | Coordinates, diameter | Confirm trim clearance |
Sketch features. Subtract uncovered vents and grilles: width × height. Keep outlets in totals; position seams clear of electrical boxes. Use the photos during layout to avoid obstructing airflow or device access during installation.
Conclusion
Start by treating 15 to 25% of your room’s surface area, then measure decay and add panels until midrange reverberation meets your target. In a 12×15 bedroom, that typically means 55–90 ft² of absorption. Use broadband panels first, add bass traps and ceiling treatment as needed.
Account for reflective glass or concrete. Treat rear theater walls carefully, verify fire and egress requirements, remember absorption doesn’t soundproof, and document outlets and vents before installation to avoid conflicts.