Portable Recorder vs Audio Interface: Which Should You Record With?
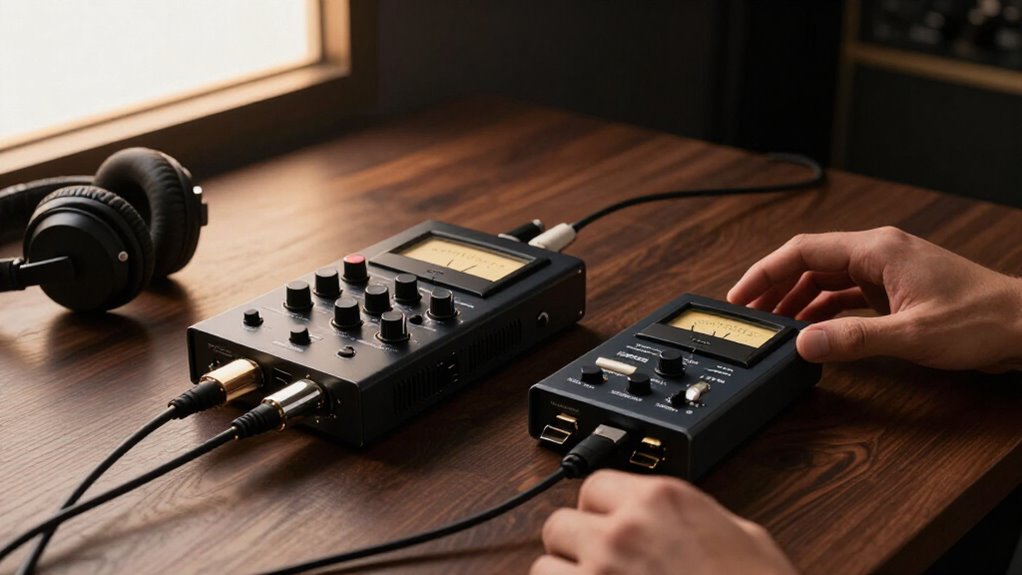
Choose a portable recorder for battery-powered, laptop-free WAV capture to SD for interviews, rehearsals, or field work.
It adds a transfer step, so choose an audio interface when you want multitrack recording in your DAW and low-latency monitoring.
On Windows, install the manufacturer’s ASIO driver and confirm mic inputs.
Either option needs enough preamps and switchable 48V for condensers.
Preamp design, not SD versus USB, largely sets noise; details below help you choose with confidence.
Battery-Powered Recording Capability
Portable recorders run independently on AA or built-in rechargeable batteries, so you can capture WAV or AIFF files directly to SD or microSD without bringing a laptop.
You can work for hours away from mains power, but verify the specified runtime under your actual load. Phantom power, multiple active preamps, and high headphone volume drain batteries faster.
Choose a recorder with enough input channels and onboard preamps for every microphone. Its phantom power lets you operate condenser mics without separate power-hungry equipment.
| Check | Why it matters | Your action |
|---|---|---|
| Battery type | Determines replacement options | Pack compatible spares |
| Runtime estimate | Changes with phantom power | Test your microphone load |
| Headphone level | Increases current draw | Monitor efficiently |
Carry charged cells; test a full session before first field work.
SD Card Recording vs USB
SD-card recording saves WAV files directly to the recorder’s SD or SDXC card, so you can capture a session without a laptop or DAW. This standalone workflow suits location interviews, rehearsals, and field work: arm tracks, set levels, record, then transfer the WAV files to your DAW afterward. It adds a copy-and-import step, but it keeps the recorder independent of computer power, software, and connection issues.
With USB, you route the recorder or audio interface into your laptop and capture audio in real time in software such as Studio One. You can monitor and adjust levels from the DAW immediately, which streamlines studio sessions and software-based routing. Many Zoom-style recorders support both modes. Choose SD for mobility; choose USB for tight direct DAW integration.
Preamp Noise and Audio Quality
Preamp quality, not whether you record to an SD card or over USB, usually determines the noise floor you hear. Both devices contain mic preamps, and their design, gain range, and impedance behavior matter more than file destination.
- Choose a cleaner preamp when high gain produces audible hiss.
- Set gain conservatively; excessive analog gain magnifies preamp noise.
- Record at 24-bit/48 kHz for editing headroom, but don’t expect it to remove analog noise.
- Use a dynamic USB mic, such as an MV7, to capture less room noise in untreated spaces.
- Use direct monitoring to judge levels without delay; it won’t alter fidelity, but helps prevent peaks and unnecessary gain.
If your interface sounds noisy, a recorder with a better mic and headphone stage may improve SNR.
Before you set levels, choose where the recording will live: a portable recorder writes files to an SD or microSD card, while an audio interface sends each input directly to tracks in your laptop DAW. On a recorder, format the card, select XLR or line input, switch on +48 V phantom power for condensers, and choose mono or multitrack mode.
Set gain, limiter, and high-pass filter, then you’ll make a headphone-checked test take. With an interface, connect USB, open Studio One, create audio track per source, assign each track’s input, and set 24-bit/48 kHz. Enable direct monitoring when available, adjust gain, and test for clean levels.
Afterwards, transfer card files into your DAW or begin editing because interface inputs are captured as separate tracks.
Windows ASIO Driver Requirements
On Windows, an audio interface usually needs its manufacturer’s ASIO driver for reliable low-latency monitoring and full multichannel access in your DAW. Install the vendor-specific package before you open Audio Settings; otherwise, Windows may expose only MME/WASAPI, increasing latency or hiding separate input channels.
- Download the current driver for your exact interface model and Windows version.
- Select that ASIO device in your DAW’s audio settings, not the default.
- Set 48 kHz first, then lower buffers until playback remains stable.
- Confirm each microphone appears as an individual input before recording.
- Remember a standalone recorder bypasses Windows drivers, so computer configuration can’t affect capture.
If monitoring crackles or channels disappear, update the driver, reconnect the interface, and restart your DAW before troubleshooting hardware further.
AA Battery Replacement Costs
Unlike an interface powered from your computer or mains supply, a portable recorder adds an ongoing AA battery cost to each session. Alkaline cells may last from a few hours to a day, depending on the recorder’s draw, so frequent sessions can erase its lower purchase price. Check how many AAs it requires and its stated runtime, then calculate sets per month from your recording schedule.
Rechargeable 2,000 to 2,500 mAh NiMH cells sharply lower recurring costs; keep charged spares and rotate matched cells. For extended location work, use compatible external DC or battery-pack power when available. Don’t wait for cells to fail: declining voltage can reduce headphone level and destabilize gain or monitoring, risking quieter takes. Budget cells and a charger; retire weak rechargeables.
File Transfer Workflow Delays
A portable recorder adds a handoff step: after tracking, you must copy its SD or microSD files to your computer, then import them into Studio One before editing or mixing. That delay matters when deadlines are tight, especially with separate multitrack WAV files. You can’t begin post-processing until transfer, import, and compatibility checks finish. Card-reader speed and available computer storage can also determine when work resumes.
- Label recorder files clearly at capture.
- Verify sample rate and bit depth before import.
- Budget time for copying every track.
- Keep cards until you confirm backups.
- Use an interface to record channels directly into named DAW tracks.
With a USB interface, Studio One writes each channel in real time. You can monitor, organize takes, and edit immediately, reducing turnaround.
Portability and I/O Trade-Offs
For mobile sessions, you can record directly to SD storage with a portable unit and avoid relying on a laptop. You’ll trade some expansion for that convenience, so count the mic inputs, headphone feeds, and whether each input records to its own track.
If you need DAW routing or future I/O growth, choose an interface, or a recorder that exposes separate USB channels.
Portability for Mobile Recording
When you need to capture audio away from a desk, a portable recorder lets you run on batteries, record directly to SD or microSD, and leave the laptop behind. You’ll capture WAV files independently, avoiding computer power, startup, and handling risks at the location.
- Choose a recorder with reliable battery life and sufficient card capacity for your planned sample rate and duration.
- Format and test cards beforehand; keep a spare card and charged batteries accessible.
- Enable multitrack SD recording when you need isolated files for later DAW editing.
- Expect to offload and back up recordings before editing; that transfer replaces real-time DAW capture.
- Use USB interface mode only if your recorder supports it; its preamps, routing, and channel count still define the session’s limits.
I/O Needs and Expansion
I/O requirements often decide whether a portable recorder or an audio interface fits your workflow: recorders commonly provide 2 to 8 built-in mic inputs and capture directly to SD storage, while interfaces route inputs into a laptop DAW and may offer fewer mic preamps at the same price.
Choose a multitrack recorder when you need isolated DAW channels: a PodTrak P4 saves separate SDXC files alongside a stereo mix, unlike units that deliver only a combined file. Interfaces can add line, Hi-Z, and phantom-powered sources, and you can upgrade models or use multi-interface workflows. Compact recorders rarely gain XLR channels; adapters mainly add phone guests. You’ll transfer SD files before editing, so weigh that step against laptop-based expansion when your input count grows beyond the chassis.
Condenser Mic Phantom Power
If you use a condenser mic, confirm that your recorder or interface supplies +48V phantom power on its XLR input. You can enable it per channel, sending DC bias through the same XLR cable while setting proper gain without an external supply.
Check the recorder’s battery impact and the interface’s available power before choosing your setup.
Understanding Phantom Power
Phantom power is a DC supply, usually 48V, that an audio interface or portable recorder sends through an XLR cable to run a condenser microphone’s internal electronics. Condenser capsules generally need this voltage, while dynamic mics usually don’t. Find the +48V control for each XLR input and enable it only for compatible microphones. With power active, the mic’s electronics boost its output before the preamp and ADC convert it to digital.
- Check +48V when a condenser is quiet or silent.
- Leave it off for dynamics.
- Avoid it with ribbon mics unless approved.
- Use balanced XLR connections.
- Enable power before setting gain, then monitor the input meter.
If your recorder lacks +48V on that input, your condenser won’t deliver a usable signal. Choose another powered input instead.
Portable Recorder Power Options
Most portable recorders provide switchable +48V phantom power on each XLR mic input, so you can power one or more condenser microphones directly without an external supply.
Connect the XLR cable before enabling it, and lower monitoring first to reduce transients and speaker pops. Check the input menu: you can usually enable phantom power independently per channel, using a condenser on one input and a dynamic mic on another.
Since condensers capture more handling noise, air movement, and room rumble, engage a low-cut filter where appropriate. Use limiting for unexpected peaks, but set conservative preamp gain first.
If your recorder lacks +48V or supplies insufficient power, choose a dynamic microphone or gear rated for your condenser model. Verify its specification before each recording session.
Audio Interface Power Supply
Unlike a portable recorder, an audio interface draws power from USB or its external adapter and typically provides switchable +48V phantom power on its XLR mic inputs. You’ll use it when your condenser needs power for its internal electronics; without it, you may hear little or no signal. You can then monitor and record through the interface normally.
- Enable +48V only on the input connected to your condenser microphone before recording.
- Leave it off for dynamic microphones, although balanced XLR dynamics generally tolerate it safely.
- Use per-input switching to combine a condenser vocal mic and dynamic podcast mic.
- Connect the microphone normally; phantom power travels through the XLR signal lines.
- If levels remain weak, verify the switch, cable, and mic requirements before adjusting gain.
Choose for Your Guest Count
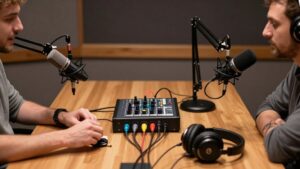
Match the recorder or interface to the maximum number of people you’ll mic at once, not just your usual solo setup. For two people, a compact all-in-one mixer/recorder such as the RodeCaster Duo is usually simplest; an interface also works if your computer can monitor and record every microphone to its own DAW channel.
For two to four people, use a portable recorder with enough mic inputs. The Zoom PodTrak P4, for example, provides four inputs and writes isolated tracks to an SDXC card, so you don’t depend on a laptop onsite.
At four or more, standalone multitrack units are generally more practical, avoiding USB and DAW limits. If remote guests matter, select Bluetooth or wired-phone input support; capture them on an additional channel.
Conclusion
Choose a portable recorder when you need battery power, SD-card backup, fast setup, and easy location recording. Choose an audio interface when you record at a computer, need lower-noise preamps, stable ASIO performance, and more flexible monitoring.
Match inputs to your guest count, confirm phantom power for condenser microphones, and factor in transfer time before you buy gear. You’ll get better results when your workflow, power source, and I/O needs determine the device, not convenience alone.