How to Set Up a Podcast With Two Hosts: Mics, Mixer and Headphone Routing
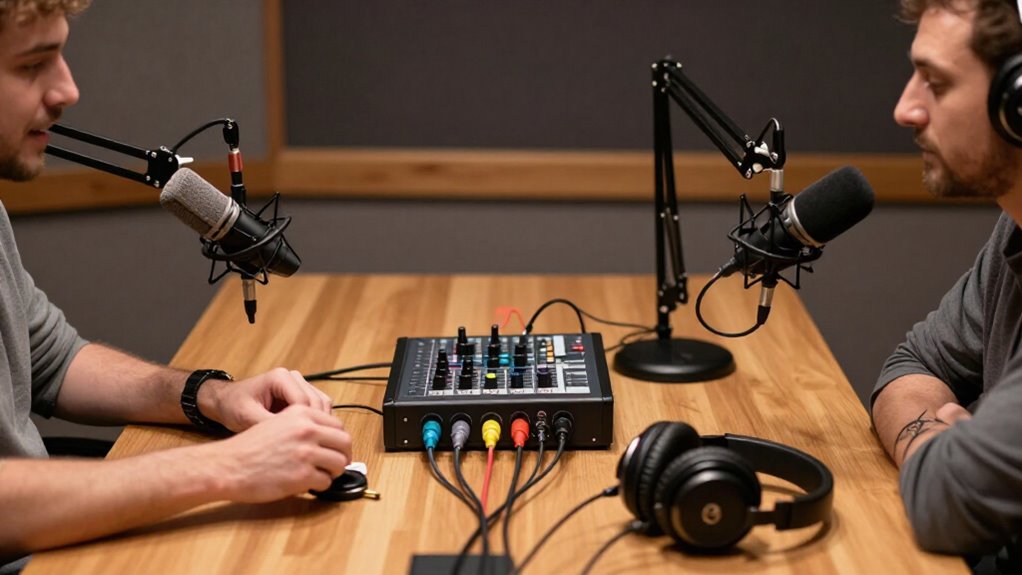
Connect each host’s microphone to a separate labeled XLR input on a two-channel interface or mixer, then assign each input to its own mono track.
Place cardioid mics 6 to 8 inches away, slightly off-axis, and set speech peaks near -12 to -6 dBFS.
Feed both mics to closed-back headphones, using independent volume controls.
Run a 30-second dialogue test to confirm routing, separation, and plosive control.
Next, you’ll see how to troubleshoot and maintain the setup properly.
Two-Track Setup: Easy, 30m
A two-track setup gives each host an independent recording, making level fixes and edits far easier. Connect each microphone to a separate input on a two-channel interface or mixer, then connect that device to one computer by USB. In your recording software, create two mono tracks and assign one interface input to each track.
Set gain for each microphone independently, leaving headroom. Point cardioid microphones at each host and angle their rear nulls toward the other speaker. Use closed-back headphones to reduce bleed. Send both signals to both hosts’ headphones; if it has one headphone jack, add a splitter with separate volume controls.
Before recording, run a 30-second level check and make a test recording. Verify both tracks record, monitor, and play back correctly.
Label Each XLR Cable
Label every XLR cable at both ends with its assigned channel and host, such as “CH1, Host A” and “CH2, Host B.” Match each label to the interface or mixer’s exact input number: Input 1 for Host A, Input 2 for Host B, so tracks don’t get swapped during editing.
- Use durable tape labels or heat-shrink markers. Place them near each connector, where you can read them after setup or teardown.
- Keep the naming scheme identical on cable ends, mixer inputs, and recording software. This creates a direct path from host to track and simplifies troubleshooting.
- Record a 30 to 60 second test. Have each host speak, then verify that the correct meter responds. Bundle spares with matching host labels, so duplicate XLR cables don’t get mixed up.
Step 1: Position Hosts 6–8 Inches Away
Position each host’s microphone 6 to 8 inches (15 to 20 cm) from their mouth, angled slightly off-axis toward the voice rather than directly at the grille. This placement delivers a consistent vocal signal while limiting room bleed. The off-axis angle softens P and B plosives without making voices sound distant.
If you use cardioid dynamic microphones, keep both hosts in this range to improve isolation; moving farther away captures more reflections and other speaker. Condenser microphones work at 6 to 8 inches, but they pick up more room sound, so check for cross-talk. Once everyone is seated naturally, record a 30 to 60 second level test. Set gain from normal conversation and louder phrases. Sitting too close can create level spikes; sitting too far back requires gain, which raises background noise.
Step 2: Set Independent Headphone Levels
With both microphones placed and gain-tested, give each host independent headphone volume control so they can monitor comfortably without changing how they speak into the mic. If your mixer or interface provides only one headphone jack, connect a headphone amplifier; a Behringer HA4700 powers up to eight sets. Use closed-back headphones while setting levels to stop monitor audio bleeding into the microphones.
Feed both headphone channels the same monitor mix used for recording, then let each host adjust only their output level. Use similar comfortable volumes to encourage comparable mic technique and reduce later correction. Record a brief test conversation. Listen in real time, adjust each headphone volume, and repeat the check. Confirm neither host strains to hear or speaks forcefully from quiet monitoring.
Step 3: Assign Separate Mic Inputs
Connect each host’s microphone to its own XLR input, such as Input 1 for Host A and Input 2 for Host B, rather than sharing a mic or using a splitter. This assignment gives you a dedicated preamp and gain control for every voice.
Configure your recording software to capture Input 1 and Input 2 as separate mono tracks, not a stereo file. You can adjust one host’s level, mute a cough, or reduce noise without changing the other host’s audio. Set each input’s preamp independently, keeping speech below clipping. Confirm that your mixer or interface sends multitrack audio over USB. A stereo-only USB mix won’t preserve isolated channels and limits edits. Avoid splitters and shared mics; they cause crosstalk, hiss, or missing channels.
Step 4: Record 30 Seconds of Dialogue
Record a 30-second conversation with both hosts speaking at their normal episode volume into their assigned microphones. Use inputs you configured, and ask each host to talk. Both hosts should wear closed-back headphones so you can confirm each person hears the mix clearly in both ears.
Watch the interface or recording-software meters. Set gain so louder speech peaks around -12 to -6 dBFS, leaving headroom below 0 dBFS. Adjust each channel’s gain during this test, not after recording the episode; correct levels reduce editing work. Listen for a headphone level, bleed, or a track that sounds too hot or quiet. If anything is off, correct it and repeat the test.
Start the episode only when both tracks sound clean, consistent, and are comfortably monitored.
Step 5: Check for Plosive Pops
Check for plosive pops before starting the episode by recording a short test with each host speaking words containing “p,” “b,” and “t” sounds. Keep each microphone six to eight inches (15 to 20 cm) from the speaker’s mouth, then listen for low-frequency bursts and adjust distance as needed. Fit a pop filter or foam windscreen in front of every microphone to reduce airflow without altering vocal character.
Angle each mic slightly off-axis so breath strikes the side of its diaphragm rather than directly. Watch mixer or interface meters during the test and leave several decibels of headroom below 0 dBFS. If spikes persist, reposition the mic and repeat the same 30-second level check instead of relying on heavy EQ later. Placement often fixes them faster.
Step 6: Coil Cables With Velcro Ties
Once mic placement and levels sound right, coil each excess cable length into a loose loop and secure it with Velcro cable ties. This keeps mic and headphone runs manageable instead of leaving them dangling near foot traffic or power strips.
Place Velcro ties at several points along the bundle, roughly every one to two feet, rather than cinching one tight wrap around the entire coil. Fasten each tie snugly, but don’t compress the cable jacket or create sharp kinks; repeated pressure can damage internal conductors.
Leave a small service loop near each plug, positioning the nearest tie one tie-width away from the connector. Keep the Velcro-facing side on the outside of each loop. You’ll avoid snags and can unpack, reroute, and repack the cables.
Verify Both Waveforms Stay Separate
Before you begin the episode, assign each microphone to its own mono track in your DAW: Input 1 to Host 1’s track and Input 2 to Host 2’s track. Use a two-channel interface, not a summed stereo mix. Arm both tracks and make a test clap; each meter and waveform should move independently.
Record 30 seconds while both hosts speak, then inspect results. Host 1’s peaks should appear on Track 1 and Host 2’s on Track 2, with minimal bleed. If your DAW offers stereo recording, confirm it captures Channel 1 and Channel 2 separately, not a combined mix. Don’t split one stereo file later. For a routing check, mute one input and speak into the other; activity must stay on its assigned track.
Troubleshoot One-Sided Headphone Audio
Start by confirming that each host’s headphones plug into the correct headphone outputs, such as CH/Phones L+R or dedicated headphone jacks. Check mixer or interface routing: don’t mute, swap, or isolate left/right channels. In software, send both inputs to the monitor mix. Center the headphone balance control and verify output levels.
| Test | Result |
|---|---|
| Center balance | Restores both ears |
| Swap channels | Identifies routing |
| Change jack/headphones | Exposes hardware |
| Check TRS | Avoids mismatch |
Test splitter or adapter by moving each headset to another jack, then connect a known-good pair to the suspect output. A TRRS/TRS mismatch can silence one ear. Finally, swap Input 1 and Input 2 temporarily. If the fault follows the channel, correct routing; if it remains at one output, replace or service the hardware.
Wipe Microphone Grilles Weekly
After you confirm clean headphone routing, maintain both microphones by wiping their grilles weekly with a dry, lint-free microfiber cloth. This removes dust and skin oils that can dull high frequencies. If residue remains, lightly dampen the cloth with 70% isopropyl alcohol and gently wipe the grille.
Don’t soak the microphone; moisture can enter the capsule. For stubborn buildup, use a soft, anti-static brush first, then wipe. Avoid compressed air; it can push debris deeper into the mic.
Inspect the mesh afterward for stuck particles, and repeat the brush-and-wipe process until it looks uniformly clean. Keep each microphone covered with a foam windscreen or mic cap when not in use, reducing cleaning frequency and helping keep performance consistent between your two hosts’ recording sessions.
Conclusion
With two dedicated mic inputs and independent headphone feeds, you’ll capture clean, controllable audio for both hosts.
Label and secure every XLR cable, keep microphones 6 to 8 inches from each speaker, and confirm separate waveforms before recording. Set headphone levels individually so neither host strains to hear. If one side drops out, check the headphone adapter, routing, and channel assignment. After each session, coil cables neatly and clean mic grilles weekly.