How to Set Up a Bedroom Studio That Sounds Good and Still Feels Like a Bedroom
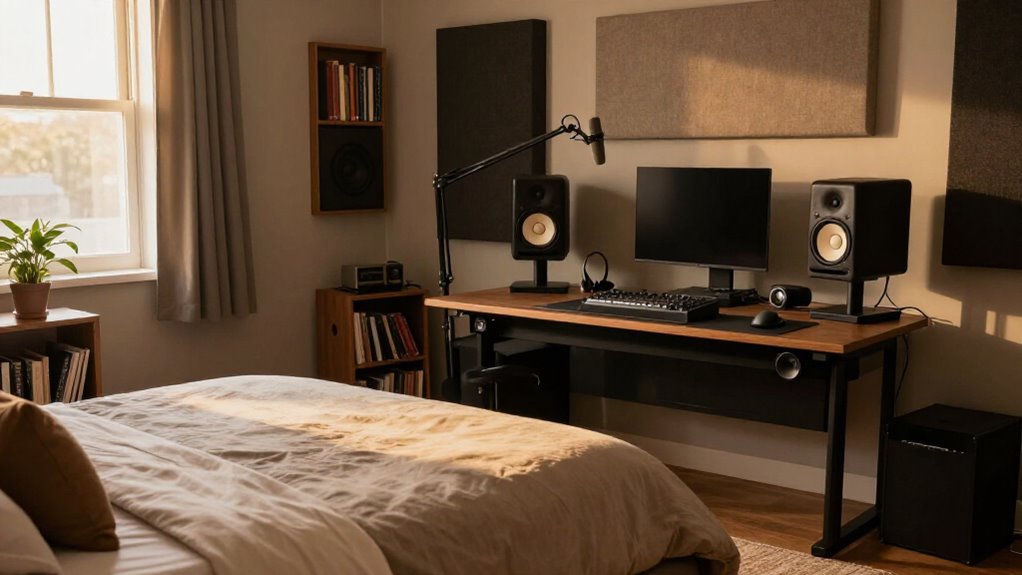
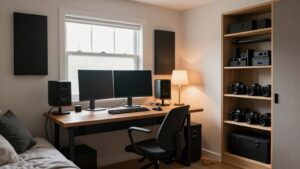
Start by centering your desk on the short wall, with monitors firing down the room and 8 to 12 inches of clearance behind them.
Put tweeters at ear height, match wall spacing, and treat sidewall and ceiling mirror points with broadband panels.
Add thick corner bass traps and curtains over windows, while leaving the far end moderately live.
Measure nighttime noise, reroute hum-prone power cables, label connections, and check mixes on earbuds.
Further checks reveal major gains.
Balanced Sound, Bedroom Comfort
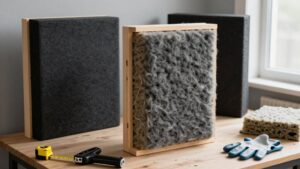
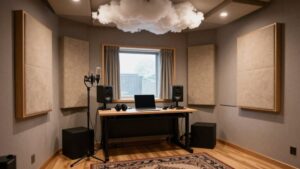
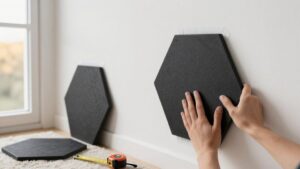
A good bedroom studio balances control with comfort: treat the early reflection points around your speakers or recording position with broadband absorbers such as mineral wool, Rockwool, or melamine foam. Place these panels at sidewall and ceiling mirror points, and use a live-end/dead-end layout: keep the speaker or microphone end controlled, while leaving the distant end moderately reflective. This reduces flutter echo and high-frequency harshness without making the room feel sealed off.
Don’t expect carpets and curtains to do the same job; they mainly absorb treble. Use properly sized broadband panels to control a wider range and avoid an overly muffled decay. Frame panels neatly or place thick absorbers behind furniture so you retain a livable bedroom while reducing boom and dull recordings effectively.
Measure Nighttime Noise Floor
Before treating or repositioning anything, measure the room’s nighttime noise floor under real working conditions. Set your mic and interface gain to a tracking level, then record 30 to 60 seconds of silence in your DAW.
- Test during your session window, such as 10pm to 1am; HVAC, refrigerators, and traffic vary over minutes.
- Note dBFS readings: typical peaks might sit near -55 dBFS and rarely exceed -45 dBFS.
- Record a separate no-signal pass while reseating or powering down gear to identify steady 50/60 Hz hum and harmonics.
- Repeat on different nights and after weather changes; exterior sound can shift several dB, increasing required de-noise.
Keep these baselines; they reveal whether acoustic changes help recordings and whether residual noise will survive editing or processing.
Step 1: Clear Space Behind Monitors
Leave 20 to 30 cm (8 to 12 in) of clear air behind each monitor instead of pushing the cabinets hard against the front wall. This gap reduces the strength and timing of early wall reflections, helping limit boundary interference, comb filtering, and the boomy low-mid buildup that can make mixes translate poorly.
Keep both speakers the same distance from that wall, centered across the usable room width, and equally spaced from the side walls. Symmetry prevents one channel’s reflection pattern from pulling the stereo image off center.
Set the speaker centers at ear height, with tweeters aimed on axis at your listening position. Vertical misalignment can change the reflection path and introduce another audible cancellation. If tight, use mineral-wool panels directly behind monitors, not foam or curtains.
Step 2: Place Bass Traps in Corners
With monitor placement set, treat the room’s corners with thick broadband bass traps, where low-frequency pressure builds most strongly at wall-to-wall and wall-to-ceiling boundaries. Choose mineral-wool, rockwool, or melamine-based units with substantial depth; thin acoustic foam doesn’t absorb enough energy to control very low frequencies.
Start with the front-left and front-right corners around your monitoring position, particularly if that end serves as the room’s dead end. Then add traps to rear corners and available ceiling-wall boundaries. Treating multiple corner pairs matters because room modes create uneven bass peaks rather than one single buildup. Keep the installation targeted, not excessive. Properly sized broadband traps shorten low-frequency decay and reduce boom without making your bedroom sound muffled or visually turning it into a dead control room.
Step 3: Hang Thick Curtains Over Windows
Hang thick, heavy curtains over each window to soften the strong early reflections that glass sends back into a small bedroom studio. Choose multi-layer curtains or lined drapes; they provide more broadband absorption than thin sheers and reduce flutter, comb-filtering, and brittle highs.
Mount the rod close to the ceiling, and extend fabric several inches beyond both sides of the frame. This overlap limits edge leakage around the glass. Use firm hardware, weighted hems, and minimal gaps behind the fabric.
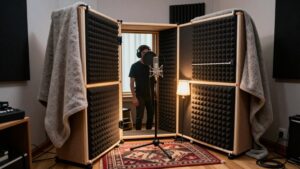
Close the curtains completely whenever you track vocals or other close-miked sources; a partly open treatment still reflects enough high-frequency energy to sound boxy. Place this treatment on window walls near or behind the microphone, but don’t treat it as a substitute for mineral-fiber panels.
Step 4: Center Desk on Shortest Wall
Center your desk on the room’s shortest wall so your monitors fire down the longer dimension and maintain equal geometry to the left and right side walls. Place tweeters at ear height and aim them at your listening position, keeping each speaker equally distant from its adjacent side wall. Start with a 38 to 60 inch (1 to 1.5 m) monitor-to-listener distance, then refine placement with measurements and familiar mixes. Leave clearance behind the monitors; don’t press them against the front wall; tight placement reinforces bass buildup and complicates modal control.
You’ll also create matching first-reflection zones on both side walls, where broadband Rockwool or Basotect panels work more predictably than thin foam.
If recording vocals there, treat the wall behind your mic with more absorbent material nearby.
Step 5: Sweep for Rattling Objects
Before you record, perform a rattle sweep to catch sympathetic vibrations that treatment and EQ can’t solve. Gently tap likely offenders: desk, bed frame, wardrobe doors, shelves, and picture frames.
Then play 30 to 60 seconds of bass-heavy pink noise or a low sine sweep while standing at the microphone position. Listen especially for buzzes between 100 and 400 Hz, where furniture resonance often appears.
Check loose items on stands, including monitor grilles and headphone amps, and secure anything that vibrates. Record a silence test at your normal gain. If periodic buzzes or door ticks remain, turn room items on and off, retesting each time.
While the sweep plays, lightly touch furniture in sequence; the noise’s disappearance identifies the source. Tighten screws or add felt pads.
Step 6: Label Every Cable Connection
Once the room is free of rattles, label both ends of every cable so you can restore the same quiet, correct signal path without trial and error. Use a label maker for tags: “Mic → Preamp IN” and “Preamp OUT → Interface CH1,” for example. Color-code XLR mic lines, TS/TRS instrument or DI lines, and monitor outputs. This prevents routing errors that create gain mismatches, hum, or noise in your monitoring chain. Tag each power brick and PSU lead, such as “Interface PSU” or “Monitor PSU”; swapped supplies can damage gear. Keep a patch map listing labels, gear, and port numbers. Include headphone splits, USB hubs, DI or reamp boxes, and adapters, with exact routes: “Interface USB → USB Audio → Phones OUT.”
Compare Mixes on Earbuds
Use earbuds as a translation check, not your primary mixing reference: set your phone or player to the same volume each time, disable volume normalization, and A/B quickly against your main headphones.
At that fixed level, audition a familiar sub-bass track. If its kick or 808 thins out, inspect 100 to 300 Hz and compression; excess control can erase transient definition. Test stereo by hard-panning a lead synth: earbuds often smear width, revealing unstable mid/side decisions. Judge vocal translation from consonants and sibilants between 2 to 8 kHz.
Harsh or veiled “S” sounds call for presence, air, or de-essing moves. Finally, repeat the check on a different earbud pair. Seal, insertion depth, and occlusion shift bass and midrange by several decibels, so agreement across pairs matters more than one fit.
Monitor Hum: Reroute Power Cables
If a low 50/60 Hz buzz remains after your earbud checks, treat cable layout as part of the signal path. Hum stems from ground loops or transformer coupling. Put your interface and monitors on one AC strip or circuit to keep grounding consistent.
| Check | Action | Benefit |
|---|---|---|
| Monitor power | Route separately | Less coupling |
| USB/Thunderbolt | Add clearance | Quieter signal |
| Suspect device | Switch off | Find source |
| Successful layout | Keep it | Stable monitoring |
Keep monitor power leads a few inches from mic, interface, and computer USB/Thunderbolt cables; distance reduces induction. Never bundle AC and audio runs. Turn off displays, chargers, drives, and power bricks one at a time, then reroute the offender. If the buzz stops, preserve that geometry; don’t use EQ or hum filters to conceal it.
Vacuum Monitor Ports
“Vacuum monitor ports” aren’t a room-treatment method; the term usually refers to a speaker’s bass-reflex port or a nearby sealed cavity. If your monitors have front ports, leave at least 20 to 30 cm (8 to 12 inches) of clear space before any wall, desk edge, or corner. Boundaries reinforce low frequencies, which can exaggerate bass and blur mix decisions.
Don’t cut vents into your desk or furniture to control the room. Ports alter the speaker’s low-frequency tuning; bass traps and broadband absorbers address room modes. To diagnose a port issue, measure response or record the same low notes with the port open and temporarily blocked. Blocking typically reduces extension and shifts tuning. Hollow shelving or sealed voids near monitors can resonate, so isolate contact points and stop rattles.
Conclusion
You don’t need to turn your bedroom into a control room to make reliable mixes. Start with the nighttime noise floor, then protect monitor placement, corner absorption, and window treatment. Keep wiring organized, separate signal and power paths, and check ports for dust.
Test every mix on your monitors and earbuds. By controlling reflections, bass buildup, hum, and practical workflow issues, you’ll create a room that translates accurately while remaining comfortable enough to sleep in.