How to Use Drum Pads on a MIDI Keyboard to Program Beats in Your DAW
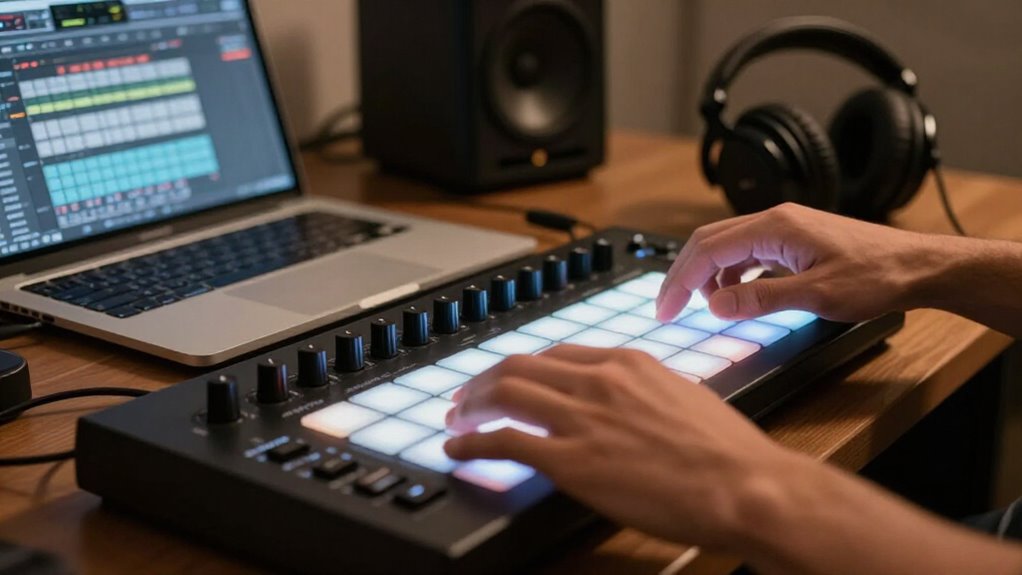
Connect your MIDI keyboard by USB, enable it as a MIDI input in your DAW, and load a TR-909 drum kit.
Confirm each pad triggers the intended kick, snare, and hi-hat sound. Set 120 BPM, record a four-bar groove, then quantize key hits lightly while preserving feel.
Save the project as “First Beat,” and lower levels if you hear clipping.
If pads stay silent, check MIDI settings; the steps below cover mapping, timing, and care.
Beginner Four-Bar Beat: 15 Minutes
Start by setting your DAW to about 90 BPM, creating a four-bar MIDI clip in 4/4, and loading a drum kit or rack. Assign pads to kick, snare, closed hi-hat, and open hi-hat, then audition each sound. Program the foundation: place kick hits on beats 1 and 3, snare hits on 2 and 4, and closed hats on every eighth note.
Record the groove in real time using the pads. Don’t worry if the first pass isn’t tight. Quantize the MIDI to eighth notes, then vary hat and snare velocities slightly for movement. Loop all four bars and inspect the clip for missing or doubled hits. Use bar 4 for one restrained change, such as an open hat or extra kick, then check the pattern’s overall balance.
Connect Keyboard via USB
Before you can tap out that four-bar groove on pads, you need your keyboard talking to your DAW. Grab a USB cable and connect your keyboard to your computer—most models draw power and send MIDI data through that single connection. From there:
- Plug into the port labeled “To Host,” not a generic USB-A jack meant for flash drives
- Open your DAW’s MIDI or controller preferences and enable your keyboard as an input device
- Load a drum instrument or drum rack, then hit a key or pad to confirm sound triggers
- If nothing shows up, check your cable, install the manufacturer’s driver, and restart your DAW
Once your keyboard’s recognized and triggering sounds reliably, you’ve got a solid MIDI connection—ready for whatever drum sounds you load next.
Step 1: Load 909 Drum Kit
Load a TR-909-style drum kit on a MIDI or instrument track so your pads trigger the classic kick, snare, and hi-hat sounds. Create the track in your DAW, then insert a drum instrument or sampler containing a 909-style library. Open its preset browser, search for “909” or “TR-909,” and choose a kit; names and locations differ between applications.
Check the MIDI note map before playing: assign pads to kick, snare, closed hi-hat, and open hi-hat notes. If any pad triggers an incorrect sound, edit the instrument’s mapping or change the DAW’s MIDI note assignment. Finally, tap every pad and set sensible output levels. Presets often balance 909 drums differently, so verify that no sound is unexpectedly loud or too quiet before you record.
Step 2: Set Tempo to 120 BPM
With your 909 kit mapped and level-checked, set the DAW’s tempo to 120 BPM in the transport bar or tempo field. This tempo gives each quarter-note beat a duration of 0.5 seconds, establishing a steady, predictable pace for programming your pattern. If your grid’s set to 4/4 time, each bar runs exactly 2 seconds at this tempo, which makes it easy to count out phrases and align your hits visually on the timeline.
Before committing anything to the grid, enable the metronome and tap your drum pads along with the click. Listen for drift or hesitation in your timing. This quick check confirms the tempo feels natural under your fingers, so you’re not fighting the clock once you start locking in hits.
Step 3: Record Kick-Snare Backbeat
Create a one-bar MIDI loop in 4/4 and assign separate drum pads to your kick and snare samples. In your DAW, load a drum instrument or sampler, then confirm that each pad triggers the correct sound. Keep the project at 120 BPM and enable the metronome. As it clicks, count “1, 2, 3, 4” and record one pass: play kick hits on beats 1 and 3, then snare hits on beats 2 and 4. This placement establishes the standard backbeat across the four quarter-note beats.
After recording, open the MIDI editor and inspect timing. If any notes fall ahead of or behind the beat, quantize them to quarter notes. Finally, adjust note velocities so the kick stays solid and the snare remains balanced and natural.
Step 4: Layer Hi-Hats on Off-Beats
Set the MIDI grid to eighth notes, then program closed hi-hat hits on the off-beats: the “and” after each count in “1 and 2 and 3 and 4 and.” Use a hi-hat pad or enter notes in the piano roll, keeping the hat on its own drum-rack pad or MIDI note apart from the kick and snare.
Begin with a steady eight-hit pattern across each 4/4 bar: place a closed-hat note at every eighth-note position. Listen against your recorded kick-snare backbeat, and mute selected off-beat hats for a more open, lighter rhythm. Change pad velocity as you play: make a few off-beats slightly stronger and leave others softer. These controlled dynamics keep the repeated hi-hat part from sounding mechanical while preserving a rhythmic layer.
Step 5: Quantize Hits for Tightness
Once you’ve recorded your hi-hat, kick, and snare pattern, select the drum MIDI notes and apply your DAW’s quantize function to snap their start times to the beat grid. For most pop or electronic patterns, begin with a 1/16-note quantize value; use 1/8 notes when rhythm is simpler. Don’t automatically set strength to 100 percent. Instead, use roughly 70–90 percent, which moves late or early hits closer to the grid without erasing your playing’s feel.
Correct only notes that need it, particularly kick and snare hits. Leave deliberately offbeat hi-hats and other groove details unquantized. If the result sounds overly rigid, audition your DAW’s swing or groove options after quantizing. Apply subtle amounts, compare timing until the beat stays tight but still moves naturally.
Step 6: Save Project as “First Beat”
With your hits quantized and grooved to taste, lock in your progress before you lose it. Open File > Save As in your DAW; in Ableton Live, choose File > Save Live Set As. Type First Beat as the project name and retain your DAW’s default project-file extension. Select an easy-to-locate destination, such as your dedicated Music Projects folder, then confirm the save.
When the DAW asks whether to create a project folder, accept the option. This keeps the session file, recorded MIDI, audio, samples, and other related assets organized in one location. As you edit the arrangement, save incremental changes regularly with Ctrl+S on Windows or Command+S on macOS. Consistent saving protects the programmed beat and makes reopening, copying, or backing up the project straightforward later.
Listen for Clipping or Latency
Play the beat back at its loudest section and listen for clipping, which sounds like harsh distortion or crackling on hard drum hits. Lower the drum track, instrument, or master output level until the distortion disappears.
Then test timing. Compare each pad tap with its immediate playback, and record a pattern to confirm that hits land where you played them. If the sound arrives late, reduce the audio buffer size in your DAW or audio driver settings. Smaller buffers lower monitoring latency, but they can overload your computer and create clicks or dropouts. If that happens, raise the buffer and test again.
When notes are consistently late, use your DAW’s recording or MIDI timing-compensation controls. Don’t shift every note by hand; correct system timing first.
Silent Pads: Enable MIDI
Connect your MIDI keyboard or pad controller to your computer via USB or a MIDI cable, then select it as an input device in your DAW’s MIDI or audio settings. Create a MIDI or instrument track, load a drum plugin or rack, and arm the track. Enable input monitoring so pad notes reach the instrument.
| Check | Action |
|---|---|
| No sound | Select track; enable correct input channel. |
| Notes received | Match pad note numbers to drum mapping. |
Use DAW MIDI activity indicator or record a test pattern to verify incoming notes. If the indicator flashes but you hear nothing, the drum instrument’s note mapping doesn’t match your pads. Choose the correct input port and channel, rearm the track, and test each pad. MIDI data needs an instrument.
Clean Pads With Microfiber Cloth
Turn off or disconnect your MIDI keyboard before cleaning so you don’t trigger notes or controls. Use a clean, dry microfiber cloth to gently wipe each drum pad, lifting fingerprints, dust, and light grime without affecting the playing surface. Work across the pad faces with light pressure, then inspect edges and controls for debris.
For stubborn marks, slightly dampen the microfiber cloth with water, wring it thoroughly, and wipe only the affected area. Never spray water or any cleaner directly onto the pads. Keep moisture away from pad seams, edges, and nearby buttons, where it can enter the hardware. If any dampness remains, buff the surface with a second dry microfiber cloth. Avoid paper towels, abrasive fabrics, solvents, or harsh cleaners; they damage pads.
Conclusion
With your keyboard connected, MIDI enabled, and a 909 kit loaded, you can program a solid four-bar beat in minutes. Keep the tempo at 120 BPM, record a kick-snare backbeat, and save the project as “First Beat.” Play it back and check for clipping or latency before adding more parts. If pads don’t respond, verify MIDI routing. Wipe pads with a microfiber cloth to maintain reliable triggering and keep your workflow moving during future sessions.