Pop Filter vs Windscreen: Which One Stops Plosives Better?
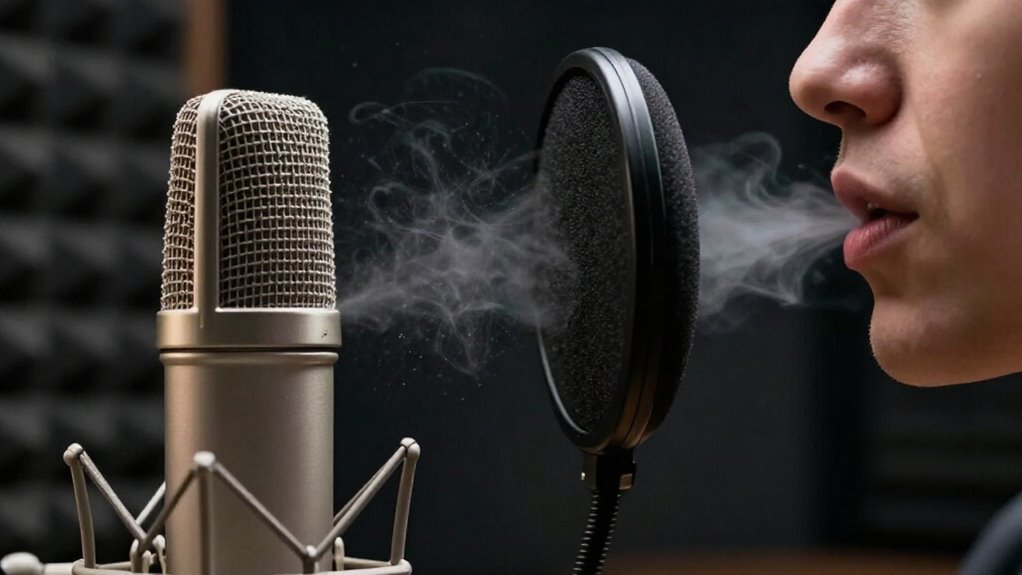
For indoor vocals, you’ll usually stop plosives better with a stand-mounted nylon or metal pop filter than with a quarter-inch foam windscreen, especially at a six-inch speaking distance.
Place the screen 2–4 inches from the capsule and speak across the mic at about 45 degrees. Choose foam outdoors, where its 360-degree coverage handles wind and shifting airflow. Avoid stacking both, since combined high-frequency attenuation can dull detail.
The setup details below clarify the trade-offs clearly.
Nylon Mesh vs Foam Density
Nylon pop filters and foam windscreens control plosives through different mechanisms: a two-layer nylon mesh diffuses bursts from “P” and “B” sounds before they reach the microphone, while foam resists airflow directly over the capsule. You’ll hear nylon preserve frequency response relatively well because its layered mesh disperses transient air energy without covering the diaphragm. Foam’s ¼ to ½-inch thickness resists wind, yet strong plosives can penetrate ¼-inch material.
| Type | Airflow control | Treble effect |
|---|---|---|
| Two-layer nylon | Diffuses bursts | Minimal loss |
| ¼-inch foam | Limited against strong plosives | Slight reduction |
| Dense foam | Higher resistance | More 8 to 10 kHz loss |
Choose nylon when you prioritize vocal detail. Choose denser foam when wind resistance matters more, recognizing that added density increasingly attenuates high frequencies. Your tradeoff is direct: resistance versus spectral transparency.
Screen Placement and Airflow Deflection
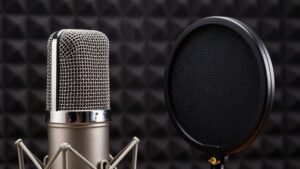
Material choice sets the airflow resistance, but screen placement determines where that energy disperses before it reaches the capsule. Place a stand-mounted pop filter between your mouth and the microphone capsule, starting about 2 to 4 inches (5 to 10 cm) from the capsule. This gap lets the screen intercept the pressure pulse and gives the displaced air room to spread rather than strike the diaphragm as a concentrated jet. A nylon screen diffuses hard P and B bursts through one or more transparent fabric layers.
Metal mesh redirects airflow downward, whereas a foam windscreen encloses the capsule for 360-degree coverage. Further reduce direct loading: speak across the microphone at roughly a 45-degree angle, so the airflow doesn’t travel directly toward the capsule during each plosive consonant event.
Six-Inch Plosive Test Results
At a six-inch speaking distance, a stand-mounted pop filter generally controls P- and B-sound plosives more effectively than a foam windscreen because it intercepts and disperses the forward air burst before it reaches the capsule. Qualitatively, you’ll hear less low-frequency blast energy with either a two-layer nylon or metal-mesh filter. Nylon slows and diffuses the burst; metal mesh redirects its path and may provide a slight additional advantage.
A quarter-inch foam cover supplies moderate attenuation, yet forceful consonants can still drive air through it. If airflow arrives from several directions, foam’s full-capsule coverage becomes more useful, but it doesn’t match a pop filter’s direct-path control for close, frontal speech. These results remain comparative rather than numerical.
Clamp-On Setup vs Slip-On
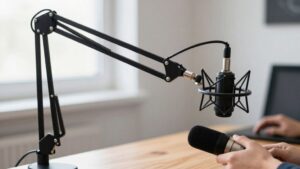
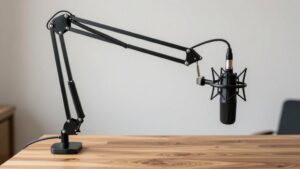
A clamp-on pop filter mounts to a stand or boom arm on a flexible gooseneck, letting you place its screen directly in the airflow path without adding mass or contact to the microphone. Start it 2–4 inches from the capsule, then adjust the distance and angle to match your voice and setup. A foam windscreen takes the opposite approach: it slips directly over the capsule, so you need a snug but not overly tight fit for your specific microphone.
The tradeoff comes down to footprint versus flexibility. Foam covers are compact, fast to swap, and travel-friendly. Clamp-on filters take up more space but work across microphones of different sizes and brands. Skip improvised fabric shields attached directly to the mic body—contact transfers vibration into the capsule and degrades your recording.
USB Microphone Clearance Requirements
USB microphones add their own set of clearance considerations on top of standard pop filter placement. Position a stand-mounted screen about 2 to 4 inches (5 to 10 cm) from the capsule. Keep it between your mouth and the microphone, but don’t let it touch the housing; contact can transmit vibrations.
Verify that the clamp and gooseneck fit your stand or boom arm without blocking controls, ports, or the USB cable. A foam windscreen mounts directly over the capsule, so match its diameter to the microphone and seat it snugly, not excessively tight. Preserve enough working distance to place yourself roughly 2 to 6 inches (5 to 15 cm) from the microphone while the filter remains correctly positioned. This geometry maintains access, avoids mechanical coupling, and leaves a vocal path through the screen.
Foam Washing, Replacement Costs
Foam windscreens collect saliva and dust over time, so remove and wash them periodically to maintain hygiene and airflow. Let the foam dry completely before reinstalling it on the microphone; retained moisture can affect fit and handling.
Inspect the cover during cleaning. Replace it when you find tears, crumbling, deformation, or a loose fit, because compromised foam provides less consistent screening and may slip during use. Match replacement diameter to your microphone so the cover seats snugly without stretching.
Budget for approximately $5 to $60 or more for a foam cover, depending on the microphone model and replacement design. By comparison, a $10 to $100 pop filter mounts to a stand, so you can use one across multiple microphones, potentially lowering per-microphone accessory costs in a multi-mic setup over the time.
Humidity-Induced Foam Degradation
Humidity can shorten a foam windscreen’s service life even when the cover appears clean. Open-cell foam readily absorbs moisture from humid air, and repeated dampness weakens its cellular structure over time. As the material breaks down, it loses density and resilience, so it fits less securely over the capsule and delivers less reliable plosive and wind protection.
You’ll want to let foam covers dry completely after each use, particularly after outdoor sessions or extended contact with breath moisture. Don’t store damp foam in sealed containers or humid environments; trapped moisture accelerates deterioration and promotes microbial growth. Inspect your foam regularly, and replace it once it turns crumbly, stays permanently compressed, or tears, since these conditions compromise coverage and signal that the material can no longer attenuate airflow effectively.
Camera Framing and Visibility
In an on-camera setup, you’ll usually keep a lower profile with a snug, correctly sized foam windscreen. A stand-mounted pop filter can enter the frame, so you must verify its placement while maintaining clear sightlines. Its independent arm adjustment helps you position it outside the shot, but its larger screen remains harder to conceal.
On-Camera Profile
Since you’re on camera, what your audience sees matters as much as what they hear. A foam windscreen creates the lowest-profile option because it fits directly over the microphone capsule or grille. Its compact form keeps the accessory visually integrated with the mic, rather than adding a separate object to the setup. This makes foam a practical choice when you want an unobtrusive presentation for video podcasts and streams.
Maintaining Clear Sightlines
Clear camera framing depends on both accessory size and placement. Foam windscreens stay compact and low-profile, so they rarely block your face or obstruct the shot.
Stand-mounted pop filters take up more space, but you can position them 2 to 4 inches from the mic, keeping the screen between your mouth and the capsule without crossing your main sightline. For streaming or video podcasts, you’ll often prefer foam when you need an unobstructed view and minimal visible gear. If you want plosive control with a smaller footprint, a clip-on windscreen gives you a hybrid of foam and pop-filter protection. You can also angle your mic slightly off-axis and speak across it at roughly 45 degrees, this reduces plosives while keeping your face clear on camera.
Outdoor Interviews vs Studio Vocals
For outdoor interviews, you’ll need a snug foam windscreen because it provides 360-degree protection against wind that a pop filter can’t block. For studio vocals, use a stand-mounted pop filter 2–4 inches from the mic to control P and B plosives while retaining high-frequency detail. Match the barrier to the environment, and angle the mic about 45 degrees when plosive control needs further improvement.
Outdoor Wind Challenges
Outdoor recording introduces turbulent airflow from multiple directions, so a foam windscreen generally protects an interview microphone more effectively than a studio pop filter. Its 360-degree coverage attenuates pressure fluctuations before they reach the capsule, including gusts that shift around the microphone. A pop filter primarily intercepts the speaker’s forward airflow, so it offers limited protection when crosswinds or rearward eddies develop.
You can further reduce plosive energy by positioning the speaker about 45 degrees off-axis from the microphone. Foam also moderates close-range consonant bursts, although thin material may pass strong plosives and slightly soften high-frequency detail. For unpredictable outdoor conditions, prioritize thorough wind control over the narrower protection a pop filter provides. Keep foam coverage intact, since exposed capsule areas admit turbulent airflow.
Studio Vocal Clarity
Once you’re working in a controlled studio environment, a stand-mounted pop filter typically controls P and B plosives better than foam does, while preserving detail above 8–10 kHz. Its mesh disperses the fast air jet before it reaches the diaphragm, limiting low-frequency overload without materially dulling consonant articulation.
- Position the filter between your mouth and capsule.
- Start with 2–4 inches of spacing from the microphone.
- Speak slightly off-axis to reduce direct air bursts.
Foam offers moderate attenuation, but forceful plosives can still pass through its pores. It may also soften content above roughly 8–10 kHz, which can reduce perceived vocal openness. In an indoor recording chain, the pop filter thus isolates the plosive problem while leaving more of the microphone’s audible upper-band detail intact.
Choosing The Right Barrier
Choose the barrier based on the dominant problem: a stand-mounted pop filter suits studio vocals, while a snug foam windscreen suits outdoor interviews. In a controlled booth, you’re fighting hard P and B plosives, so mount the pop filter 2 to 4 inches from the capsule; it preserves high-frequency detail and swaps easily between microphones since it attaches to the stand, not the mic.
Outdoors, wind becomes your dominant variable. A snug foam windscreen gives you 360-degree coverage, cutting wind noise far better than a pop filter can, though it only moderately tames strong plosives. It’s compact, too, shielding the capsule from bumps and dust during handheld interviews.
Don’t stack them for “extra” protection: combining both compounds attenuation above 8 to 10 kHz, dulling your recording’s clarity.
Podcasters: Choose a Pop Filter
Why risk distorted plosives when recording solo indoors? When you’re capturing solo podcast audio, a pop filter intercepts bursts of air from “P” and “B” sounds more effectively than a foam windscreen, protecting your diaphragm from distortion or clipping. Position it between your mouth and the capsule, starting 2 to 4 inches away, then mount it on a stand or boom arm rather than the mic itself—this keeps it versatile across mic sizes and minimizes vibration transfer.
Consider your filter’s construction:
- Nylon mesh: diffuses airflow evenly, preserving high-frequency detail
- Metal mesh: redirects airflow while maintaining clarity
- Foam alternative: blocks more treble, dulling your voice
For solo recording, you need precision, not guesswork. Choose a pop filter, position it correctly, and you’ll eliminate plosive distortion before it ever reaches your capsule.
Conclusion
For close-miked studio speech, you’ll usually get stronger plosive control from a properly spaced nylon pop filter than from a foam windscreen. Position the screen about two to three inches from the capsule, preserve USB-mic clearance, and test your own six-inch speaking distance. Choose foam when you need a slip-on solution, cleaner camera framing, or outdoor wind reduction. Replace degraded foam after humidity exposure. For podcasting, clamp-on filters deliver consistent airflow deflection and vocal transparency.