Rack Unit Size Chart: 1U, 2U and 3U Dimensions for Studio Gear
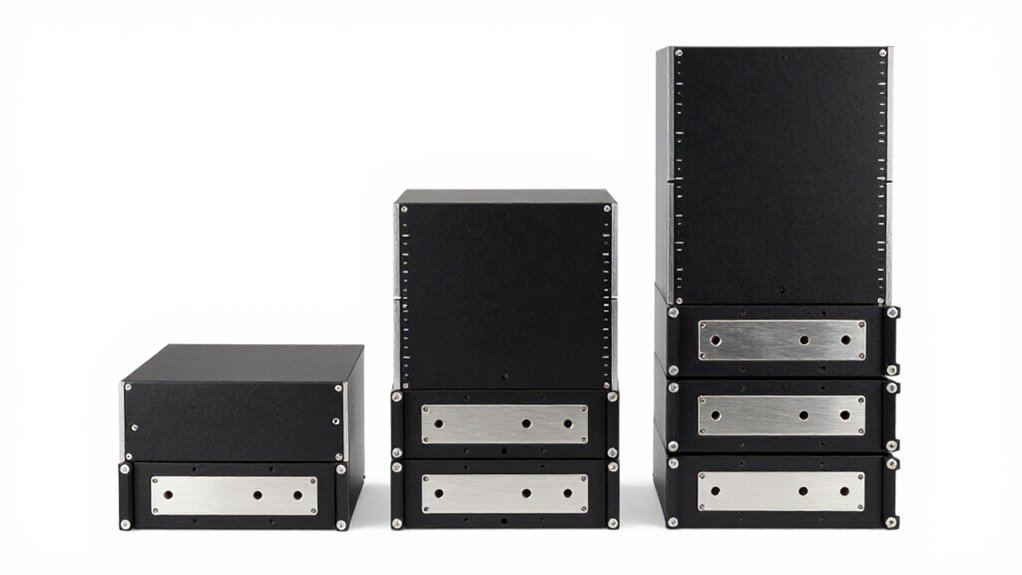
Use the EIA-310 rack-unit standard to plan studio gear: 1U equals 1.75 inches (44.45 mm), 2U equals 3.50 inches (88.90 mm), and 3U equals 5.25 inches (133.35 mm) of nominal panel height. You should allow for the slightly shorter panel clearance and any required 1U ventilation gap.
A 19-inch rack designation defines rail spacing, not chassis width or depth. Next, verify ears, hole groups, fasteners, and rear-support needs to guarantee a compliant installation every time.
19-Inch Rack Width Standard
A 19-inch rack uses a standardized frame width, not a 19-inch equipment faceplate. You should treat 19 inches as the rack format that governs compatible chassis and mounting hardware. The two vertical mounting rails sit 18 5/16 inches (465.14 mm) apart, measured center to center. Equipment front panels span the format sufficiently to attach to these rails, but their usable chassis widths can vary.
When selecting studio gear, confirm the mounting pattern as well as the nominal rack designation. Rails may provide tapped 10-32, 12-24, or M6 holes, while square-hole rails require cage nuts matched to the screw size. You can install two half-width devices, typically 9.5 inches wide, side by side with suitable mounting hardware. This distinction prevents fitment errors when planning equipment layouts.
1U–3U Height Conversion Chart
Rack compatibility also depends on vertical height, measured in rack units (U). You’ll use these nominal increments to confirm that your studio gear occupies the intended cabinet space. One U equals 1.75 inches, or 44.45 mm; multiply any U value by 1.75 to obtain its nominal height in inches.
| Rack height | Nominal dimension |
|---|---|
| 1U | 1.75 in / 44.45 mm |
| 2U | 3.50 in / 88.90 mm |
| 3U | 5.25 in / 133.35 mm |
| Any U value | U × 1.75 in |
For panel-height measurements, don’t use the nominal figure alone. Apply the standard clearance: panel height in inches = (1.75 × U) − 0.031. This allowance prevents interference between adjacent mounting spaces and lets you specify equipment height accurately during installation and compliance checks in professional rack systems with confidence.
Rack Ears vs. Chassis Width
Although a 19-inch rack defines the frame width, the mounting rails sit 18 5⁄16 inches (465.14 mm) center to center. Rack ears are side flanges that secure your equipment to those rails. Their hole pattern follows the rack standard, whereas the chassis may be narrower than the nominal 19-inch frame. Don’t judge compatibility by U height alone: carefully verify both ear placement and the enclosure’s outside width before installation.
A half-width device is 9.5 inches wide, allowing two compatible units to occupy a position side by side. However, chassis widths vary. For example, an IT appliance may measure 8.4 inches wide because it is designed to fit within a 19-inch chassis. Confirm that a unit’s ears align with the rail holes and adjacent equipment has lateral clearance.
Common Rack Depth Ranges
Rack depth runs from the front mounting rail to the cabinet back, with 12-inch shallow desktop racks and 15-inch standard studio racks as common options. You should select a deeper rack for equipment requiring 15 inches or more, based on your deepest chassis and the usable internal depth.
Allow rear cable clearance, and specify a custom-depth rack when standard dimensions don’t fit.
Shallow Desktop Rack Depths
Depth determines whether a desktop rack can physically accommodate your gear: common studio models provide 12 or 15 inches from the front rail to the rear. These shallow enclosures suit compact processors, interfaces, patchbays, and similar equipment, but they don’t automatically fit every rackmount device.
Measure your deepest unit, including any fixed rear hardware, before selecting a rack. Then reserve clearance for power plugs, audio connectors, data cables, and bend radius; the chassis depth alone isn’t the installed depth. Rack depth is independent of rack-unit height: 1U, 2U, and 3U specify vertical panel space, not front-to-back capacity. If a 12-inch or 15-inch chassis won’t provide the required clearance, specify a custom-depth rack. This prevents interference and lets you route and service cables without strain.
Standard Studio Rack Depths
Two common studio rack depths are 12 and 15 inches, typically measured from the front mounting rail to the cabinet’s rear interior. These dimensions suit processors, interfaces, patchbays, and power units, but depth isn’t standardized across rack models. Verify usable interior depth rather than published external cabinet depth, because rails, rear panels, and hardware reduce clearance.
Before buying, compare your deepest component’s stated chassis depth with the rack’s usable measurement. Allow room for connectors and cable bend radius, especially when rear connections project beyond the chassis. If standard 12- or 15-inch depths don’t fit, specify a custom-depth rack. Choose a slanted rack for better display and control access; choose a straight rack when you need efficient use of floor area in smaller control studios.
Deep Equipment Rack Depths
When your equipment chassis reaches 15 inches deep or more, select a deeper rack than the common 12- or 15-inch studio formats. Deep racks accommodate long power amplifiers, computer servers, storage units, and other chassis that exceed typical studio proportions.
Before you order, identify the deepest installed device in its published specifications; a 1U, 2U, or 3U designation states vertical mounting height only and doesn’t indicate chassis depth. Specify a rack depth that supports the equipment body and its rear I/O, including XLR, TRS, IEC, network, or other connector types. You must also reserve space for cable bend radius and strain relief, especially with rigid power or data cables. If available standard enclosures don’t meet your required depth, order a custom-depth rack as needed.
Measuring Usable Cabinet Depth
Measure usable cabinet depth from the front mounting rail to the rear rail or the cabinet’s rear interior, then compare that dimension with your deepest planned device. This rail-to-rear measurement, rather than the cabinet’s outside depth, establishes the usable mounting envelope. Studio cabinets commonly provide 12 or 15 inches of usable depth.
A 12-inch model suits many shallow processors, patchbays, and utility units, while deeper signal processors, power amplifiers, or computer-based hardware may require 15 inches or more. Don’t infer depth from a device’s 1U, 2U, or 3U height: rack units specify vertical panel space only. Review each manufacturer’s dimensional drawing and confirm the chassis depth before purchase. If your equipment exceeds standard cabinet capacity, specify a custom-depth rack with rails positioned to match installation.
Allowing Rear Cable Clearance
Rack depth runs from the front mounting rail to the cabinet’s rear, but the equipment chassis must not consume that entire dimension. Common studio racks provide 12- or 15-inch depths, measured along this rail-to-rear axis. Before you select a cabinet, measure your deepest device from its front mounting surface to the outermost rear connector. Include power plugs, audio connectors, network terminations, and cable bend radius.
A chassis that fits within a 12-inch rack may still require a 15-inch or deeper enclosure once you install and route cables without strain. Maintain sufficient rear clearance to prevent compressed plugs and restricted cable paths. If standard 12- or 15-inch depths don’t meet your measured requirement, specify a custom-depth rack that preserves serviceable routing and connector access space.
Plan 1U Ventilation Gaps
Plan a 1U ventilation gap, 1.75 inches (44.45 mm), between heat-intensive devices if their installation requirements call for additional airflow. Treat this open position as occupied rack capacity when you calculate enclosure height. For example, placing two 2U processors with one 1U ventilation gap requires 5U total, not 4U. Review each manufacturer’s installation documentation and thermal guidance before assigning the space. Some devices need a full 1U separation, while others rely on specified front-to-rear airflow, side clearance, or no additional gap.
You can install a blank panel over unused rack positions to preserve a clean front surface while retaining the planned gap. Verify that the panel and rack airflow arrangement don’t obstruct required intake or exhaust paths. Record gap in your rack elevation and total-U calculation.
Heavy Amplifiers Need Rear Support
Because heavy amplifiers can overload front mounting rails, support their rear chassis with manufacturer-approved brackets or a rack shelf rated for the unit’s weight. Before installation, verify the rack’s documented load capacity and confirm that every bracket, shelf, fastener, and rail component meets or exceeds the amplifier’s installed weight. In a four-post rack, position rear supports at the chassis’s designated attachment points or along compatible support rails.
Align both sides squarely, then tighten all specified fasteners to the manufacturer’s torque requirements. Don’t rely on front panel screws alone for structural support. Maintain clearance around intake and exhaust paths, power connectors, signal cables, and strain-relief bends. After mounting, inspect for level seating, secure engagement, and unobstructed airflow. Recheck hardware after transport or service before operation again.
Mounting a 2U Compressor
Unlike a heavy power amplifier, a 2U compressor typically mounts directly to the front rails, but you should still verify the manufacturer’s installation requirements. A 2U chassis occupies 3.5 inches (88.9 mm) of rack height, although its panel can be slightly shorter for clearance. Confirm that the unit fits a standard 19-inch rack and that its specified mounting width matches your enclosure.
Align both mounting ears with the rail holes, then support the compressor while you install compatible fasteners on each side. Select screws specified for your rail system, such as 10-32, 12-24, or M6, or use appropriate cage nuts in square-hole rails. Tighten screws evenly without overtightening or stressing the ears. Maintain manufacturer-recommended ventilation clearance and account for that space in rack layout.
M6 Cage Nut Mismatches
M6 cage nuts work only with square-hole rack rails that accept M6 hardware; they won’t secure equipment on rails threaded for 10-32 or 12-24 screws.
Before you buy hardware, verify the rail specification, not the rack-unit size. Standardized rack-unit heights don’t determine mounting threads. An M6 screw in a 10-32 or 12-24 threaded rail won’t engage correctly; forcing it can strip threads, deform fastener, and compromise reliable equipment retention.
- Use cage nuts only in square holes; install the selected metric fastener after engagement.
- Treat threaded 10-32 and 12-24 rails as incompatible with M6 screws and nuts entirely.
- Never cross-thread an M6 screw; remove it immediately if resistance appears before seating fully.
- Select replaceable cage nuts to change fastener types without replacing square-hole rails in service.
Confirm EIA-310 Hole Spacing
Confirm the EIA-310 pattern before mounting: each 1U section uses a three-hole group with adjacent hole centers 0.625 inches (15.875 mm) apart, while the uneven gap between groups produces the full 1.75-inch (44.45 mm) rack-unit height. Treat the larger gap as the boundary between units; don’t assume evenly spaced holes. Align your gear’s panel ears to complete U groups, not arbitrary openings.
- Confirm rail centers measure 18 5⁄16 inches (465.14 mm) apart, as specified for 19-inch EIA-310 racks.
- Verify whether your rails use 10-32, 12-24, or M6 threads; screws must match the installed threading.
- Fit cage nuts only into square holes, then select screws that match the cage-nut thread size.
- Align both ears to matching U groups; uneven placement can twist the panel during tightening badly.
Conclusion
Use the 19-inch EIA-310 standard as your baseline: rack width stays fixed, while 1U equals 1.75 inches of panel height. Select 2U or 3U equipment by measured faceplate height, not chassis width or depth. Verify rail hole spacing, cage-nut thread size, and rack depth before installation. Leave ventilation space where manufacturers require it, and add rear support for heavy amplifiers. You’ll prevent fitment errors, blocked airflow, and unsafe front-rail loading in your studio rack system.