How to Clean a Microphone Grille Safely Without Damaging the Capsule
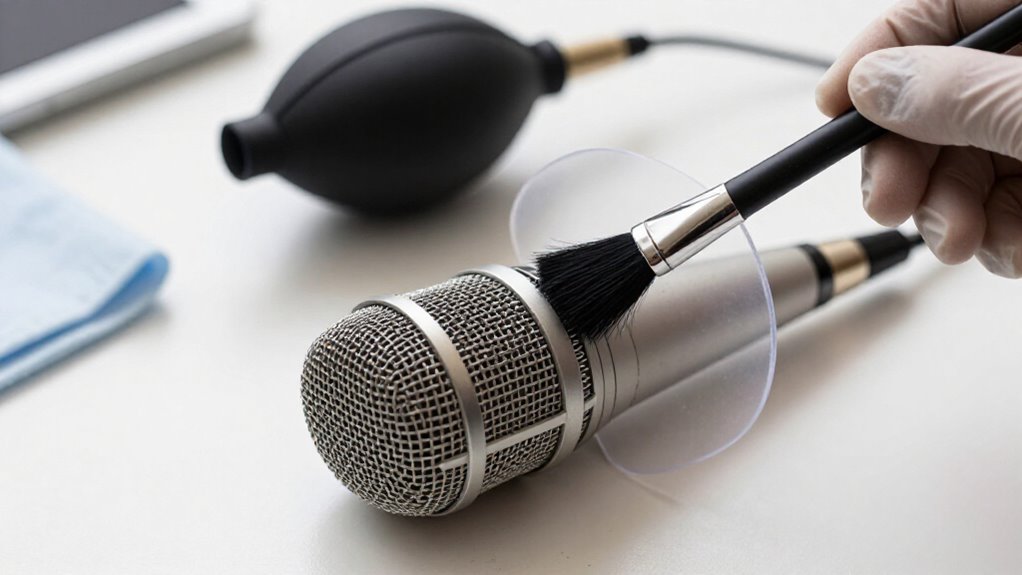
Power down the microphone, hold its body, and remove the grille using the manufacturer’s twist or release method; don’t touch the capsule. Inspect the grille and foam, then brush dry debris with a soft nylon brush. Wash only detached washable parts in warm water with mild dish soap, rinse thoroughly, and air-dry for 24 hours. Never spray alcohol into the grille, and stop if the capsule rattles. The steps below explain inspection, drying, and reassembly.
Remove Grille Without Capsule Contact
Before you clean anything, hold the microphone by its body and remove the grille using the model’s intended twist-off or spring-release method, keeping your fingers away from the capsule area. Keep every part dry during removal so moisture can’t travel toward the capsule assembly. Turn the grille only as designed. If it resists, gently wiggle it back and forth while stabilizing the body; don’t pull, pry, or apply sudden force near the exposed transducer.
Some microphones use concealed retention hardware, such as a spring clip beneath a label. Check the manufacturer’s instructions and release that mechanism correctly rather than probing around the capsule. After removal, lift out the foam windscreen carefully. Use needle-nose pliers only when necessary, grip the foam rather than internal components.
Required: Soft Nylon Brush
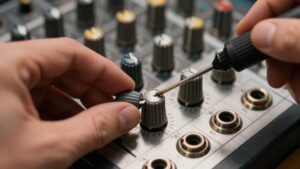
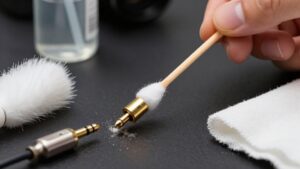
Use a soft nylon brush, such as a clean dedicated toothbrush or small nylon paintbrush, to loosen dried saliva and debris from the removed grille without scratching or deforming its mesh. Choose bristles that flex easily; stiff, metal, or abrasive tools can snag fine mesh and damage contact points.
- Hold the grille over a clean towel, keeping the microphone body and capsule well away from all moisture.
- Brush both sides with small, light strokes, following the mesh pattern; don’t press bristles into openings.
- Work around cloth or foam contact edges, lifting residue carefully instead of pulling, stretching, or tearing the windscreen.
- After washing the grille or foam, scrub remaining visible grime gently, then rinse the removable parts thoroughly.
Inspect mesh under light before reassembly.
Dry Grille for 24 Hours
After rinsing, set the grille on a clean, dry towel and allow it to air-dry for a full 24 hours, away from the microphone body and capsule. Keep it separate so trapped moisture can’t migrate toward the capsule. Don’t use a hair dryer, heater, or direct high heat; heat can distort mesh, coatings, or adhesive components.
Rotate the grille once during drying to expose all surfaces, but handle it by its rim to prevent deformation. Before reattaching, inspect the grille under good light and confirm its exterior, threads, seams, and interior are completely dry. If you cleaned the foam windscreen, dry it fully before reseating it.
| Check | Verify | Action |
|---|---|---|
| Grille | Inside and outside dry | Reattach only when dry |
| Foam | Completely dry | Reseat after inspection |
Mild-Soap Grille Wash
Remove the grille first to keep water away from the microphone capsule. Soak it for about 30 minutes in water mixed with a few drops of mild dish soap, then gently brush both sides of the mesh with a soft toothbrush. Rinse away all soap residue and let the grille dry completely on a towel before you reattach it.
Choose a Gentle Soap
Choose a mild dish soap for removable metal grilles and foam windscreens, mixing only a couple of drops into a small container of warm water. Use plain dish soap without oils, abrasives, fragrances, or conditioning additives. Keep the solution dilute; excess detergent leaves residue that traps dust and restricts airflow.
Apply it only to washable grille parts and removable foam, and keep the microphone body, connector, and capsule dry. Don’t use bleach, hydrogen peroxide, alcohol-heavy cleaners, or degreasers; they can corrode metal, weaken foam, damage finishes, or migrate toward internal components. Rinse each washed piece thoroughly in clean water until suds disappear.
Check mesh and seams for residue, then air-dry every part completely before reattaching it. Full drying prevents moisture from reaching the capsule.
Remove Grille First
Before washing, consult the microphone’s manual or manufacturer website to confirm how its grille detaches, as some grilles don’t unscrew. For a screw-on design, steady the microphone body with one hand and rotate the grille counterclockwise. If it resists, stop and use small, gentle back-and-forth movements; don’t force the threads or twist the body.
Some microphones use concealed spring clips rather than threads. On models such as the Shure SM57, inspect beneath the label and follow the specified release method before attempting removal. Once detached, keep the microphone body, connector, and capsule well away from water. Wash only the grille in water with a couple of drops of mild dish soap. Rinse it thoroughly to remove soap residue, avoiding bending the mesh during handling.
Mix a Dilute Solution
With the grille detached, fill a small container with clean water and add only a couple of drops of mild dish soap. Stir the mixture gently until the soap disperses evenly. You want a lightly soapy solution, not concentrated detergent that can cling to the mesh or foam.
Keep the ratio conservative; excess soap can leave deposits and make washing less controlled. Use this solution exclusively on the removed metal grille and, if it’s confirmed washable, the foam windscreen. Keep the microphone body, connector, internal electronics, and capsule completely dry and away from the container. Don’t substitute bleach, hydrogen peroxide, or other harsh cleaners, because they may damage finishes, degrade foam, or compromise microphone parts. Set the solution on a surface to prevent spills.
Rinse Away Soap Residue
Empty the soapy water, refill the container with clean water, and rinse the detached grille thoroughly inside and out until no soap residue remains. Hold only the removed grille over or in the rinse container. Keep the microphone body, capsule, and any attached electronics well away from water.
Agitate the grille gently, rotate it through several angles, and direct clean water through both mesh surfaces. Inspect the interior and exterior; lingering bubbles, slickness, or a detergent scent indicate additional rinsing is needed. Replace the rinse water if it becomes cloudy or foamy, because contaminated water can redeposit soap. Don’t use forceful spray pressure, which can deform fine mesh or drive residue into seams. Continue until water runs clear and the grille feels clean.
Dry Completely Before Reassembly
After the final rinse, place the grille and foam windscreen separately on a clean, lint-free towel in a dry, well-ventilated area. Let both parts air-dry without heat, direct sunlight, or forced airflow that could deform the foam. Overnight drying provides a safe margin, particularly in humid conditions.
Don’t reinstall either component while it feels cool, damp, or carries trapped moisture in seams or mesh; moisture can migrate to the capsule and cause corrosion, noise, or failure. Before reassembly, inspect the foam closely. Confirm it is fully dry, intact, and free of tears, crumbling, or distortion. Fit the foam inside the grille gently, keeping every edge clear of the grille threads. This prevents pinching, cross-threading, and an improper seal. Reattach grille after completing these checks.
Increase Cleaning After Outdoor Use
After outdoor use, inspect the grille and foam windscreen for dust, grit, moisture, and debris before storage. If you find heavy dirt or moisture, clean the removable parts promptly and keep all liquid away from the capsule. Let every component dry completely, then store the microphone in a clean, dry location.
Inspect For Outdoor Debris
Outdoor use exposes a microphone grille to dust, dirt, grass, moisture, and windblown particles, so inspect it before storage. Under good light, examine the mesh from several angles for embedded dust, soil, grass, pollen, and windblown fibers. Remove any foam windscreen and inspect both its inner surface and the grille’s underside for trapped particles, tears, crushed mesh, or loose fittings.
Increase this check after every outdoor performance, particularly when conditions are dusty, windy, or damp. Hold the microphone by its body and avoid pressing the mesh inward. If you find debris, consult the manufacturer’s instructions before removing the grille. Clean the detached grille and compatible foam components separately; keep the microphone body and capsule dry and untouched. Rinse thoroughly, then dry completely before reassembly.
Clean After Moisture Exposure
Moisture requires prompt attention because rain, condensation, and sweat can carry debris into the grille and threaten the capsule if left in place. After outdoor use, inspect the grille and removable foam windscreen for dampness, residue, or trapped particles. If moisture is present, remove the grille from the microphone body before cleaning. This separation prevents water from reaching the capsule.
Wash the grille and foam with mild soapy water, then rinse both parts thoroughly to remove soap and loosened debris. Place them on an absorbent surface and allow complete air-drying, overnight if necessary. Don’t use a hair dryer, heater, or high heat. Wipe the microphone body with a lightly damp cloth. Keep liquid away from openings, don’t spray the microphone, and never soak it.
Store Microphones Properly
Before storage, place your microphone in a clean, dry case or cabinet to keep dust, moisture, and debris away from the grille and capsule. Let the grille and foam windscreen dry completely before you reassemble or store them. Trapped moisture can promote mold and damage equipment.
After outdoor use, inspect both parts for dirt, condensation, and embedded debris. Clean them before storage, especially after exposure to sweat, rain, dust, or shared handling. Increase your cleaning frequency after outdoor sessions because contamination can reach the grille quickly. Never store a microphone while it is wet. Keep it away from damp areas, radiators, direct heat, and other high-temperature locations. Once every component is dry, return it to its case and close it securely to reduce contamination.
Clear, Odor-Free Vocals
Clean vocals start with a hygienic grille: remove it from the microphone body so water can’t reach the capsule, then inspect the foam windscreen for tears, crumbling, or odors that warrant replacement.
With the grille separated, soak it in warm water mixed with two drops of dish soap for about 30 minutes. Use an old toothbrush to brush the mesh gently, working across both the inside and outside without deforming it. Rinse thoroughly under clean water until no soap remains; this removes saliva and debris that can trap odors and reduce clarity.
Place the grille and foam on a towel, and let them dry completely, overnight if necessary. Reassemble only when both parts are dry. A foam windscreen helps maintain clean, odor-free vocals.
Stop if Capsule Rattles
If you hear or feel the capsule rattle when you gently move the microphone, stop immediately and don’t shake, tap, or further disassemble it. A rattle can indicate a loose internal component, and additional movement may worsen the fault. Set the microphone upright in a stable, dry location and pause the cleaning process.
Keep water and every cleaning solution away from the microphone body. Wash only a grille or foam windscreen that you’ve fully removed, then allow each part to dry completely. Don’t reinstall damp components, because moisture near a loose capsule can cause further damage.
Consult the microphone’s manual for model-specific guidance, or contact the manufacturer or a qualified audio technician. If the rattle remains, arrange an inspection. Don’t attempt capsule repair yourself.
Never Spray Alcohol Into Grille
Never spray alcohol directly into a microphone grille, because liquid can penetrate the mesh and reach the capsule or other internal components. Fluid can wick inward, causing corrosion or capsule failure. Follow these steps exactly.
- Power down and disconnect the microphone before cleaning.
- If the grille is removable, unscrew it and wash it separately in mild soapy water.
- Keep the body dry; don’t soak it or allow runoff to enter the opening.
- For exterior sanitizing, wipe surfaces with a cloth lightly dampened with 70% isopropyl alcohol.
Don’t reattach a washed grille until it has dried completely. Air-dry it in a clean location, then confirm no moisture remains in the threads or mesh. This controlled approach cleans exposed surfaces while preventing liquid from reaching internal electronics.
Inspect Foam Insert for Residue
With the grille removed and fully dry, carefully lift out its foam insert and inspect it for dried saliva, grime, or other residue. Set it on a clean towel; inspect both sides in good light. Look for tears, crumbling edges, or loose particles. Replace degraded foam.
If residue is present on sound foam, immerse it in mild soapy water and gently squeeze the solution through it. Don’t scrub, twist, pull, or stretch it; these actions can cause tears. Rinse repeatedly with clean water until no soap remains, then press it lightly between towels. Allow it to air-dry completely before reinstalling. Never return damp foam to the grille, since trapped moisture can threaten the capsule. Replace compromised foam to preserve protection against plosives and air gusts.
Conclusion
By removing the grille without touching the capsule, you protect the microphone’s most sensitive component. Brush loose debris with soft nylon, wash only the detached grille with mild soap, and let it dry for 24 hours. Don’t spray alcohol through the mesh. Inspect the foam insert, clean more often after outdoor use, and stop if you hear capsule rattle. This method keeps your vocals clear, odor-free, and safe without risking moisture or unnecessary mechanical damage.