How to Fix a Scratchy Volume Knob on Interfaces, Mixers and Amps
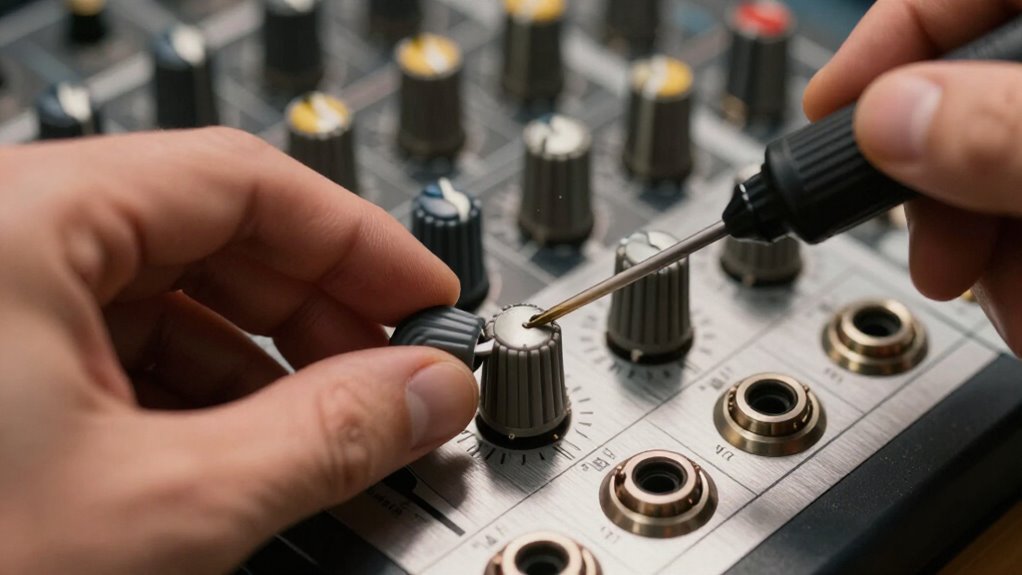
Unplug the interface, mixer, or amp, then access the potentiometer from the rear and photograph its wiring. Place the DeoxIT D5 straw just inside the service slot and give one spray.
With power disconnected, rotate the shaft through its full travel for one to two minutes, let it dry five minutes, then test at a safe level. If crackle remains after one repeat, replace the matched pot. Amp chassis work requires a qualified technician; next steps follow.
Easy Quiet-Control Fix: 10 Minutes
Start by powering off and unplugging your interface, mixer, or amp before touching the scratchy volume control. This quick procedure works best when contamination, rather than a worn component, causes the noise. Place the unit on a stable, well-lit surface, disconnect signal cables, and note each screw location before removing any cover.
Avoid forcing the knob or shaft; excessive side pressure can damage the potentiometer or its circuit-board joints. Inspect the control’s rear area for an accessible service opening and keep liquids away from switches, displays, and powered sections. After servicing the control, rotate it smoothly through its full travel for one or two minutes.
Reassemble the unit, reconnect it, and test at low volume. If crackling persists, repeat the service once. Continued noise suggests replacement; let a qualified shop inspect amps if you’re uncertain.
Use DeoxIT D5 Contact Cleaner
With the unit powered off and unplugged, use DeoxIT D5 to flush oxidation and residue from the potentiometer’s internal contacts. Place paper towels beneath the spray area to capture drips. For the most direct treatment, spray through the potentiometer’s rear opening; front-panel spraying can work, but it’s less precise and may waste cleaner.
- Aim the straw at the access opening.
- Deliver one quick, controlled spray, don’t soak the component.
- Rotate the knob back and forth for one to two minutes, distributing cleaner across the resistive track and wiper.
- Let excess cleaner drain, reconnect power, and test the control.
If crackling remains, power down and unplug the unit before repeating the process. Persistent noise after treatment indicates wear or damage, so have the potentiometer replaced.
Step 1: Unplug and Access the Potentiometer
Turn the unit off, unplug it from mains power, and locate the potentiometer before applying any cleaner. Remove external power sources and disconnect audio cables so you can work safely and avoid strain on connectors. Although spraying through the knob opening may seem convenient, it is less precise and may not reach the internal contacts effectively.
For direct access, open the appropriate panel or enclosure and reach the rear of the potentiometer. On a Telecaster-style guitar, remove the two control-cavity screws. Amplifier chassis work demands special caution: stored high voltages can be lethal even when unplugged. If you aren’t trained to service amplifiers, stop and take the unit to a qualified repair shop. Keep screws organized and don’t force panels or controls during access.
Step 2: Photograph the Potentiometer Wiring
Before you loosen or desolder anything, photograph the potentiometer wiring in clear, even light. Frame the entire component, including its terminals, wire colors, solder joints, and nearby connections. Make sure each wire’s original position is visible, not hidden by shadows or your hand.
Take close-up images from more than one angle when terminals overlap or wires cross. Check each photo for focus before proceeding. Keep the images accessible during reassembly and match every wire to its documented terminal.
For an amplifier, do this only after it’s safely unplugged. Don’t open or handle internal sections unless you understand the equipment’s voltage hazards and safe service procedures. A labeled backup copy can prevent costly mistakes if a lead shifts, breaks, or becomes difficult to identify later.
Step 3: Insert Straw Into Potentiometer Slot
After you’ve powered off and unplugged the equipment, locate the potentiometer’s small rear access slot and guide the cleaner’s straw into it without forcing it. The opening is on the back of the housing, rather than near shaft or terminals. Use a flashlight to confirm that you’ve identified a ventilation or service slot, not a wiring connection. Position the straw just inside the opening so it can direct DeoxIT D5 toward the internal contact area.
Don’t bend the straw sharply, probe deeply, or apply pressure that could damage the wiper assembly. If the unit is an amplifier, don’t open its chassis unless you understand safe procedures around hazardous stored voltages. When access is uncertain, stop and take the equipment to a qualified repair technician.
Step 4: Turn Shaft 30 Times
With the equipment powered on for testing, rotate the volume shaft smoothly from one stop to the other about 30 times. Keep your grip light and use only the control’s normal travel; don’t force it beyond either mechanical stop. This repeated movement can help dislodge loosened dirt or debris inside the potentiometer and may improve contact between its internal surfaces. As you work, listen through the connected speakers or headphones at a safe monitoring level.
Note whether crackling, static, or dropouts decrease as the shaft moves. Turning alone isn’t a guaranteed cure for every noisy pot. If scratchiness persists, switch off and unplug the unit before using suitable contact cleaner or arranging professional service for damaged or worn internal parts as needed.
Step 5: Wait Five Minutes Before Retesting
Let the DeoxIT D5 settle inside the potentiometer for about five minutes while the device remains powered off and unplugged. This pause gives the cleaner time to distribute across the internal resistive track and contact surfaces. Don’t reconnect the interface, mixer, or amplifier during this period, and don’t rotate the shaft further unless necessary.
After roughly five minutes, reconnect the equipment using its power and audio connections. Power it on, then turn the volume control through its full range while listening for crackling, dropouts, or uneven signal level. Keep monitoring at a volume to protect speakers and headphones. If scratchiness persists, shut the unit down, unplug it from mains power, and repeat the cleaning procedure. Never apply another treatment while the gear remains energized.
Step 6: Reinstall Knob Cap and Screws
Once the control operates smoothly, power the equipment off and disconnect it again before reassembly. Align the knob cap with the control shaft, noting any flat-sided or splined profile. Press the cap straight onto the shaft until it seats securely; don’t force it or strike the control.
If you opened a guitar control cavity, position the cover correctly and install its two screws. Refit every screw removed for access, turning each only until snug. Don’t overtighten fasteners, as excessive force can strip threads, crack plastic, or distort a cover.
Before restoring power, grip the knob gently and confirm that it remains firmly attached. Rotate it through its full travel to verify free movement and confirm the cap doesn’t rub against the panel or enclosure.
Monitor Headphones for Crackle
Why listen through monitor headphones during this check? Monitor headphones let you hear low-level crackle clearly while isolating the test from room noise and speakers. With the device connected normally, turn the volume knob slowly from end to end at a safe listening level. Note whether the noise occurs only during movement.
If it crackles, first rotate the knob back and forth several times; debris may shift, though this isn’t a reliable fix. If noise remains, power off and unplug the device before using DeoxIT D5. Apply a brief spray through the potentiometer’s rear access point, when safely accessible. Don’t open an amplifier unless you’re qualified; high voltages can remain hazardous. Then rotate the knob for a minute, reconnect, and retest through headphones. If persists, repeat once.
Persistent Scratch: Replace Potentiometer
If the scratch remains after a careful cleaning and retest, the potentiometer likely has worn internal contacts or a damaged resistive track and should be replaced rather than sprayed again. Disconnect power, record its value, taper, shaft, and mount before ordering an exact replacement. On an amplifier, don’t open the chassis unless you’re qualified; hazardous voltages can remain even when unplugged.
| Observation | Action |
|---|---|
| Crackle after cleaning | Replace the pot |
| Amplifier chassis | Use a qualified technician |
| New control installed | Test through your audio system |
Match terminal connections carefully, inspect solder joints, and reassemble the unit before powering it. Then send a stable signal through the connected system and rotate the knob slowly across its full range. You should hear smooth changes without crackle during testing.
Store Gear Below 60% Humidity
Keep interfaces, mixers, and amplifiers in a dry storage area below 60% relative humidity to reduce corrosion and contamination on controls and contacts.
Place a hygrometer near the equipment, rather than relying on room comfort, and check it regularly. If readings often exceed 60%, run a properly sized dehumidifier or move the gear to a drier location. Avoid basements, exterior walls, and other spaces prone to moisture.
When you bring equipment indoors from cold, humid conditions, leave it unplugged until it reaches room temperature and any condensation has evaporated. Powering it on while moisture remains can damage circuits, promote oxidation, and create electrical hazards. Keep cables, covers, and ventilation openings dry as well. This routine helps preserve smooth, reliable control operation safely over time.
Conclusion
You can usually stop a scratchy volume control in about 10 minutes by safely cleaning the potentiometer with DeoxIT D5. Disconnect power, document wiring, apply only a brief spray through the access slot, and rotate the shaft repeatedly before reassembly. Test with headphones at low volume and listen for remaining crackle. If noise persists, don’t force the control; replace the potentiometer. Keep interface, mixer, or amp stored below 60% relative humidity to limit future oxidation.