How to Mic a Drum Kit With Only a Few Microphones
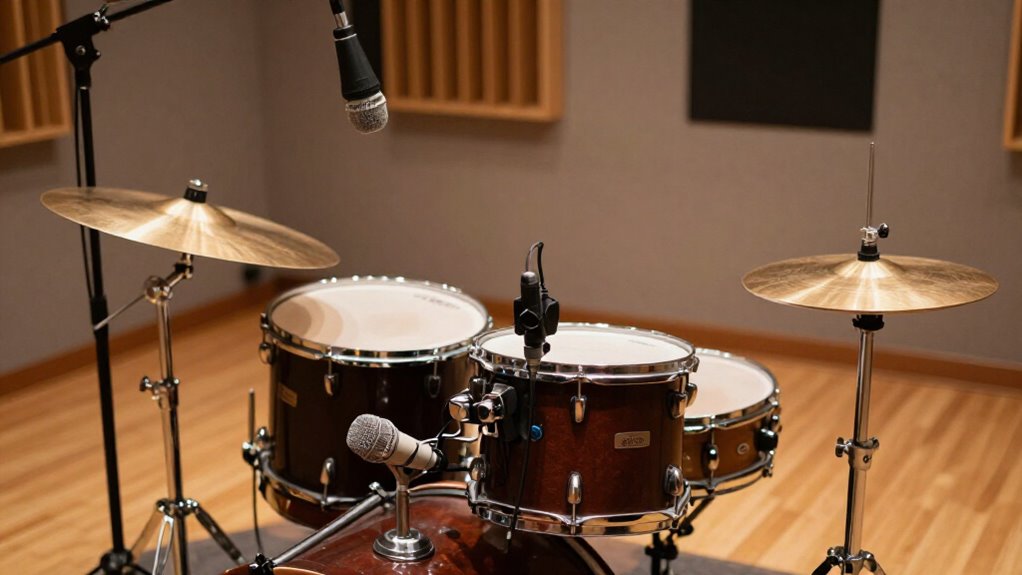
Start with a tuned, rattle-free kit and two matched cardioids.
Place one mic above the snare, aimed down, at slightly over two stick lengths high.
Put the other over your right shoulder, aimed at the kick beater.
Measure both capsules equally from snare and kick, then hard-pan them and check mono for a centered, punchy image.
Keep stands and taped cables clear of pedals, and document the geometry for repeatable sessions.
Further details refine results.
Quick Two-Mic Kit Setup
For a fast, balanced stereo picture, start with the Recorderman approach: place one cardioid mic above the snare, aimed downward, at roughly a little more than two drumstick lengths above the head, then position the second cardioid over the drummer’s right shoulder and aim it toward the kick-beater impact point.
Measure from each capsule to the snare and kick centers; make both distances identical. Hard-pan the pair left/right, or begin with a 50/50 spread, and confirm that the snare remains centered. Check in mono before recording; reposition either mic until kick and snare retain punch.
Need extra weight? Put a reinforcement mic in a room corner that captures low end, low-pass it near 100 Hz, and blend it subtly only beneath the main pair.
Use Matched Cardioid Microphones
Matched cardioid microphones make the two-mic setup more stable: their similar frequency response and polar patterns preserve a consistent stereo image as you refine placement. Choose a matched pair, so each capsule captures cymbals, toms, and transients with comparable tone and directionality. Your priority is geometry: keep the kick and snare exactly the same distance from both capsules.
- Place one cardioid directly above the snare; Glyn Johns starts around five to six feet high.
- For Recorderman, set it slightly above two drumsticks’ length, then aim the shoulder mic toward the beater strike.
- Measure from the snare to both capsules, then verify the kick distance.
- Hard-pan left and right; adjust side placement until the snare stays centered.
This keeps snare attack centered and focused reliably.
Step 1: Clear Space Around Kit
Clear space around the kit before you place the stands: overhead capsules need an unobstructed path to the snare, kick, cymbals, and toms, while stand legs must stay outside the drummer’s stick and pedal travel. Leave room to move each stand without crossing a tom or cymbal path. With one overhead or a two-mic Glyn Johns or Recorderman layout, aim each capsule so it sees some of the full kit, particularly snare and kick.
For Recorderman, clear both lines of sight and match capsule-to-center distances to the kick and snare before adjusting angles. Keep microphones away from walls and corners, which exaggerate reflections and spill. While the drummer plays, walk around the kit, listen for hi-hat and crash balance, then lock each stand firmly.
Step 2: Tune Drums and Silence Rattles
With the stands positioned, tune the kit before judging microphone balance: set each drum for the song, using tighter, higher-tension heads for more attack and controlled ring or lower tension for greater sustain. Match kick and snare pitches; then retune until they reinforce each other.
Mute obvious rattles: secure snare wires, strainer parts, damper pads, tom mounts, and buzzing hardware. Have the drummer strike consistently while you test. If sympathetic resonance remains, add light foam, rags, or purpose-made mutes near a tom’s bearing edge or on the snare head or snares.
Between takes, stop the kit and listen for decays from wires, kick and tom hardware, or loose accessories; re-tighten or re-damp until only the intended drum decay remains clearly audible in the room.
Step 3: Position Overhead Above Snare
Start by making the snare center equidistant from both overhead capsules, since equal path length keeps its arrival time and level consistent in both channels. Measure with tape, not by eye, then listen in mono for snare thinning or low-end cancellation.
For Recorderman, you’ll place the first mic directly above the snare, slightly higher than two drumsticks’ length, and set the second near your right shoulder while preserving equal snare distance. For conventional stereo pairs, use matched cardioids and keep the snare centered: set XY capsules at 90 degrees, or ORTF at 17 cm spacing and 110 degrees.
If you use one centered cardioid instead, begin about five feet above the kit, angle it downward, and adjust until drums sound natural. Check mono carefully.
Step 4: Position Kick Mic at Port
Place the kick mic just in front of the resonant-head port, aimed slightly toward the beater side, to capture both the batter head’s transient and the shell’s low-end tone. Use the port as a repeatable reference: it lets you set placement quickly without trying to target the batter head directly.
Begin with the capsule aimed through the port toward the impact area. For more attack and punch, move the mic incrementally closer to, or slightly inside, the opening. This position emphasizes beater click and transient detail. For more boom and resonant low end, pull it back from the port.
Listen to the balance as you adjust; small distance changes strongly shift what the mic hears. Secure the stand so it can’t drift.
Step 5: Flip Kick Mic Polarity
After recording, compare the kick mic against the snare or overheads in mono and flip the kick channel’s polarity (Ø) if the drum sounds thin, hollow, or swishy. Keep other controls fixed: don’t alter gain, EQ, compression, or microphone position during the test. Use your DAW’s Invert Phase/Polarity button, which mirrors reversing the microphone wiring polarity. A difference in distance between the kick and the snare or overheads can create cancellation around their shared low-frequency crossover region.
Loop a passage and switch Ø on and off quickly. Choose the setting that makes the kick transient defined and its low end louder, tighter, and solid in the mono mix. If inversion reduces punch or exaggerates cancellation, leave polarity unchanged. Confirm it at a consistent level.
Step 6: Tape Down Microphone Cables
Secure every microphone cable with gaffer tape before the take, routing slack in a straight, low loop between drum or stand bases and the preamp. Press the run flat along floor and secure it down each stand, so feet and fills can’t tug it or let it sway into kick pedal or toms.
Use gaffer tape rather than masking tape; it holds and removes cleanly. Keep tape clear of microphone bodies and XLR strain-relief points, preserving connector movement without transferring stress.
Where a cable must cross a drum-area route, anchor the crossing firmly to the floor and angle it away from the drummer’s reach zone. Label the drum-end tape tab SNARE, KICK, or OH. You’ll identify the run and remove the tape quickly after recording.
Listen for Centered Snare Image
With both overhead-style mics routed to hard left and right, have the drummer play the snare and listen for a solid, dead-center image. In Glyn Johns, place one mic roughly five to six feet above the snare and aim the lower mic across the floor tom toward it. Adjust their positions until the snare’s center reaches both capsules simultaneously.
If needed, nudge the lower mic or its pan slightly while checking repeated hits. For Recorderman, match both snare and kick distances to each mic; place the upper mic slightly higher than two drumsticks above the snare and the other over the drummer’s right shoulder. Check mono: if the snare shifts or thins, remeasure and reposition only the microphones for equal arrival times before recording.
Pedal Squeak: Lubricate Pedal
Before recording, isolate any kick-pedal squeak by removing the chain or rod if the design allows, then apply a small amount of light oil or dry PTFE lubricant to the main axle bearings, hinge pivots, and spring/rod guides. Use the thinnest practical lubricant; heavy grease traps dust and can revive noise. Tighten mounting bolts, since wobble can squeak despite fresh lubrication. Wipe excess, then press the pedal repeatedly and listen before tracking.
| Check | Likely source | Action |
|---|---|---|
| Axle | Bearing squeak | One small drop |
| Hinge | Dry pivot | PTFE, then wipe |
Keep lubricant off the beater, footboard grip, and drumhead. If noise remains, work each linkage slowly to locate looseness or binding; don’t flood adjacent parts. A silent pedal prevents intermittent mechanical noise from entering your sparse microphone setup during quiet passages.
Photograph Mic Positions Before Teardown
Photograph every microphone position before teardown so you can restore the setup without guessing. Take clear front and side views of the kit, including kick-side and snare-side angles. Frame each microphone’s capsule, pattern setting, angle, and relative height against useful references. For example, show an overhead’s distance above the snare and whether it aims down, or show a lower Glyn Johns mic aiming across the floor tom toward the snare.
For Glyn Johns or Recorderman setups, photograph the tape measure or string confirming that both capsules sit the same distance from the snare, or from the kick and snare centers. Include the intended pan assignment in a visible note: upper mic hard left, second mic hard right. They preserve pickup, balance, phase, and repeatability.
Conclusion
With two matched cardioids, you can capture a balanced, natural drum sound when you prepare the kit and place the microphones deliberately. Clear clutter, tune heads, stop rattles, and lubricate squeaky pedals before recording.
Position the overhead above the snare, secure every cable, then monitor in mono and stereo until the snare sits centered. Don’t rely on fixes later: photograph the final setup so you can restore proven positions quickly for future sessions with confidence.