How to Connect a MIDI Keyboard to a Computer and Your DAW
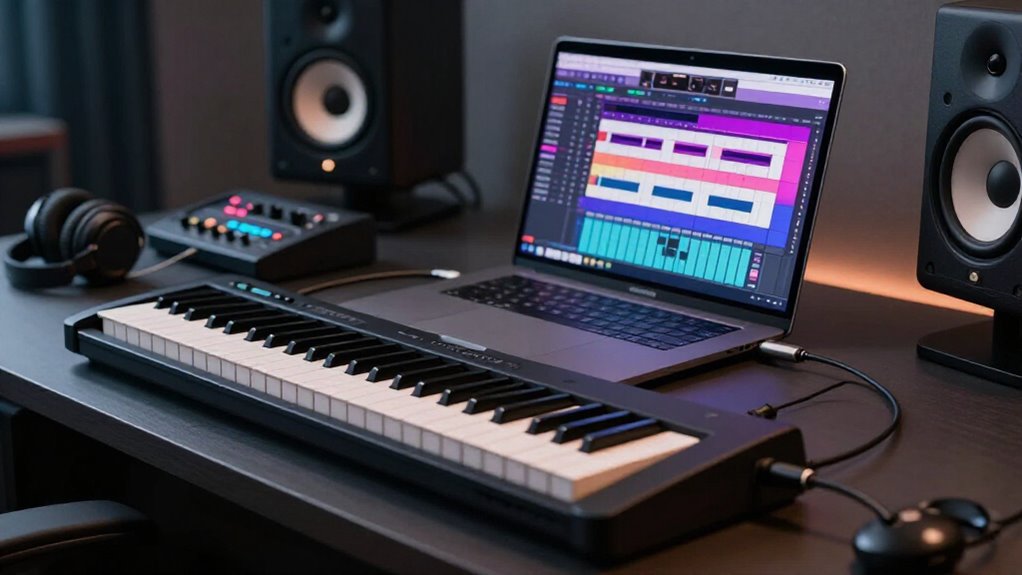
Place your keyboard on a stable surface near your computer, then connect it with a data-capable USB cable or a MIDI-to-USB interface. Power it on and open your DAW’s MIDI settings to enable the keyboard input.
Create an instrument track, select that input, arm it, and play a few keys. Confirm the MIDI activity indicator responds, then secure loose cables. If notes stick, check channels and reconnect.
The following steps cover fixes, cleanup, and setup.
DAW MIDI Keyboard Recognition
To make sure your DAW can receive MIDI data, open its MIDI or device preferences and look for your keyboard or MIDI interface in the available device list. If it appears, enable it as a MIDI input so the software can receive notes, knobs, and other controller messages.
Next, create or open an instrument track. Choose your keyboard or interface from that track’s MIDI input menu, then arm the track for recording. Play a few keys and watch for MIDI activity in the DAW.
If your device doesn’t appear, check your computer’s device settings first. Then install a driver from the keyboard manufacturer, restart the DAW, and check again. For 5-pin DIN keyboards, connect MIDI Out to interface MIDI In, then enable interface input.
Confirm USB Cable Compatibility
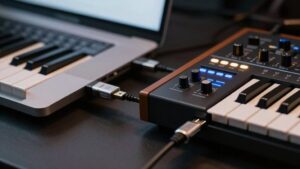
Before connecting your keyboard, check whether it has a USB port and identify its connector type, such as USB-B, USB-C, or Mini-USB. Once you know the connector, follow these steps to avoid connection issues:
- Match the cable to your keyboard’s port (USB-B, USB-C, or Mini-USB).
- Match the other end to an open port on your computer.
- Verify the cable transfers data—charge-only cables can’t carry MIDI signals.
- Use an adapter if your computer’s ports don’t match the cable; never force a connection.
If your keyboard only has 5-pin DIN MIDI ports, skip the USB cable entirely and use a MIDI-to-USB interface instead. Getting this step right guarantees your keyboard communicates properly before you move forward.
Step 1: Position Keyboard Near Computer
Place your MIDI keyboard within comfortable reach of the computer so you can play while watching your DAW. Set it where your hands can move naturally between the keys, mouse, and computer controls without twisting or standing up. Keep the screen visible, since you’ll adjust tracks, instruments, and settings.
Leave enough room for the connection cable to reach. A USB MIDI keyboard should sit near a USB port, while keyboards using 5-pin MIDI need space for the MIDI cable and their separate power supply. Don’t pull cables tight or route them where feet, chair wheels, or gear can snag them. If your keyboard is heavy, place it firmly on a desk, stand, or stable surface. It shouldn’t slide, wobble, or shift when you play.
Step 2: Power On the Keyboard
Once the keyboard is connected, turn it on using its power switch or button. Many USB MIDI keyboards receive power from your computer through the USB cable, so you may not need a separate adapter. Look for a power light, display, or controls to confirm that the keyboard has started.
If you use a keyboard with a 5-pin DIN MIDI connection, plug it into its own power adapter. A MIDI cable sends data only; it doesn’t provide power. If nothing turns on, firmly reconnect the USB cable or adapter, then check that your computer’s USB port or outlet provides power. When connecting to an iPhone or iPad, use a powered Lightning-to-USB camera adapter if your keyboard needs power than the mobile device can supply.
Step 3: Open Your Daw’s MIDI Settings
With your keyboard powered on, open your DAW’s Preferences or Settings and locate the MIDI, Audio/MIDI, or Device Setup section. This is where your software lists MIDI hardware connected to your computer. Look through the input devices for your keyboard’s name or the MIDI interface it uses. Seeing it there confirms that your computer and DAW can detect the connection.
Menu names vary between programs, but the goal is the same: find the page that manages MIDI devices before creating or configuring an instrument track. In Reaper, go to Preferences, then MIDI Devices. If you don’t see your keyboard or interface, confirm its cable and power, then reconnect it or restart the DAW. Once it appears, you’re ready for the next setup step.
Step 4: Enable Keyboard Input Port
After your DAW detects the keyboard, enable its MIDI input port so the software can receive notes, controller movements, and other performance data. Open the MIDI, devices, or preferences menu, then find your connected keyboard or MIDI interface in the input-device list. Turn on or authorize its input port; labels vary, but look for Enable, Activate, or Use Input. This step lets the DAW listen to signals sent from the keyboard.
In Reaper, open Preferences > Audio > MIDI Devices. Right-click your keyboard under MIDI inputs and choose Enable input. Then press a few keys, move a knob, or use a pedal. Watch the DAW’s MIDI activity indicator on the track or transport area. A response confirms that the port is enabled and data is arriving.
Step 5: Select Correct MIDI Channel
MIDI uses 16 channels, so your keyboard and the receiving DAW track must use the same one to communicate properly. If you’re running a simple setup with one keyboard controlling one software instrument, set both the keyboard and the DAW track to Channel 1. When the keyboard transmits on a channel the track isn’t listening to, the DAW won’t respond to your playing, even though everything looks connected.
Check your track’s MIDI input settings and pick the matching channel, or select “All Channels” to receive input from any channel at once. That’s useful if you’re not sure what your keyboard’s sending.
Working with a multitimbral instrument? Assign each part its own channel, then set each DAW track to match. This keeps every part responding only to its intended input.
Step 6: Tie Down Loose USB Cables
Secure your keyboard’s USB cable so an accidental tug doesn’t disconnect it during a session. Use a reusable hook-and-loop tie to secure the cable to your keyboard stand or desk. Route it along the stand or desk edge, keeping it away from your feet and chair wheels. Fasten the cable at several points so it can’t swing, snag, or drag.
Leave a small slack loop near both the keyboard and computer. This extra length reduces strain on the USB plugs if either piece of equipment shifts. Choose cable clips or ties that hold the cable gently without crushing it or creating sharp bends. Keep the connector itself easy to reach, so you can unplug the keyboard when needed without dismantling the entire cable route.
Verify MIDI Activity Indicator
Next, open your DAW’s MIDI or device settings and look for your keyboard or MIDI interface in the device list. Confirm that it appears, then enable its MIDI input. Play keys and watch the DAW’s MIDI activity indicator, which may appear as a light, meter, or icon. It should flash whenever you press a key, showing that your computer is receiving MIDI data.
If the indicator stays dark, make sure you selected the correct device and enabled its input. With a USB MIDI keyboard, connect it directly to a known-working computer USB port rather than a hub, then test again. With a five-pin DIN setup, check that the keyboard’s MIDI Out cable runs to the interface’s MIDI In. Correct the connection then test again.
Fix Stuck MIDI Notes
| Check | What to do | Why it helps |
|---|---|---|
| MIDI channel | Match keyboard and track | Restores note-off routing |
| Sustain pedal | Release, reconnect, or reverse polarity | Clears held notes |
If a USB or DIN cable drops out, reconnect it and confirm your keyboard remains enabled as a MIDI input. Stop playback, restart the instrument or DAW if needed, then test each key for matching note-on and note-off messages before you return to recording.
Dust Keys With Microfiber
Grab a clean, dry microfiber cloth and gently wipe away any dust that’s settled on your keyboard keys. Dust builds up fast, especially if your keyboard sits out on a desk, and it can work its way into the gaps between keys over time. Use light pressure as you wipe, since pressing too hard can push dust further into those gaps instead of lifting it away.
As the cloth picks up dust, fold it over to expose a cleaner section. This keeps you from just spreading grime around and gives you a more effective clean overall.
Skip the sprays and liquid cleaners entirely. Spraying cleaner or water directly onto your keys risks letting liquid seep into the keyboard’s internals, which can damage the electronics. A dry microfiber cloth is all you need for routine upkeep.
Conclusion
Connecting your MIDI keyboard to your computer and DAW is usually quick once you follow the basics. Use a compatible USB cable, place the keyboard safely nearby, and power it on before opening your DAW’s MIDI settings. Select the keyboard as an input device, then test the MIDI activity indicator. If notes stick, reset the MIDI connection or restart your DAW. Finally, secure loose cables and keep the keys dust-free for reliable performance.