How to Fix a Sagging Boom Arm: Springs, Tension and Mic Weight
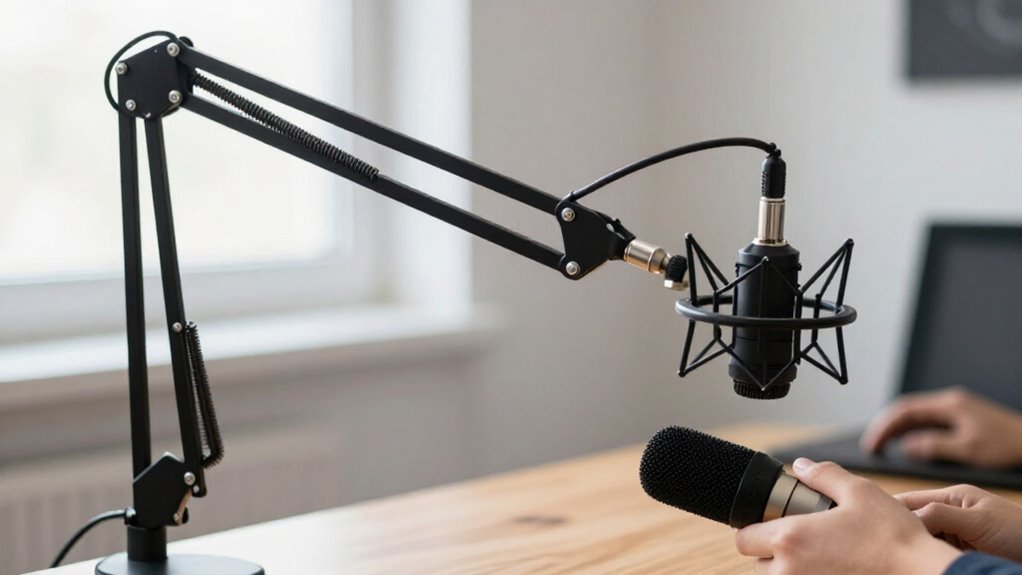
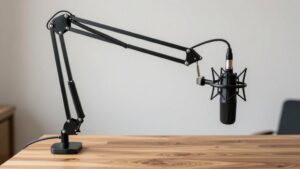
First, weigh your microphone, shock mount, pop filter, cable, and adapters, then confirm the total falls within the boom arm’s rated range. Clear the drop area and remove the microphone before tightening the desk clamp, lower hinge, and designated spring-tension screws in small, even increments. Inspect springs for rust, pitting, or distortion, and replace damaged parts.
Route excess XLR cable with slack at pivots, then test every position. Next, you’ll verify mounting and noise control too.
Match Spring Tension
Match the boom arm’s spring tension to your microphone’s weight so it holds its position without sagging or lifting upward. First, confirm that your microphone, mount, cable, and any accessories fall within the arm’s stated weight range. An overloaded arm won’t balance reliably, regardless of adjustment.
Secure the microphone and support the arm before changing spring tension, because the mechanism can move abruptly. Increase tension in small increments at the arm’s designated adjustment points. After each change, place the arm low, level, and high, then release it carefully. It should remain where you set it. If it still sags at maximum tension, add a suitable counterweight or choose an arm rated for heavier microphones. Don’t force adjustments beyond their intended travel or load capacity.
Gather Allen Key and Scale
Before adjusting spring tension, gather the correctly sized Allen key and a reliable scale. Check the boom arm label or manual to identify the spring-adjustment bolts and key size. Then weigh the complete supported load, not just the microphone.
- Microphone body
- Shock mount
- Pop filter
- Cable hardware
- Any adapters or accessories
Record the combined weight and compare it with the arm’s rated capacity. This establishes whether the springs can reasonably support your setup before you alter tension. An undersized arm may still sag even after careful adjustment. Keep the Allen key and scale within reach during testing. You’ll use the key for controlled, incremental turns and the scale to confirm the load if you add or remove equipment. Seat it fully to prevent damage.
Step 1: Clear Desk Beneath Boom Arm
Clear the desk area directly beneath the boom arm so a dropping microphone can’t hit a monitor, keyboard, or other hard object and send bumps through your recording chain. Move accessories, cables, and loose tools outside the microphone’s potential drop path before you adjust tension.
Also inspect the shock mount while the microphone sits at its normal angle. It must remain suspended without contacting the outer ring. If it sags into the mount, examine the elastic loops; stretched bands need replacement, not extra knots. After servicing them, gently raise the inner basket about three-quarters of an inch, then verify the mic stays centered and clear. Record a short test and listen for thumps or resonances before resuming normal recording work at your desk again.
Step 2: Remove Microphone From Arm
With the area beneath the arm protected, remove the microphone before you adjust any joints or tension screws. Support the microphone with one hand while you loosen its clip or mount connection. Don’t let the mic hang from the threads or cable as you work.
If it sits in a shock mount, detach it carefully. Hold the microphone body, then release the mount connection without pulling or twisting the suspension bands. Keep your fingers clear of the arm’s springs and moving sections.
Place the microphone on a stable, padded surface away from the arm and its travel path. With the microphone removed, you can assess the arm’s unloaded tension without its weight influencing the result. This keeps your equipment safer and makes testing more accurate.
Step 3: Tighten the Lower Hinge
Locate the lower hinge at the arm’s base and support the boom securely so it can’t drop as you adjust it. Identify the adjustment knob or bolt on this joint. With one hand supporting the arm and its microphone, tighten the fastener in small increments.
After each turn, release pressure gradually and test whether the arm remains at its set height. If the hinge has two tension knobs, turn each by the same amount to preserve joint alignment. Stop when the boom holds the microphone reliably yet still repositions smoothly without requiring excessive force. If it continues to sag, inspect the hinge for worn washers, damaged threads, or a microphone load that exceeds the arm’s rated capacity. Clean debris before further adjustment or replacement.
Step 4: Turn Upper Tension Screw Clockwise
Turn the upper tension screw clockwise in small increments to increase the spring resistance that supports the boom. Keep the microphone attached during every adjustment, because its installed weight determines the tension required. Use the driver, then rotate the screw about one quarter turn at a time.
After each turn, release the arm and observe whether it remains level or drifts downward. If it still droops, add a small clockwise adjustment and repeat check. Don’t force screw or make large changes, as excessive tension can make positioning difficult and place stress on the mechanism. If clockwise adjustments don’t correct the sag, or the screw becomes hard to turn, stop. Verify the arm’s load range with its complete setup and inspect the spring assembly for damage or wear.
Step 5: Test Arm at Full Reach
Extend the boom arm to its full intended reach with the microphone and all attached accessories installed, then release it carefully to confirm it holds the target height without drifting down.
Keep hands clear of the spring-loaded joints, and support the arm while you make any tension adjustment. Observe the arm briefly. If it remains level when folded but drops at full extension, the combined microphone, shock mount, pop filter, and adapter load likely exceeds the arm’s capacity at that reach. Check that neither the microphone nor the arm touches a desk, monitor, wall, or surface; contact can restrict travel and transfer handling noise. If sagging persists, reduce the supported weight, shorten the reach, or use an arm rated for the setup.
Step 6: Coil Excess XLR Cable
Coil any excess XLR cable neatly along the boom arm rather than letting it hang, since a dangling loop adds weight and can pull the arm downward. Secure the coil with reusable hook-and-loop ties or low-profile cable clips. Leave sufficient slack near every pivot so the arm can extend, retract, and swivel without stretching the cable.
Route the cable outside the springs and clear of all moving joints; otherwise, it can snag during repositioning and add resistance or strain. Don’t cinch ties tightly or force sharp bends, because either practice can damage conductors, weaken shielding, or cause intermittent signal problems. After you adjust spring tension or move the arm, inspect the routing again. Remove hanging loops and relieve taut sections after every arm adjustment.
Verify Capsule Stays Level
With the cable secured and the arm balanced, move the boom through its normal range and watch the microphone capsule. It should remain level rather than pitching forward or backward as you raise, lower, and angle the arm. Check the shock mount from several positions: the microphone must stay centered in its inner basket and mustn’t touch the outer ring.
Gently press the basket upward to test its clearance and elasticity. In this setup, it should travel about three-quarters of an inch under light force while keeping the microphone clear of the frame. Finally, record a short sample at your intended position. Listen for taps, rubbing, contact noise, or resonances that indicate the capsule or mount needs further adjustment before your next recording session.
Boom Creep: Tighten Desk Clamp
If the boom arm shifts at its base, inspect the desk clamp before adjusting the arm’s joints. Remove the microphone or support its weight. Confirm the clamp sits flat against the desk, with both contact surfaces clean, dry, and free of dust or grease. Tighten the clamp screw firmly until the base no longer creeps, but don’t force it; excessive torque can damage the desktop, clamp body, or threads.
| Check | Correct condition | Action |
|---|---|---|
| Contact surfaces | Flat and clean | Wipe, reseat, tighten |
| Desk edge | Sturdy, within clamp range | Reposition or use suitable desk |
If movement continues, verify the desk edge meets the clamp’s specified thickness range. Then gently move arm through its positions and confirm the base remains stable before reinstalling and positioning the microphone.
Inspect Spring Coils for Rust
Once the desk clamp holds securely, inspect each boom-arm spring for corrosion that can reduce its strength and support. Examine the full length of every coil, concentrating on hooks and attachment points, where moisture can attack the metal. Look for orange or brown staining, pitting, flaking, thinning, or distorted coils.
Check both sides of each spring and inspect sections concealed by the arm’s joints; use a flashlight to expose hidden damage. Don’t try to correct a heavily rusted, pitted, or deformed spring by adding tension. Replace it with a spring that matches the boom arm’s specified type and load rating. An incorrect replacement can alter balance, reduce support, and create an unsafe setup. Disconnect the microphone first, then compare the new spring’s hook orientation carefully.
Conclusion
You’ll restore a sagging boom arm by matching spring tension to the microphone’s actual weight, then securing each hinge and clamp in sequence. Remove the mic before adjustment, support the arm, and use the correct Allen key to avoid stripping hardware. Route XLR slack so it can’t add downward pull. Finally, confirm the capsule remains level through its full range. If sagging persists, inspect springs and replace rusty, stretched, or damaged components promptly when needed.