How to Set Up a Mic Boom Arm Without Sag, Wobble or Desk Noise
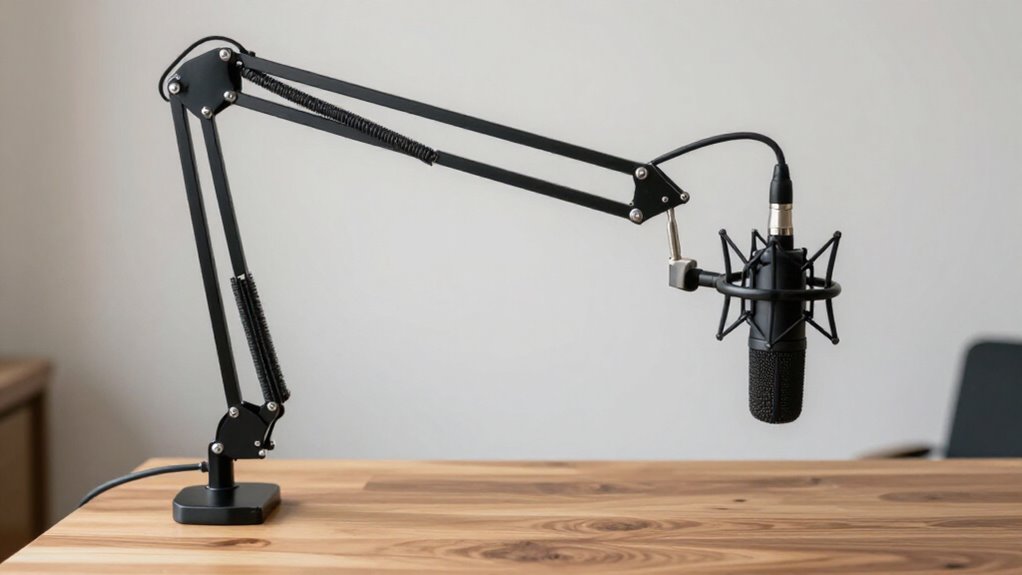
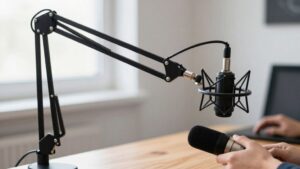
Mount your boom arm on a solid desk edge that fits the clamp, clear obstructions underneath, and keep the microphone, mount, and accessories within the arm’s load rating. Seat the protective pad flat, tighten the clamp squarely, and lock the post fully. Balance spring tension with the mic installed, then route cables with slack through arm clips.
Sweep the arm, tap-test desk vibration, and correct sag, wobble, or creaks. The steps below help refine adjustments.
Quiet, Sag-Free Setup Goal
A quiet, sag-free boom arm starts with correct load and mounting. Add the microphone, shock mount, pop filter, and any other accessories, then compare their combined weight with the arm’s rated capacity. For example, the Maono B01 supports up to 2.2 lb. Stay within that limit to preserve holding force and stable positioning.
Clamp arm squarely to a sturdy desk edge. With microphone installed and arm fully extended, test for rocking or slipping. Adjust each tension joint under manufacturer guidance until microphone remains level and doesn’t bounce after repositioning. Route cable with slack to follow arm movement without pulling downward or creating a taut vibration path. If desk taps transmit, fit one sized rubber shim beneath clamp; don’t stack pads or use uneven material.
Verify Clamp Edge Thickness
Before tightening the boom arm, measure the desk edge at the exact mounting point, including any lip, bevel, or underside apron that affects clamp contact. Record the full thickness where both jaws will bear, not just the visible top.
- Compare your measurement with the clamp’s published minimum and maximum thickness range. A clamp that merely reaches the edge may not tighten safely.
- Confirm the upper pad and lower jaw sit flat. Rounded profiles, deep bevels, or aprons can make the bracket rock.
- Check screw travel before loading the arm. It must tighten firmly while the bracket remains square and perpendicular to the desktop.
If the edge falls outside the range or prevents full, flat contact, relocate the mount or use a compatible clamp. Don’t force the screw; uneven seating invites wobble, slippage, and desk damage over time.
Step 1: Clear Cables Beneath Clamp Zone
Clear the space directly beneath the mounting point so the clamp’s lower jaw can contact the desk without obstruction. Remove cables, adapters, power strips, and any other items from the clamp zone before tightening it. The clamp must bear evenly on desk surfaces.
Route the microphone cable along the boom using its channels or clips. Leave slack at every joint, allowing full arm movement without tension. Keep the cable from pulling across the desk edge or rubbing against the arm, because those contact points can transmit vibration into your recording. Use Velcro ties to secure excess length, but don’t cinch them tightly. Finally, sweep the arm through its full range and confirm that no cable catches, pulls the microphone, or interferes with the clamp.
Step 2: Confirm Arm Load Rating
Check the boom arm’s manufacturer-rated load against the combined weight of your microphone, shock mount, and attached accessories before mounting anything. Typical arms handle roughly 1 to 4 lb (0.5 to 2 kg), but each model’s limit differs. Find the listed capacity in the manual or product specifications, then total every item that the arm will carry, including adapters, pop filters, and cable-mounted hardware.
Keep that total at or below the stated rating. For a Maono B01, the maximum supported load is 2.2 lb. Don’t try to compensate for an overloaded setup by tightening joints or increasing spring tension; use a higher-rated arm instead. Once installed, extend the arm to full extension and verify it supports the microphone securely without sagging. Stay within the manufacturer’s specified load limit.
Step 3: Seat the Clamp’s Protective Pad
Place the protective pad squarely between the clamp and the desk edge, covering the clamp’s full contact area without extending into the screw mechanism. Before tightening, inspect desk edge and clamp faces for dust, finish damage, curvature, or pre-glued pads that prevent flat contact. Use a pad rated for the arm’s full load, including microphone and accessories. Check its specified load limit and deflection; density alone doesn’t guarantee stability.
Align it fully on the contact surface, clear of the screw path. Tighten gradually, confirming the bracket stays flat and perpendicular, without rocking or tilting. After installing the microphone and accessories, extend the arm fully. Check for slipping or uneven pad compression; reposition or replace the pad if needed under the system’s actual operating load.
Step 4: Mount Arm in Clamp Socket
Lower the boom arm’s mounting post straight into the clamp socket until it seats fully, then engage any locking collar or retaining screw specified by the manufacturer. Keep the post vertical as you insert it, and verify that the clamp sits squarely against the desk edge. Confirm that your desk thickness and clamp fit meet manufacturer specifications before proceeding.
Tighten the socket lock only enough to let the arm rotate smoothly while holding its selected angle; don’t force the threads. Before installing the microphone, move the unloaded arm gently through its full range. Check that the post cannot lift, spin freely, or shift within the socket. After you mount the microphone and accessories, inspect the socket again and confirm the arm remains fully stable.
Step 5: Set Spring Tension Precisely
Before adjusting the springs, confirm that the microphone, shock mount, cable, and any accessories fall within the boom arm’s rated weight range.
With the microphone installed, support the arm and adjust each spring-tension control in small increments. Raise and lower the arm through working positions after each adjustment. Increase tension until it holds position without drifting downward; reduce tension if it rises, rebounds, or feels excessively stiff.
Test arm sections, then set the microphone where you’ll use it. Extend the arm fully and recheck balance, because maximum reach creates the greatest leverage and exposes sag first. If droop remains, shorten the reach or remove excess weight.
Don’t force tension controls beyond their intended range. Finally, tighten pivot joints only enough to stop unwanted movement while maintaining smooth, controlled repositioning.
Step 6: Route Cable Through Arm Clips
Route the microphone cable through the boom arm’s built-in clips or cable channels, keeping it clear of your workspace and away from the arm’s moving parts. Seat the cable in each clip, but don’t stretch it between sections. Leave a relaxed loop at each pivot so you can raise, lower, rotate, or fold the arm without pulling the cable taut. Position loops outside joint travel, not where they can catch in hinges.
Keep cable off desk edges and separated from the arm frame; rubbing contact can create mechanical noise. Use Velcro ties to control sections, fastening them snugly enough to prevent movement but never tightly enough to pinch the jacket. Then move arm through the full range; confirm cable doesn’t snag or shift microphone.
Tap-Test for Vibration Transfer
With the microphone and boom arm in their normal recording position, monitor or record a short test while you lightly tap the desk near the clamp. If the captured knock resembles the noise you want to eliminate, vibration is traveling through the clamp. Establish this as your baseline, then tap the desk farther from the clamp using similar force. Next, gently tap the arm and microphone mount, listening for the path that produces the clearest noise. If tapping near the clamp remains quiet, inspect other paths: cable sections pulled taut against the desk or arm, or a shock mount that has bottomed out. After reseating the clamp or fitting a correctly sized isolation shim, repeat the identical test and compare recordings directly.
Troubleshoot Pivot-Joint Creaks
Isolate the source by moving one pivot joint at a time through a small part of its range. If you hear noise at one hinge, focus there rather than tightening every joint. Check for looseness, debris, or visible wear. Don’t force the arm through resistance.
| Symptom | Inspect | Corrective step |
|---|---|---|
| Creak | Debris | Brush gently |
| Local creak | Loose tension | Increase gradually |
| Persistent noise | Visible wear | Follow manufacturer guidance |
| Broad noise | Load balance | Reposition accessories |
Set tension according to the arm’s instructions in small increments. Over-tightening can damage threads or strain the pivot. Keep microphone and accessories within rated load; an unbalanced setup increases pivot stress.
Then move the arm through its normal range. It should hold position without creaking, sagging, or wobbling. If not, repeat hinge-specific checks.
Inspect Clamp Threads Monthly
Each month, remove the microphone and support the boom arm before inspecting the clamp screw threads. Check for dirt, corrosion, flattened areas, cross-threading, or other damage that can prevent secure tightening. Turn the screw gently through its normal range; it should travel smoothly without sticking, wobbling, or slipping. Clean debris with a soft brush or cloth, and don’t force a binding screw or apply lubricant unless the manufacturer approves it.
If threads are stripped or damaged, replace the clamp. Reseat the new clamp squarely on the desk, then tighten it only until it holds the arm securely. Over-tightening can damage the desk edge, distort the clamp, or accelerate thread wear. Confirm the arm remains stable before reinstalling the microphone and routing its cable.
Conclusion
A stable mic boom arm starts with a solid clamp connection, correct load rating, and balanced microphone placement. You’ll prevent sag by tightening pivots to the manufacturer’s specification and keeping cable weight supported through the arm clips. Reduce desk noise by seating the protective pad fully, clearing the clamp zone, and tap-testing for vibration transfer. If creaks develop, inspect pivot tension and lubrication. Check clamp threads monthly so your setup stays quiet, secure, and repeatable.