What Size Studio Monitors Do I Need for My Room? 3, 5, 7 or 8 Inch
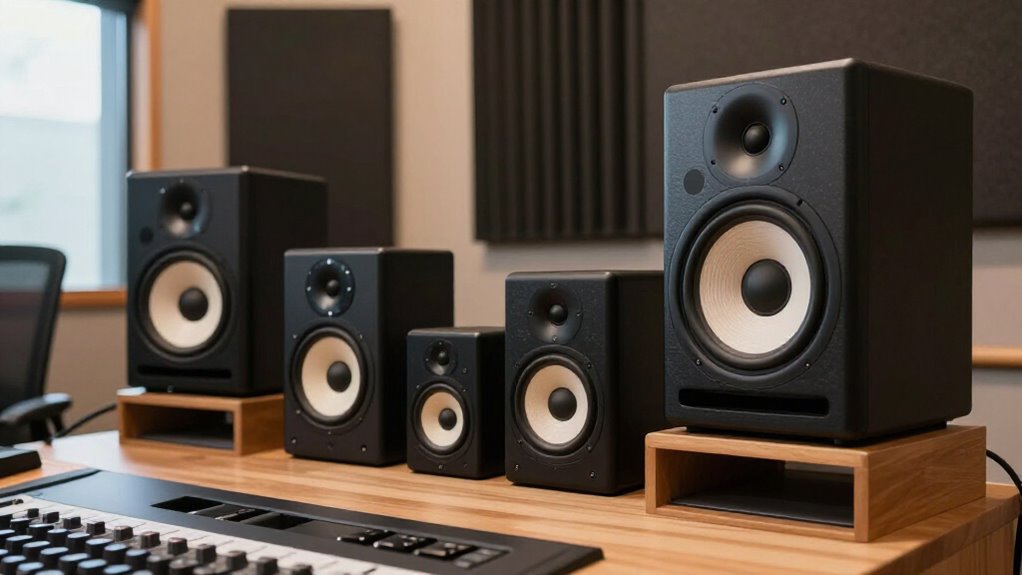
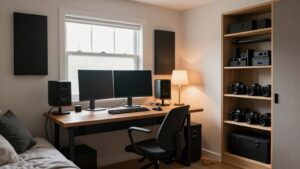
Choose 5-inch monitors for most small bedrooms and untreated rooms: they provide useful nearfield detail without overwhelming bass buildup.
Use 3-inch models for very close desktop or podcast work, but check low frequencies on headphones.
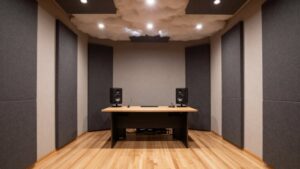
Consider 7-inch monitors in medium, reasonably treated rooms. Choose 8-inch models only when you have more than about 15 m², adequate listening distance, and acoustic control.
Measure ear-to-tweeter distance, keep an equilateral triangle, and use guidance below to refine your choice.
5-Inch Monitors Suit Most Bedrooms
For most bedrooms and compact home studios, 5-inch monitors provide the most practical balance of nearfield detail, manageable bass output, and placement flexibility. Their restrained low-frequency extension is often an advantage in small, untreated rooms, where 7- or 8-inch models can excite stronger bass buildup and obscure mix decisions.
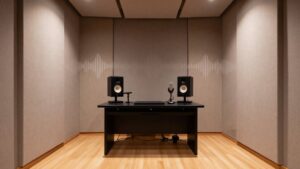
You should place each speaker at ear height and arrange them with your listening position as an equilateral triangle. Keep them off the desk to reduce vibration and early reflections. Bass traps and other treatment improve low-frequency reliability, but you must learn your room’s response; deficiencies may cause you to overstate bass in mixes that translate poorly elsewhere. If you need deeper extension, add a calibrated subwoofer carefully so it doesn’t create misleading low-end information.
Measure Your Listening Distance
Before choosing a monitor size, measure the distance from your listening position to each monitor’s tweeter. This measurement indicates whether your setup functions as a nearfield arrangement and sets a practical limit on monitor size. Position the speakers and chair as an equilateral triangle: the speaker-to-speaker distance should equal each tweeter-to-ear distance.
Keep both tweeters equally distant from your listening position; unequal paths shift the stereo image and compromise timing balance. Adjust monitor height so your ears align with the space between the tweeter and woofer, as the reProducer Epic-5 manual recommends. Assess the distance you can actually maintain. Larger monitors generally require more space for their drivers to integrate and their sound to develop properly.
If you must sit close, a smaller woofer is usually more appropriate.
Match Bass Extension to Room
Bass extension should match your room’s volume, treatment, and listening distance rather than woofer diameter alone. Larger drivers may reach lower and sustain higher output, yet they don’t guarantee accurate bass. In compact, untreated spaces, excess low-frequency energy can accumulate, masking decisions. Placement and boundaries matter: wall, floor, and ceiling reflections create modal peaks, nulls, and long decay times.
| Room condition | Bass priority | Practical approach |
|---|---|---|
| Small, untreated | Control | Use manageable extension |
| Small, treated | Consistency | Measure response |
| Larger, treated | Depth | Accommodate lower reach |
| Shared building | Containment | Limit deep-bass transmission |
You should select low-frequency reach for measured room behavior and listening distance. You can add a subwoofer to five-inch models, but calibrate its crossover, level, phase, and placement. Deep bass travels through structures; keep levels neighbor-safe.
3 vs. 8-Inch Nearfields
A 3-inch nearfield gives you clear close-range imaging but limited bass reach, while an 8-inch model can deliver deeper lows and higher output. You’ll need sufficient listening distance, room volume, and careful placement for an 8-inch monitor to avoid bass buildup and uneven response. Judge accuracy by your room treatment, monitor position, and bass needs—not woofer diameter alone.
Bass Reach And Accuracy
Although 8-inch nearfields typically extend lower than 5-inch models, that added reach does not automatically give you more accurate bass. Their larger woofers can deliver deeper extension, higher output, or a balance of both, but cone diameter alone doesn’t determine perceived bass weight.
In your setup, placement relative to walls, the floor, and ceiling strongly shapes the low-frequency response. An 8-inch design can energize room modes and boundary-related buildup, causing peaks, nulls, and smeared bass in an untreated space. Bass traps and measured positioning can improve accuracy as much as monitor size. Choose 8-inch nearfields for additional extension only when you can assess that range reliably at your listening position. Otherwise, you may make translation decisions from distorted low-end information rather than source content.
Room Size Requirements
Room volume and acoustic control set more useful limits on 8-inch nearfields than woofer diameter alone. You can consider 8-inch models in rooms above 15 m², provided placement and treatment let the low end develop without modal buildup. In rooms under 10 m², 5-inch monitors are the safer starting point. For 10–15 m² spaces, 6- or 6.5-inch designs often offer a compromise, although treatment quality can outweigh floor area.
An 8-inch driver doesn’t sound bassier; speaker design determines extension and output. In a small or untreated room, deeper extension can excite resonances, creating peaks, nulls, and blurred bass that compromise mix decisions. A 21 × 15 ft room, roughly 29 m², is large enough for consideration, but you must assess boundaries, monitor placement, and acoustic control.
Listening Distance And Volume
Listening distance often determines whether 8-inch nearfields behave as intended: their larger drivers and higher output capability generally need more space than smaller monitors for the drivers to integrate and for the soundstage to stabilize. At close range, roughly two feet, an 8-inch design may not deliver its most coherent presentation, especially at quiet levels. Its added SPL capacity and dynamic headroom help only when your working distance and target level let you use them.
More output doesn’t automatically improve clarity; excessive level can obscure balance decisions and fatigue your hearing. Smaller monitors often suit compact, low-volume workflows better. An Equator D5 owner, for example, reported satisfactory monitoring from about two feet at conversation level. Choose size by your distance and sustainable working volume.
Placement And Acoustic Treatment
Placement determines whether an 8-inch nearfield’s added bass extension helps your decisions or exaggerates the room’s problems. Put each monitor on a separate stand, not directly on your desk, because desk vibration can create boominess. Set tweeters at ear height and form an approximately equilateral triangle between both speakers and your listening position.
Keep the monitors away from walls whenever possible. Boundary reflections alter bass response, and rear-ported designs, including the JBL LSR308, are especially difficult to position near a wall.
Install bass traps to control low-frequency buildup and panels at reflection points to reduce early reflections. Eight-inch models deliver more low end, but a small or untreated room makes it uneven. You can’t fix acoustics by choosing larger monitors; placement and treatment matter.
Podcast Editing: 3-Inch Monitors
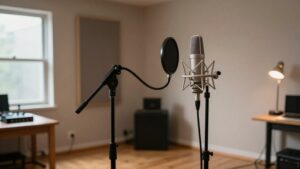
For podcast editing, you can use 3-inch monitors to assess dialogue clarity and midrange intelligibility at close range. Their nearfield design fits small workspaces when you place them at ear level in an equilateral triangle, reducing room influence on stereo imaging. However, they don’t reproduce deep bass reliably, so check bass-heavy voices and music cues on headphones or a fuller-range system.
Voice Clarity and Dialogue
Three-inch monitors can serve podcast editing well because they prioritize close-range vocal detail over deep bass extension or high-output playback. You can use their focused midrange reproduction to judge intelligibility, consonant definition, sibilance, mouth noise, edits, and level consistency in spoken material. This makes them useful when your primary decisions involve whether a voice sounds natural, intelligible, and balanced against music or effects.
However, their small woofers provide limited low-frequency information. You may not reliably detect deep rumble, heavy plosives, HVAC noise, or other bass-weighted artifacts that can compromise a finished episode. High-pass filtering and spectral analysis help, but they don’t replace verification.
After editing, check dialogue on headphones and several consumer playback systems. Use them to identify vocal-tone and noise translation issues.
Nearfield Placement Advantages
In a small editing room, 3-inch monitors work effectively as nearfields because you can place them close to your listening position and emphasize direct speech detail over room reflections. This geometry increases the direct-to-reflected sound ratio, helping you judge consonants, edits, breaths, noise reduction, and level changes.
Position each monitor at ear height, angled toward your head, and set the two speakers and your head as an equilateral triangle. Keep the listening distance short enough that the drivers dominate what you hear, while maintaining symmetrical placement. Their cabinets fit on a desk, but don’t place them directly on its surface when possible. Use solid stands or isolation pads to limit desk vibration and resonance. This setup creates a focused monitoring reference for dialogue decisions.
Bass Limitations Explained
Although 3-inch monitors provide clear nearfield detail, their limited low-frequency extension makes deep bass and sub-bass difficult to evaluate accurately. Small woofers move less air than larger drivers, so you can’t reliably judge the weight of low voices, rumble, or music beds. If bass is underrepresented, you may boost low frequencies excessively, causing speech and background elements to sound overly full on other systems.
For speech-focused editing, 3-inch monitors remain useful when you pair them with headphones and periodically check mixes on alternate playback devices. A subwoofer can extend response, but you’ll need precise crossover, level, and phase calibration. In shared living spaces, its low-frequency energy can travel through walls and floors, making it potentially impractical for routine editing and monitoring work at home.
Ideal Room Sizes
For podcast editing, 3-inch monitors work best in compact rooms where you can sit close to the speakers and prioritize dialogue intelligibility over deep-bass assessment. That nearfield arrangement suits desks, bedrooms, and small edit suites, especially when larger monitors would excite room modes and mask vocal detail. Position each speaker at ear height, with your head and the monitors forming an equilateral triangle.
Although small woofers reduce low-frequency energy, they don’t solve reflections; use treatment and deliberate placement. Since bass extension remains limited, check finished dialogue on headphones or a second system for rumble and plosive pops. In very tight, untreated rooms, keep boundaries considered, but don’t assume a smaller monitor guarantees neutral translation. Measure, listen, and adjust placement before committing to final EQ decisions.
Check Desk Weight Limits
Before placing studio monitors on your desk, verify the desk’s rated load capacity and compare it with the combined weight of both speakers, their stands or isolation pads, and any other equipment on the same surface.
Check manufacturer’s specifications rather than judging construction visually. Add each monitor’s mass, mounting hardware, pads, displays, interfaces, and every other item sharing the surface.
Confirm the rating covers the desktop and its support structure, particularly at monitor positions near an edge. Edge placement increases leverage and stress on joints, brackets, and the panel. Don’t treat the maximum rating as a working target; allow a safety margin for uneven load distribution. If the calculated load approaches or exceeds limit, use rated floor stands. They prevent sagging, instability, and failure.
Budget for Replacement Tweeters
A desk that safely supports your monitors doesn’t eliminate the cost risk of a damaged high-frequency driver. Before you set a repair reserve, identify the exact monitor model and revision, then check current manufacturer or authorized-parts pricing. Replacement tweeters aren’t universally interchangeable: cone diameter, mounting pattern, impedance, crossover behavior, and amplifier integration can differ across models and production revisions.
Confirm whether the supplier sells the tweeter alone or only within a complete driver assembly, because assembly-only availability can raise the bill substantially. If you use active monitors, include technician labor when cabinet access, internal wiring, or electronics handling is required. Finally, compare the complete repair total—part, shipping, labor, and tax—with the cost of a replacement monitor. This matters especially when your used pair cost $300-$400.
Ignoring Rear-Wall Clearance
Ignoring rear-wall clearance can distort a monitor’s bass response through speaker-boundary interference, which creates frequency-specific peaks and nulls at the listening position. This interaction can make any monitor sound overly heavy or oddly thin, so don’t mistake placement-induced buildup for a larger woofer’s inherent bass output. Rear-ported models, including the JBL LSR308, demand particular care because their ports couple strongly with nearby walls.
- Test several wall distances and listening positions; a few feet of clearance won’t automatically remove modal or boundary-related errors.
- If your room is cramped, consider front-ported or sealed monitors, then use bass traps to reduce low-frequency ringing.
- Measure or critically compare bass consistency before choosing 3-, 5-, 7-, or 8-inch monitors; placement can outweigh driver diameter in your specific listening environment.
Verify Audio Interface Connections
Correct placement won’t help if your interface can’t feed the monitors properly. Verify that it offers independent left and right line outputs, allowing true stereo playback.
Match those outputs to your monitors’ inputs: balanced XLR and quarter-inch TRS are standard, although some models accept RCA. Prefer balanced XLR or TRS cables, especially for longer runs, because they reject induced noise more effectively.
- Connect each active monitor directly to its corresponding interface output. Active designs contain their own power amplifiers.
- Don’t connect passive monitors directly to the interface. Route left and right signals to a suitable external power amplifier, then wire that amplifier to the speakers.
- Check cable type, connector gender, and output level before buying adapters. Incorrect routing, unbalanced cabling, or missing channels compromise stereo imaging.
Conclusion
Choose monitor size by combining your listening distance, room volume, bass requirements, and desk capacity. You’ll find 5-inch nearfields suit most bedrooms, while 3-inch models work for close podcast editing and 7- or 8-inch speakers need more space and treatment. Don’t chase deeper bass if your room can’t support it.
Confirm rear-wall clearance and interface connections before buying. Check stand or desk weight ratings, and reserve funds for potential tweeter replacement. Measure first, then match.