Do Reflection Filters Work? An Honest Look at Portable Vocal Shields
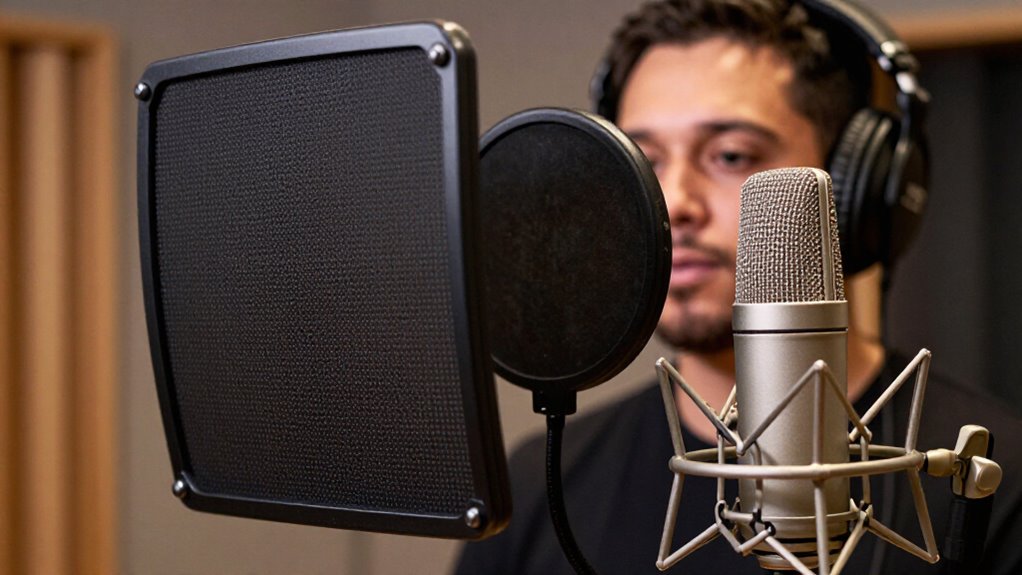
Reflection filters work as supplementary, portable absorption: they can reduce some reflections reaching your cardioid microphone from the rear and sides.
They can’t soundproof, isolate external noise, treat your ceiling, or turn an untreated room into a booth. If you close-mic vocals at six inches, a nearby shield may also introduce boxiness or comb filtering.
You’ll gain more from thick absorption behind you; verify with matched recordings and a clap test. Below, you’ll see why.
Usually Not for Untreated Rooms
Reflection filters can absorb some sound around a cardioid microphone, but they can’t transform an untreated, reflective room into a reliable vocal-recording space. You’ll still capture early reflections from nearby side surfaces and other hard boundaries because a cardioid pattern attenuates, rather than eliminates, off-axis sound. Compact shields intercept only a limited portion of the reflected field, so their result depends on the room geometry, microphone polar response, singer position, and shield construction.
Larger, thicker designs usually absorb more effectively and extend somewhat lower in frequency, yet they still cannot control the room as a whole. Treat the surfaces around the performer first; even a suspended duvet can materially reduce audible reflections. Then use a filter as supplemental absorption, not as your acoustic treatment.
Rear Absorption Behind Microphones
Rear absorption matters because a cardioid microphone still picks up sound from its sides and rear-facing angles. A reflection filter absorbs part of the sound that would otherwise strike these areas, but it can’t eliminate room reflections. Nearby walls remain important because cardioid patterns retain side sensitivity, allowing reflected energy to reach the capsule.
Prioritize thick absorption behind and beside the performer. A hanging duvet can substantially reduce early reflections before they return to the microphone. The filter also intercepts some direct vocal energy, which lowers the amount released into the room and later reflected back. Treat the rear area as room treatment: use the filter as a supplement, not a substitute. In most untreated spaces, a duvet is the more effective first step.
Close-Miked Vocals at Six Inches
At a six-inch vocal distance, a reflection filter sits close enough to the microphone that reflections from the shield itself can affect the recording. Those short-delay reflections may interfere with the direct vocal and create comb filtering, producing frequency-dependent peaks and nulls. A nearby shield can also modify the microphone’s effective polar response, so its coloration varies with capsule design, directionality, and the room.
You may hear little change, a natural result, or a boxy, phasey quality; reports support all three outcomes. Test your own setup rather than assuming a universal benefit. Keep the singer’s position, mouth-to-microphone distance, microphone angle, preamp gain, and performance as consistent as possible, then record matched takes with and without the filter. Continue treating surfaces behind and beside you.
Curved Panels vs Isolation Boxes
Curved panels cover the microphone’s rear hemisphere, while isolation boxes enclose a wider area around your recording position. You must weigh coverage against trade-offs: small or thin shields absorb little low-frequency energy and may reflect sound back toward the mic, causing boxiness or phase effects. Neither design treats the wall behind you, so you’ll still need absorption there and must position any enclosure within your room’s available space.
Design and Coverage
Reflection-filter performance depends heavily on how much of the microphone’s surrounding sound field the design actually covers. A curved panel shields the rear and part of each side, where it absorbs some returning energy and intercepts a little direct vocal sound. It doesn’t enclose the source: sound can still arrive from lateral angles, the ceiling, floor, and wall behind you.
| Design | Coverage around microphone |
|---|---|
| Curved shield | Rear and partial sides |
| Larger curved panel | Wider rear-side sector |
| Isolation-box arrangement | Larger recording-area perimeter |
| Two foldable booths in a corner | Booth-like vocal enclosure |
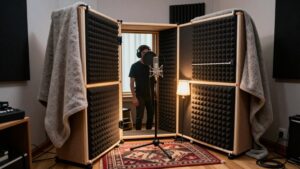
If you need broader geometric coverage, isolation-box layouts place larger panels around your recording area. You can combine two foldable GIK Portable Isolation Booths in a live-room corner to create a vocal booth.
Acoustic Trade-Offs
Coverage alone doesn’t determine the result: a curved filter trades portability for limited low-frequency control and a greater risk of near-mic coloration. Its thin construction cannot absorb bass; increasing panel depth and area generally lowers the absorption roll-off. It absorbs part of the sound that reaches the rear of your cardioid microphone, yet it may intercept direct vocal energy, producing boxy resonances or phasey comb-filter effects.
A foldable isolation box, such as a GIK Portable Isolation Booth, surrounds you with more absorption. Pairing two units in a live-room corner creates a complete vocal zone, though wall and microphone relationships still affect the outcome. Neither option replaces absorption behind and beside you. You’ll often get a first improvement by hanging a duvet or blanket there.
Practical Placement Limits
Placement sets the practical limit: if you position a curved filter very close around the microphone, its inner surfaces can generate short reflections that comb-filter the vocal or alter the mic’s effective pickup response. Leave space to reduce early returns and treat boundaries behind the singer.
With cardioid microphones, absorption behind or beside you often matters more than shielding mic’s rear; a blanket or panel behind you reduces reflected energy entering the front lobe. A curved filter is a portable tool: small area and shallow depth absorb little low-frequency energy. Isolation boxes, including portable folding booths, cover more area and can pair in a corner to form a vocal zone. Still, place booth carefully relative to walls and microphone. Neither option replaces room treatment.
Ceiling Height and Room Volume
Low ceilings shorten the path of overhead reflections, increasing their potential to cause comb filtering at your microphone. In a small room, limited volume and closely spaced boundaries can produce a boxy, colored recording. A reflection shield can reduce some rear and side reflections, but it can’t add room volume or replace ceiling treatment and careful mic placement.
Low Ceilings Increase Reflections
Ceiling height and overall room volume shape how quickly reflections return to your microphone: in a low-ceilinged space, the ceiling can create an early, audible reflection that contributes to room coloration and comb filtering. A portable shield behind your microphone doesn’t intercept this overhead path, so it can’t prevent ceiling energy from reaching the capsule.
You can reduce that path with a suitably placed ceiling cloud or other absorption above the recording area. Placement also matters: adjust your microphone and performer positions to avoid emphasizing strong reflected arrivals. Treat the shield as a partial measure within a broader setup, not as room treatment.
Small Rooms Sound Boxy
Room volume matters alongside ceiling height: small rooms often sound boxy because closely spaced boundaries reinforce resonances and standing waves, particularly in square or near-square spaces.
You can’t infer a universal problem from ceiling height alone, because no reliable threshold links a particular height or room volume to boxiness. A compact, symmetrical room can concentrate modal effects and create uneven low-frequency response that a microphone shield won’t correct. For vocals, place absorption behind you, such as a broadband panel or packing blanket, and consider a ceiling cloud to reduce early overhead reflections and comb filtering. These measures address reflection paths more directly than a shield surrounding the microphone. They won’t eliminate every modal resonance, but they can improve the environment’s consistency and reduce coloration.
Shields Cannot Add Volume
A reflection filter can’t increase ceiling height or room volume; it only absorbs limited sound near the microphone. In a small room, you hear resonances and reflections from the ceiling, floor, and walls. Those boundaries remain acoustically close, so their early reflections reach the microphone within milliseconds.
Ceiling reflections are problematic: they can combine with the direct vocal signal and produce comb filtering, which changes tone across frequencies. A shield behind the microphone cannot intercept those paths. To address them, treat the recording space. Install a ceiling cloud above the performance area and place broadband absorption behind you.
If loud singing overwhelms the room, the shield cannot create volume, raise the ceiling, or deliver isolation. You’ll need a larger, suitably treated recording space.
Mobile Voiceover in Hotel Rooms
Although a reflection filter can reduce some sound entering the rear of a cardioid microphone, it won’t make a reflective hotel room behave like a treated studio. For hotel voiceover, place thick duvets behind and beside you; these surfaces intercept reflections that otherwise return toward the microphone.
Use a shield only as supplementary absorption. Test your actual microphone and room with recorded speech: benefits can be limited or uneven, and close shielding can sound boxy or phasey. Larger, thicker filters may absorb more low-frequency energy, but their weight and bulk can undermine mobile setup.
| Option | Function | Mobile trade-off |
|---|---|---|
| Duvets | Broad absorption | Needs placement |
| Foam panel | Test baseline | Minimal bulk |
| Small shield | Rear reduction | Limited coverage |
| Large shield | More LF absorption | Heavy |
Record each setup; choose the clearest result.
Mic Stand Tipping Hazards
Because large reflection filters add weight and shift the load outward, confirm that your stand securely supports both the filter and microphone. These shields can be large and heavy, increasing the overturning tendency when their mass sits away from the stand’s central axis. Set the stand on a stable, level surface before mounting any equipment.
Keep the microphone and filter positioned so neither projects far enough to make the assembly unbalanced. Check the complete setup after adjustment, since moving either component changes how the load acts on the stand. If the stand doesn’t hold the combined equipment securely, use a more suitable support rather than recording with an unstable configuration. This simple check reduces the risk of the setup tipping during use in practice.
Foam Does Not Soundproof
Foam absorbs part of the sound energy that strikes it, reducing reflections inside a room, but it doesn’t block sound transmission through walls, doors, windows, or other openings.
That distinction matters when you use a reflection filter: it can lower some early reflections near your microphone, yet it cannot isolate your vocal from external noise or prevent leakage into adjacent spaces.
- Foam tiles treat internal reflections, not kitchen noise or traffic.
- Blankets and duvets absorb too, but don’t create isolation.
- Effective isolation requires mass, airtightness, decoupling, and sealed openings.
- Use shields for microphone control, not as portable soundproof booths.
If noise remains audible before treatment, foam won’t remove it; structural paths and gaps determine how much sound crosses the boundary during recording in practice.
Record a Clap Test First
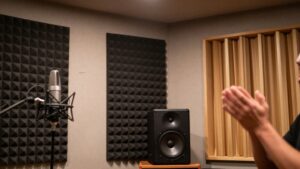
Before you buy a reflection filter, record a sharp clap from your intended vocal position and listen to how the room responds. It exposes early reflections and decay that can color vocal tracks. Listen for flutter echoes, narrow ringing, or a tail that persists after the initial transient. Repeat the test at positions: boundaries, ceiling height, and room dimensions create resonances that vary across the space.
Use the same microphone, gain, distance, and position when you compare clips before and after treatment. That comparison shows whether absorption changes reflection level or decay time at the mic. A clap test diagnoses acoustic problems, but it doesn’t establish that a shield will solve them for your vocal setup; shields mainly affect the area behind and around the microphone.
Conclusion
Portable reflection filters rarely fix an untreated room because they absorb only a small area behind and beside your microphone. You’ll get the most reliable improvement by placing absorption behind you, close-miking vocals at about six inches, and testing the space with a recorded clap. Curved panels can reduce some early reflections; isolation boxes may create coloration.
They don’t soundproof. In hotel rooms, prioritize soft surfaces, safe stand placement, ceiling clearance, and low ambient noise.
For practical guidance on this related topic, see our guide to acoustic treatment.