Home Studio Layout Ideas for Small Rooms, Bedrooms and Closets
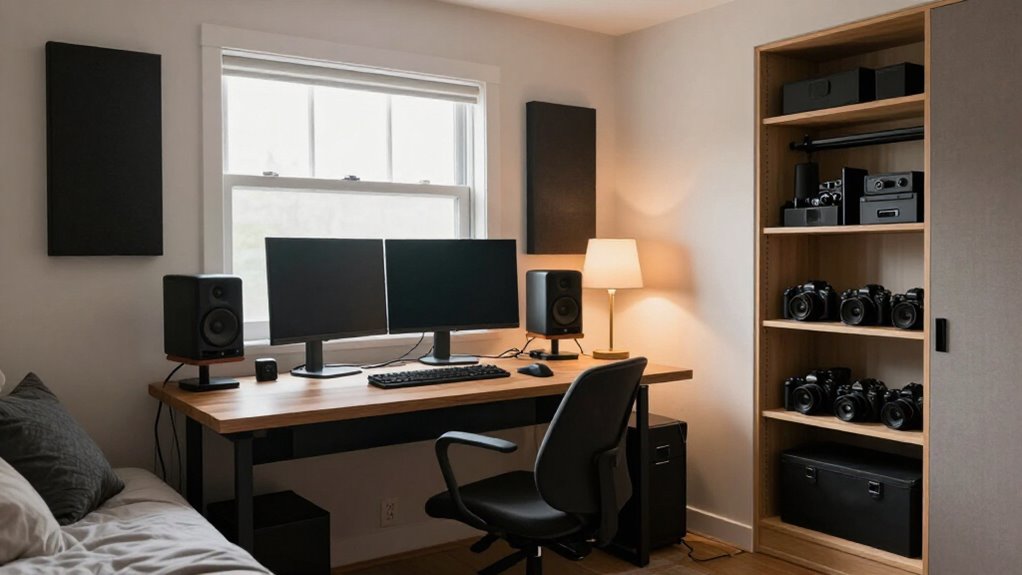
Create a flexible home studio by zoning your small room with rugs, lighting, and compact furniture while preserving a clear path.
Set nearfield monitors in an equilateral triangle, tweeters at ear height, and manage desk reflections with a thick mat.
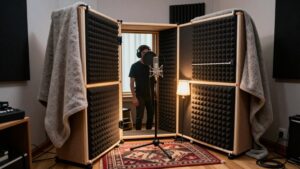
For voiceover, use a closet or corner with clothes behind the mic, clear floor space, and portable absorption. Treat reflections, seal gaps for isolation, and measure ceiling height before adding a loft.
Further guidance follows.
Hybrid Work Drives Acoustic Zoning
Hybrid work calls for clear zoning, even when a studio can’t support permanent walls. You can use rugs, furniture placement, and lighting to establish a desk zone while preserving open circulation. Position your work surface away from the bed or seating area to create a readable boundary and reduce visual distraction.
For flexible separation, suspend a ceiling-mounted curtain or place a lightweight bookshelf between work and living functions. Choose a wall-mounted fold-down table or compact desk so the work surface disappears after hours. In studios under 400 square feet, a loft bed releases the floor below for a dedicated desk area. These elements organize activity and sightlines; they don’t provide verified sound isolation or acoustic ratings. Treat them as spatial cues, not sound-control assemblies.
Closet Vocal Booth Layouts
A closet can define a compact vocal-recording zone within a studio while preserving the rest of the room for work or living. Keep its footprint clear: you need room for a chair, microphone stand, and comfortable movement. Move storage upward with shelves or closed cabinets, keeping cables, pop filters, and accessories off the floor. Install wall-mounted lighting, so illumination doesn’t consume usable standing area or introduce a bulky floor-lamp obstacle.
| Layout element | Space-efficient approach |
|---|---|
| Floor area | Reserve clear space for movement |
| Vertical plane | Add shelves or closed cabinets |
| Boundary | Use a curtain or lightweight divider |
These choices create a defined recording zone without permanently closing off your studio. You can open the divider when tracking ends, maintain flexible circulation, and keep accessories within reach.
Nearfield Monitoring Desk Setups
Place your desk symmetrically so the nearfields and your listening position form an equilateral triangle, with tweeters aimed at ear height and equal clearance from walls. Use compact monitors on isolated stands or wall shelves to reduce desk-borne reflections and preserve desktop space for essential gear. Add a rug, curtains, or broadband treatment at early-reflection points to tighten imaging and control small-room coloration.
Speaker Placement Fundamentals
For a reliable nearfield setup, position your monitors at ear height in an approximately equilateral triangle with your listening position. Measure from each tweeter to your seated head, ensuring both distances match as closely as your room allows. Toe the speakers inward so their tweeters aim directly at your ears, and keep them symmetric around the desk centerline.
Keep monitors clear of walls and especially corners whenever possible; nearby boundaries can boost low frequencies and skew your bass judgment. If space forces a close placement, use the manufacturer’s recommended rear-wall distance or boundary compensation settings. Put each monitor on a sturdy stand or isolation pad, with its drivers above the desk edge rather than behind it. Keep nearby gear low and balanced left to right.
Desk Reflection Control
Your desk can create early reflections that blur stereo imaging and alter tonal balance before direct sound reaches your ears. Mount nearfield monitors on isolation stands or dense pads, with tweeters near ear height. This decouples the cabinets and helps direct their output above, rather than across, the desktop. If stand height is limited, tilt the monitors so their acoustic axes aim at your ears, not the desk.
Keep the speaker pair and your monitoring point symmetrical: match each speaker’s distance to you and nearby sidewalls or furniture. Clear the area between speakers and listener of screens, controllers, hard drives, and reflective clutter where possible. For a compact desk that still produces a noticeable bounce, place a thick desk mat or similarly absorptive layer on the reflection path. It reduces high-frequency reflection energy without consuming valuable room area.
Listening Position Setup
A reliable nearfield setup starts with geometry: center your chair between the monitors and arrange all three points as an equilateral triangle, with each speaker-to-ear distance matching the distance between speakers. Set the tweeters at ear height, aim each cabinet directly toward your head, and keep your seat on the room’s centerline whenever possible. Match each monitor’s distance from its sidewall, front wall, and desk edges so early reflections arrive similarly on both sides.
In cramped rooms, move the pair forward from the wall as far as practical, preserving symmetry before chasing maximum separation. Keep the desktop uncluttered around the speakers and listening path; screens, controllers, and accessories can create short, uneven reflection routes that blur imaging. Measure from your ears, not the chair.
Monitor Isolation Solutions
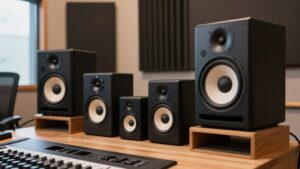
Isolation improves nearfield accuracy by limiting vibration transfer from each monitor into the desk, where resonances can smear low mids and compromise stereo focus. Use desk stands or dense isolation pads to decouple each cabinet with tweeters near ear height. Set both monitors symmetrically, with equal distance to your listening position, then toe them in so the speakers and your head form an approximately equilateral triangle. This preserves center imaging and makes panning decisions more reliable.
Keep cabinets out of desk corners and away from walls where practical; nearby boundaries can alter bass balance and create early reflections. In especially cramped bedrooms or closets, mount stable shelves to the wall or choose compact floor stands. You’ll reclaim desk space while preserving accurate monitor placement.
Small Room Acoustic Treatment
Small rooms benefit most from treating the reflections that reach your ears immediately after the direct monitor signal. Position nearfield monitors on a stable desk or stands, creating an approximately equilateral triangle with your listening position. Keep each speaker equally distant from your ears, and aim its tweeter at ear level for reliable stereo imaging.
Avoid placing speakers directly against walls or in corners. When space forces close placement, use boundary EQ controls and add suitable treatment. Install broadband absorbers at sidewall first-reflection points and, if practical, overhead. Add bass traps in available corners to control low-frequency buildup, which otherwise makes mix decisions translate poorly. In tight spaces, prioritize absorption thickness and symmetrical placement rather than covering every surface with thin foam panels alone.
Cable Management Strategies
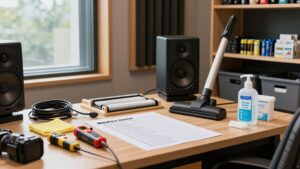
Once you’ve controlled early reflections and bass buildup, organize monitor cabling to preserve a clear, adjustable listening area. Route each monitor’s power and audio leads along the desk’s rear edge or beneath the work surface, keeping the desktop and floor free for stands, treatment, and safe movement. Secure runs with adhesive clips or an underdesk cable tray so cables don’t dangle or pull against connectors.
Keep balanced audio lines separate from AC power where practical to minimize induced hum and electrical interference. Coil only surplus length, then fasten it with reusable hook-and-loop ties; retain enough slack to reposition monitors without stressing plugs. Label both ends of every power and signal cable. When you alter toe-in, desk placement, or interface routing, you’ll identify connections quickly and troubleshoot without disturbing your listening geometry.
Best Layouts for Voiceover Artists
You can adapt a closet booth, bedroom corner, or portable treatment layout to control reflections without sacrificing usable floor area. Keep your desk compact and place the microphone away from parallel walls, using rugs, shelving, or a lightweight divider to separate recording and editing zones. Mount lighting and store gear vertically so you’ll preserve clear movement paths and keep the recording position accessible.
Closet Booth Configuration
A closet booth works best when it gives you enough depth to sit comfortably, place the microphone without obstructing the door, and aim its rear toward hanging clothes rather than a hard wall.
Position your chair and mic inside the closet, leaving a path to the door and wardrobe. Keep garments on hangers behind the microphone; their porous mass absorbs midrange and high-frequency reflections. Don’t compress them so tightly that you can’t shift your seat or refine mic placement.
Install a narrow shelf at arm’s reach for interface, script, and headphones, and use a wall-mounted sconce to preserve floor area. If the closet won’t fit you and the gear, set the microphone just outside the open doorway, using the hanging clothes as absorptive backdrop.
Bedroom Corner Setup
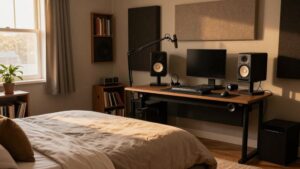
When floor space is limited, turn a quiet bedroom corner into a compact voiceover station with a small desk, wall shelves, and enough clearance for a mic stand and chair. Position desk tightly in the corner, then mount shelves above it for interfaces, cables, and scripts, keeping the floor clear. A spindle chair and small square side table use minimal footprint without crowding the bed.
Install a wall sconce at script height; focused light preserves stand placement and avoids floor-lamp reflections. Define the work zone with a rug or coordinated color palette instead of a divider, retaining visual openness. Store equipment in closed drawers or a cabinet to limit hard-surface clutter. Reserve your desktop for microphone, headphones, current script, and neatly routed cable slack.
Portable Treatment Layout
Because portable treatment must reduce early reflections without consuming the room, place a freestanding bookshelf or folding screen behind and slightly to the sides of the microphone position, separating the recording zone from the bed or living area. Keep the assembly outside the main circulation path, leaving windows unobstructed so daylight still reaches the room through sheer curtains.
A rug beneath the recording corner damps floor bounce and visually defines the temporary zone. Match its color palette to the surrounding space, so the enclosure feels intentional rather than intrusive. Store scripts, interfaces, and accessories on wall shelves instead of the floor; this preserves clear pathways and lets you fold, roll, or relocate the treatment when the room returns to daily use as needed.
Desk And Mic Placement
Define a dedicated work zone for your desk, using a rug or open shelving to separate it from the sleeping area without cutting off daylight or circulation. Place the microphone on a desk-mounted boom arm, oriented away from noisy windows and adjoining activity, so the capsule rejects more unwanted sound. Keep it close to your mouth and slightly off-axis; this limits room pickup and plosive bursts while preserving keyboard and script space.
Choose a compact desk or fold-down table, then tuck stools or chairs away after recording. Mount shelves for headphones and accessories, plus wall-mounted lighting, to keep the floor clear around your setup. That clearance improves movement, cable routing, and quiet mic access with less clutter.
Measure Ceiling Height First
Start with a floor-to-ceiling measurement before choosing a loft bed or ceiling-high storage. Record the usable height, not just the nominal room dimension: subtract the bed frame, mattress, ceiling fixtures, and any trim that limits installation. Then verify two clearances. Above a loft mattress, you need enough room to sit upright comfortably; below it, confirm that your desk, chair, or seating zone works without forcing a cramped posture.
In a 400-square-foot London studio, a loft bed created a compact sleeping area while releasing valuable floor space. Tall ceilings also make a small room feel less compressed and give you vertical storage options. In a 296-square-foot Brooklyn studio, cabinets run to the ceiling, separating everyday supplies from less-used items. Accurate height data prevents obstructive overhead choices and preserves circulation.
Heat Buildup and Dust Control
Keep windows clear of bulky furniture so daylight and airflow can reach each living zone without creating stagnant, overheated pockets. Use sheer curtains or adjustable blinds to diffuse glare while preserving ventilation across your sleeping, work, and recording areas. This helps equipment shed heat and keeps the room’s air from feeling heavy during long sessions.
Replace floor lamps with wall-mounted sconces or ceiling fixtures. You’ll free valuable floor area for seating, stands, and cable paths while reducing horizontal surfaces that trap dust. Put clothes, shoes, accessories, and supplies in closed wardrobes or cabinets rather than on open racks. Reserve high cabinets, built-ins, or ceiling-height kitchen cupboards for seldom-used belongings. Fewer exposed objects reduce dust near microphones, computer fans, and monitor ports, preserving cleaner airflow.
Foam Panels Don’t Soundproof
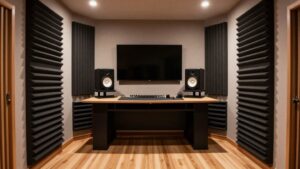
Although foam panels can tame flutter echo and early reflections in a home studio, they won’t soundproof the room. Use them to make your recording or call position less splashy, not to contain drums, monitors, or conversation. Lightweight, porous foam absorbs only a portion of reflected high- and mid-frequency energy; airborne sound still passes readily through it and through typical walls, doors, ceilings, and gaps.
For isolation, prioritize airtightness: seal the door perimeter, outlet penetrations, and other leaks. Then increase mass where practical with a solid-core door or additional layered construction, and use decoupling when you’re building or renovating. Those measures limit transmission; foam merely improves the acoustic conditions inside.
In a tight room, mount foam at first-reflection points or behind a mic for.
Best Layouts for 10×10 Rooms
Once you’ve treated reflections where they matter, arrange a 10×10 room in clear zones so furniture supports both usable floor area and predictable acoustics. Use rugs and placement to define sleeping, working, and lounging areas without building partitions. Keep major pieces at the perimeter, leaving a direct central path that avoids cramped, reflection-prone corners and reduces obstructive furniture density.
- Float a sofa at the bed’s foot, separating functions while maintaining open circulation.
- Choose a daybed with drawers, so bedding and equipment don’t consume cabinet space.
- Add a drop-leaf desk; expand it for meals, then fold it flat afterward.
- Position slim open shelving as a divider; it preserves daylight and sightlines.
- Install wall sconces, mirrors, and light finishes to increase perceived width without clutter.
Conclusion
You’ll get better results from a small studio when you treat layout as an acoustic system, not a furniture puzzle. Measure ceiling height, place nearfields symmetrically, and create separate zones for recording and work. Use closets carefully for vocal absorption, then control heat, dust, and ventilation. Don’t expect foam to soundproof; seal gaps and add mass instead. In a 10×10 room, prioritize listening position, clear pathways, and adjustable treatment for reliable, repeatable mixes and recordings.
Headphone Drive Check: Will My Interface Power These?
Estimate whether an audio interface can drive your headphones: power in mW, maximum SPL and margin to your own target, with every step shown.
Home Studio Room Calculator: Acoustic Treatment & Monitor Placement
Enter room size and finishes to get room modes, RT60 per octave, a panel count, monitor triangle, SBIR null and first-reflection points.