How to Make DIY Acoustic Panels That Actually Absorb Sound
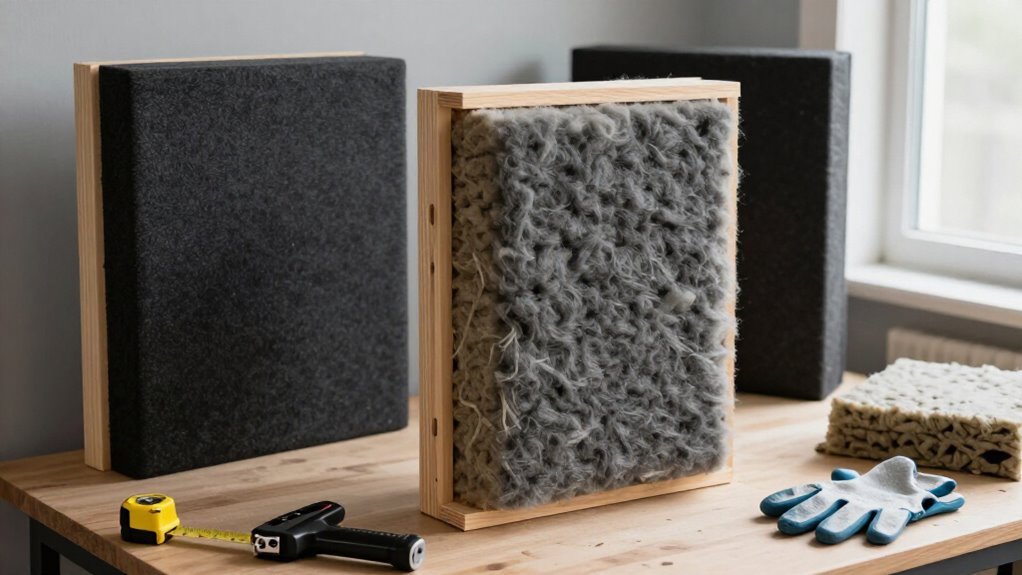
Build panels that absorb room reflections by framing a 2-inch semi-rigid fiberglass or mineral-wool board in wood and wrapping it with breathable, unbacked fabric.
You’ll get better voice-focused treatment with 1-inch fiberglass, but drums and bass benefit from 2 inches.
Wear gloves, long sleeves, and a respirator, then fully enclose the core. Staple fabric taut, mount D-rings into frame stock, and use a clap test to refine placement.
The steps below cover safe construction and maintenance.
Absorption Rating, Skill, Build Time
These DIY acoustic panels don’t carry a formal absorption rating such as an NRC value, so you shouldn’t treat the recommended materials and thicknesses as quantified performance data. Instead, select the core according to your primary source material. A 1-inch fiberglass panel can absorb human voices, whereas a 2-inch semi-rigid fiberglass or mineral-wool core is the recommended option for amplified music containing drums and bass. These dimensions are practical build guidance, not laboratory-verified coefficients across frequency bands.
You can complete this as a beginner-friendly project with basic tools. Plan one hour per panel for assembly, but don’t schedule that estimate as a total. Cutting the core, wrapping the fabric, and mounting each panel add time, particularly when you need accurate dimensions and secure placement.
Protect Against Fiberglass Dust
Once you’ve selected the panel core, control fiberglass exposure during cutting and wrapping. Fiberglass fragments can cause itching for days and create airborne dust, so use personal protective equipment before you handle the insulation. This reduces direct contact and limits contamination of clothing, tools, and nearby surfaces. It also makes the finished panel safer to transport later.
- Wear gloves, a long-sleeve shirt, and a respirator.
- Keep exposed skin covered and don’t touch your face.
- Move slowly to limit fiber release while positioning the core.
- Enclose each batt in a plastic mattress bag for containment.
- Cut and tape plastic neatly without compressing the insulation.
A sealed, uncompressed wrap keeps loose fibers out of the room while preserving the core’s thickness, handling stability, and sound-absorption performance.
Step 1: Cover Workbench With Protective Plastic
Cover the workbench with protective plastic before placing insulation on it to prevent fiberglass fibers and residue from contaminating the work surface.
Clamp a clean plastic mattress bag across the bench, creating a disposable barrier that contains loose material during panel wrapping. If the bag is wider than required, cut open its side seams while leaving the bottom intact. This produces a custom-width sleeve; use tape to set the side thickness so the plastic stays taut and doesn’t shift.
Place the insulation on the covered bench, then lower the panel frame over it. This sequence supports the material evenly and reduces handling before you flip the frame. Afterward, fold plastic inward and discard it when finished, following applicable local waste-handling requirements for safe cleanup.
Step 2: Gather Fiberglass and Frame Lumber
Start with a 2-inch semi-rigid fiberglass or mineral-fiber board for each panel; its thickness provides more effective absorption of drums, bass, and other amplified music than a 1-inch core.
For voice-focused treatment, you can use 1-inch fiberglass, but the thicker core better suits music rooms where low-frequency energy is significant. A 2-by-4-foot board costs about $7, making it a practical panel core.
Gather two 1-by-2-by-8-foot furring strips per panel; they cost roughly $1.50. Inspect each strip for straightness before buying: reject warps, twists, bows, or gouges that can prevent the frame from holding the absorber flat. Wear gloves, long sleeves, and a respirator while handling fiberglass or mineral wool; airborne fibers and direct contact can irritate your lungs and skin. Keep materials dry throughout.
Step 3: Cut 1×4 Boards to Size
For each 2 × 4-foot acoustic panel, cut two straight 1×4 boards to 49½ inches for the sides and two to 24 inches for the top and bottom.
The side pieces are 1½ inches longer than the 48-inch panel height because they span the thickness of the top and bottom boards. This layout produces a nominal 24-by-48-inch frame with outside dimensions. Before cutting, inspect boards for warp, twist, and gouges; straight stock lets the joints close evenly. Measure from one board end, mark each cut line, and verify dimensions before sawing.
Use a hand saw, jigsaw, or circular saw, keeping the blade aligned with the mark. If you don’t have tools, ask a hardware store to cut the lumber. Wear eye and ear protection while cutting.
Step 4: Staple Fabric Around Insulation
Once the frame holds the insulation securely, lay breathable, unbacked fabric face down on a clean surface and center the panel over it. Leave at least 6 inches of material extending beyond every side so it can wrap onto the rear. Before working on the panel, test staple depth on a fabric scrap; staples should grip firmly without cutting fibers or punching through. Pull one long edge taut, but don’t over-stretch the weave, and drive staples at 2-inch intervals.
Move to the opposite edge, maintaining even tension across the face to prevent wrinkles, ripples, and later sagging. Staple the remaining top and bottom edges, folding each corner into a neat, low-profile pleat. Inspect the back for loose sections. Apply spray adhesive behind loose fabric.
Step 5: Square Frame Before Stapling
Before you staple, verify that all outer-frame corners meet at true 90-degree angles; a square frame hangs level and lets the fabric wrap with uniform tension. Use a right-angle square during assembly, or clamp the corners until the joints are secured. Check the frame by measuring diagonals: matching diagonal measurements confirm it is square.
Measure the inner opening at the top and bottom. Cut the 1×2 horizontal inner-frame pieces about 1/8 inch overlength, then you’ll sand for a snug fit. Install these pieces first.
Next, measure the remaining inside height, cut the vertical pieces similarly overlength, and sand them to fit. Lay fabric face down, center the squared frame, and staple alternating opposite sides. This sequence distributes tension evenly and prevents skewing or distortion.
Step 6: Attach D-Rings and Vacuum Fibers
Mount two heavy-duty D-ring hangers to the wood frame with their supplied screws, positioning them level and far enough apart to distribute the panel’s load. Drive each screw into frame stock, not through fabric or insulation, so wood carries panel’s weight. Use picture hangers rated for at least 20 lb, accounting for the panel.
For ceiling installation, select fasteners and wire rated for the load and anchor them into ceiling rafters whenever possible. Avoid relying on drywall alone unless its anchor system is specifically load-rated. After handling fiberglass or mineral wool, keep gloves, long sleeves, and a respirator on while you vacuum loose fibers from clothing and the work area. Don’t abrade, puncture, or cover the breathable fabric because restricted airflow measurably lowers sound absorption.
Perform a Clap Echo Test
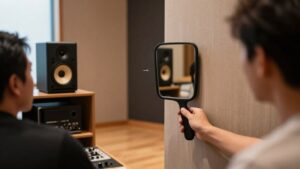
With the panels installed, assess their effect with a simple clap echo test: stand in the room, clap sharply once, and listen for flutter, ringing, or repeated reflections between hard surfaces. Repeat the test from several positions, because reflection patterns and echo strength can vary across the room. Keep your location and clap force as consistent as possible when comparing results before and after treatment.
Note the decay time: how long the sound remains audible after each clap. Also judge whether speech-like transients sound clearer and the room seems less reverberant. This listening check can reveal obvious early reflections and flutter reduction, but it doesn’t measure soundproofing or produce precise acoustic data. Use it to guide placement adjustments and confirm that panels improve conditions.
Fabric Sag: Loose Staples—Restaple
If the fabric develops sagging or ripples, pull it taut and restaple it to the frame so the panel face remains firm and smooth. Remove loose staples where necessary, then tension the cloth evenly rather than drawing it toward one side. On large panels, secure the center of each edge first; work outward in alternating, opposite-edge passes toward the corners.
| Check | Corrective action |
|---|---|
| Edge ripples | Restaple from center outward |
| Center sag | Staple divider support |
Set staples approximately every 2 inches along each edge, matching the original wrapping pattern. Fold each corner neatly without bunching. If a horizontally mounted panel loosens across its center divider, add staples directly along that support to restrain the span. This maintains uniform tension and prevents localized wrinkles during repair.
Inspect Panels Annually for Dust
Inspect each acoustic panel annually for dust accumulation on its breathable fabric, as surface debris can reduce the sound energy reaching the absorptive core. Examine the face, perimeter edges, and any fabric folds under good lighting, since these areas commonly retain settled particles. Don’t press against the panel while checking it: compressing fiberglass or mineral wool changes its pore structure and can reduce absorption performance.
Instead, inspect visually and note any visible film or localized buildup. If you find dust, use only the cleaning method approved by both the fabric and insulation-core manufacturers. Their guidance helps you preserve airflow through the facing while avoiding tears, coating damage, or fiber release. Wear protection if specified, and don’t use aggressive brushing, soaking, or unapproved vacuum attachments.
Conclusion
You can build effective DIY acoustic panels by using rigid fiberglass, a sealed wood frame, and breathable fabric. Your panels won’t soundproof a room, but they’ll reduce reflections, flutter echo, and reverberation when placed at first-reflection points. Protect yourself from fibers during construction, vacuum each panel before covering it, and keep fabric taut to prevent sagging. Test results with a clap echo test, then inspect panels annually for dust, damage, and loose staples.