
How to Make a DIY Vocal Booth for Cleaner Home Recordings
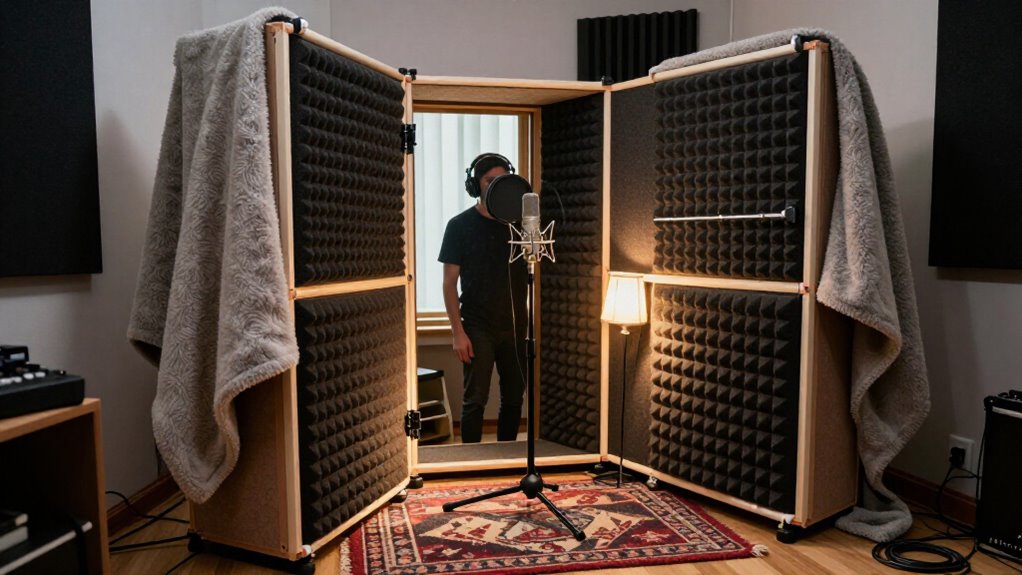
Build a compact ¾-inch PVC frame in a quiet 5-by-5-foot corner, about 30×60×77 inches, and drape moving blankets over the walls and roof. Keep your computer outside, cover the floor with a dense rug, and leave one blanket edge movable for access and airflow. Clamp blankets taut with slight overlap; tape only the seams. Record a 10-second test, then add thick porous corner traps if vocals sound boomy. The following steps refine placement, ventilation, and drying.
Cleaner Vocals, Beginner, Four Hours
In about four hours, you can build a compact PVC-frame vocal booth that noticeably reduces room echo in home recordings. Its fully covered interior absorbs mid- and high-frequency reflections, producing a drier vocal than an untreated bedroom. For a beginner, this controlled environment improves intelligibility and makes editing, compression, and EQ more predictable.
Position the booth in your home’s quietest area, and reduce nearby HVAC, appliance, and traffic exposure before recording. Low-frequency vibration remains difficult to isolate, so distance from rumbling sources matters. Keep your computer outside the booth and use a wired connection; fan noise and wireless interference can overwhelm a clean take.
Record a test line, then listen for fluttery highs or boxy bass buildup. Adjust coverage until response is neutral.
Gather PVC and Moving Blankets
Start by selecting a PVC frame kit or individual 3/4-inch PVC components that match both your available floor space and blanket layout. Compare kit dimensions, 58×78, 58×58, or 38×58, with your planned wall coverage. A “COMPLETE. DIYPVC Vocal Booth Frame Kit. Just Add Glue!” simplifies sourcing.
- Use 3/4-inch pipe and couplings, cutting runs to your target footprint, often 30 inches wide by 60 inches deep.
- Buy moving blankets sized for each wall; two 96-inch blankets commonly cover side walls.
- Fold a roof blanket in half for overhead coverage.
- Choose 6-inch Workpro clamps, office clips, or S-hooks to secure edges.
- Map blanket positions first, allowing clearance; taut, wrinkle-free surfaces limit internal reflections.
This material plan supports even coverage and predictable assembly when you build the cage later.
Step 1: Clear a 5-By-5-Foot Corner
Choose a true 5-by-5-foot corner (about 60 by 60 inches) whose adjoining walls are dense and well away from furnaces, laundry equipment, water pumps, and hallway traffic. Remove loose shelves, framed art, cables, and other objects that rattle or create hard early reflections. Position yourself so the microphone’s pickup axis doesn’t point directly at either wall; this reduces strong, immediate boundary reflections.
Caulk and air-seal gaps at baseboards, outlets, and small wall penetrations to limit airborne noise leakage. Check the floor for squeaks or movement, and stabilize it before recording; footfall vibration can enter the microphone through the structure. Use blankets that cover both wall faces continuously, preventing exposed gaps that function as acoustic leak paths during vocal takes.
Step 2: Measure and Mark Frame Layout
Map the booth on paper before cutting material, showing the footprint, finished wall height, door opening, and any window or ventilation penetrations. For a PVC enclosure, mark a 30-inch-wide by 60-inch-deep footprint and a height near 77 inches. Keep the frame a few inches smaller than acoustic blankets so their edges overlap the walls evenly; two 96-inch blankets can wrap the walls, with one folded across the roof.
Transfer the plan to the floor, then verify diagonal measurements and booth clearance. If you’re using wood, measure each wall from subfloor to ceiling and label stud cuts; a short wall can measure 30 inches wide by 76 inches tall. Mark the door early: a 26-inch frame opening can shrink to roughly 19 inches with installed seals.
Step 3: Assemble PVC Frame Joints
With the footprint and openings marked, cut the ¾-inch PVC pipe to your planned wall, roof, and crossbrace lengths, leaving enough clearance that acoustic blankets will overlap without stretching. Use matching ¾-inch couplings to connect straight sections, then assemble the base on the marked floor. Add vertical pipes at each corner and join them to the roof rails. Install additional crosspieces across the walls and roof; they increase stiffness, limit racking, and provide support points for the enclosure material.
Press every pipe fully into its coupling so the shoulder seats evenly. Before proceeding, measure opposite diagonals: equal measurements indicate a square frame. Check that it sits level, doesn’t rock, and remains stable under light hand pressure. Correct misaligned joints now, before adding acoustic treatment.
Step 4: Clamp Blankets to Crossbars
Drape the acoustic blankets evenly over the PVC crossbars so they cover each wall with slight overlap at corners and seams. The overlap reduces direct gaps that can admit reflected sound and gives you material to clamp without pulling the panels taut. Use 6-inch Workpro clamps at regular intervals along each crossbar, gripping both the blanket and PVC securely.
Position clamps near corners and at midspans to limit sagging and slipping. Where blanket edges separate or curl, add orange clips or sturdy office clips to close the seam. If your blankets have grommets, hang them from the frame with S-hooks instead; this distributes load through the reinforced holes. Keep one entrance edge unclamped or lightly clipped so it moves. For airflow, clip it open.
Step 5: Add a Thick Floor Rug
Place a thick, dense rug across the booth floor to absorb early reflections and reduce footstep noise that can reach the microphone. Hard flooring reflects midrange and high-frequency energy upward, where it can enter the mic directly or after bouncing from nearby surfaces. Choose a rug that covers the entire recording position, including the area beneath your chair, feet, and microphone stand. This coverage reduces exposed reflective floor around the source and limits vibration from shifting your weight.
Secure the rug so it lies flat, with no curled edges or movement that could create a tripping hazard or transmit stand noise. If the floor remains acoustically hard, add a dense rug pad underneath. The pad increases thickness, improves floor contact, and provides cushioning too.
Step 6: Tape Blanket Seams Closed
Overlap adjoining acoustic blankets slightly and tape each seam along its full height to limit gaps that allow sound to enter or escape the booth. First, secure the blankets to the PVC frame with clamps, aligning their edges without stretching the fabric. A small overlap creates continuous coverage while preserving the blankets’ thickness and reducing direct air paths through the enclosure.
Apply tape from the top of the frame to the bottom, pressing it firmly and consistently onto both blanket faces. Check that clamps carry the blanket weight; tape should seal the joint, not support the panel. Keep the entrance seam accessible: leave it untaped or fit a movable closure. This lets you enter, exit, and ventilate the booth without disturbing the fixed seams.
Record a 10-Second Test
Before you begin a full session, record a 10-second sample in the completed booth at your normal microphone distance and performance volume. This short baseline reveals problems before they affect an entire take. Speak or sing material representative of your session, then monitor playback on headphones. Listen for audible echo, a boxy or boomy tonal character, steady room tone, and intermittent exterior noise. A booth that sounds different from its immediate surroundings may still contain reflective gaps or poorly placed absorption.
Identify background sources, including computer fans, HVAC cycling, refrigerators, or nearby appliances, and correct them at the source when possible. Then change one variable: reposition a blanket, adjust microphone placement, or alter the ventilation opening. Record another 10-second sample and compare both files.
Boominess: Trap Corners
Boominess often builds in booth corners, where low-frequency sound pressure concentrates. You reduce this buildup by placing thick, porous absorption across each corner. Fibrous traps outperform thin foam because their depth dissipates more low-frequency energy. Mount them floor to ceiling when possible; full-height coverage treats more vertical pressure buildup.
| Location | Material | Result |
|---|---|---|
| Lower corners | Thick porous trap | Reduces bass buildup |
| Full height | Trap with air gap | Improves low-frequency absorption |
If space permits, leave an air gap behind each corner absorber. The gap increases effective depth and improves lower-frequency absorption. Use traps with wall blankets or panels; don’t rely on thin foam, which generally can’t control bass boom. After installation, repeat your 10-second test and directly compare low-mid weight with the untreated result on playback.
Air-Dry Blankets Between Sessions
After recording, open the booth entrance and use movable clips to hold it back so air can circulate around the blankets. Your voice, body heat, and room humidity can leave moisture in dense fabric, particularly inside a small enclosure with limited air exchange. Keep the booth ventilated while it is unused, rather than sealing it immediately with a curtain, cover, or closed entrance. This allows damp areas to dry and reduces the conditions that support musty odors.
Check blankets before you close the booth. They should feel dry throughout, including folds, corners, and layers that face the frame. If fabric remains cool or damp, leave the entrance clipped open longer and increase room ventilation. Fully drying blankets between sessions limits trapped moisture in storage.
Conclusion
With PVC, moving blankets, and a clear corner, you can build a compact vocal booth in about four hours without permanent construction. Your frame and sealed blanket seams reduce early reflections, while corner treatment limits low-frequency buildup. Verify results with a consistent 10-second recording, then adjust blanket spacing or add absorption where you hear ringing or boominess.
Air-dry the blankets after use to prevent moisture and odor, and you’ll maintain cleaner, repeatable home vocal recordings.
