How to Use In-Ear Monitors for Singers: Fit, Mix and Pitch Control

Fit your IEMs with a secure seal, route cables over your ears, and keep tips and charged batteries ready.
Set your vocal gain for efficient full-volume singing, then place piano, keys, or acoustic guitar ahead as your pitch anchor.
Keep your vocal centered, pan instruments wide, and lower the anchor slightly as the band enters.
Check RF strength, cable strain relief, and antenna clearance before stage time.
The following steps help keep every cue stable.
Reliable Onstage Pitch Reference
Build your IEM mix around one dependable pitch anchor, usually piano, keys, or acoustic guitar, and place it clearly in front before adding the rest of the band. Establish your supported vocal gain stage first: set mic preamp and IEM monitor levels so you can sing with normal, efficient effort without straining or backing off. Then raise the anchor until you can match pitch reliably at full performance intensity. As drums, bass, and other instruments enter, reduce it slightly enough to preserve vocal audibility and prevent masking.
Keep both earpieces in during performance. Use stereo when available, placing instruments across the field; don’t stack everything in the center. This separation helps your brain identify harmonic movement, interval relationships, and pitch cues quickly. Keep monitor levels consistent throughout.
Spare Ear Tips and Batteries
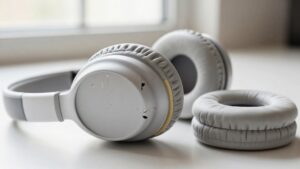
Keep spare ear tips and fresh batteries in your gig kit: a secure tip seal preserves isolation, bass response, and the clear pitch reference you need without raising IEM volume. Stable seal keeps your monitoring level conservative and reliable. Multiple foam or silicone sizes let you correct a leak quickly instead of turning up. Replace tips when they feel loose, worn, or uncomfortable; seal changes can disrupt your familiar diaphragm-and-resonance feedback and invite overcompensation.
- Pack several approved sizes and shapes for each earpiece.
- Check both channels’ seal if you hear inner hum or lost clarity before changing the mix.
- Carry fresh spare batteries for wireless receivers or active earbuds.
- Replace power before rehearsal or performance; don’t risk a dropout that makes you force vocals.
Step 1: Sanitize Ear Tips Before Fitting
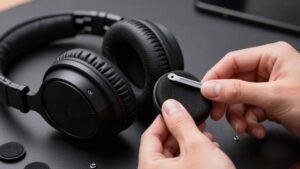
Before fitting the spare tips in your gig kit, wash your hands and wipe each tip with isopropyl alcohol or the cleaner approved by its manufacturer. Clean the outer surface and canal-contact end, removing skin oil and microbes that can trigger irritation. For foam tips, use a fresh pair rather than one compressed in a dirty case.
If you’re testing sizes, sanitize each pair separately; residue can alter pressure, comfort, and seal consistency. Let every tip dry completely before insertion. Damp material compromises hygiene and may weaken the acoustic seal, reducing low-frequency response.
Once you’ve selected and fitted a clean pair, keep that same set in place for the session. A stable seal keeps your vocal level and pitch cues consistent through every performance.
Step 2: Charge the IEM Receiver
Charge your IEM receiver fully before soundcheck, using the manufacturer’s indicator or specified charge time to confirm it’s ready. Don’t estimate by habit: rechargeable packs can lose voltage sooner when RF activity is high, risking instability, reduced clarity, or a dropout during rehearsal or performance.
If you use a wired charger, seat each connector firmly and inspect the receiver’s charging contacts for dirt, damage, or poor alignment. A charge light can indicate connection without guaranteeing reliable charging.
Before practice begins, power on the receiver and verify that it receives clean in-ear audio. Pack a tested spare charging cable and, when your system supports it, a compatible power bank. These backups let you restore power between soundcheck and the set without improvising unsafe power arrangements.
Step 3: Insert Earbuds With Cable Over-Ear
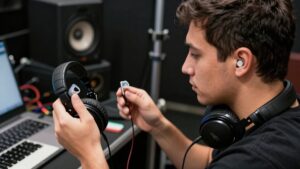
With the receiver powered and verified, fit the earbuds by routing each cable up and over the corresponding ear before inserting the eartip. This routing prevents cable movement from tugging the tips as you sing or move, helping preserve a stable seal.
Begin with a dry-fit test: choose an eartip size that seals securely without pressure or pain. A proper seal improves isolation, so you hear your diaphragm-supported vocal more clearly at lower monitoring levels. Gently twist each eartip into place, then confirm both sides sound balanced and secure.
Don’t force a tip or raise volume to overcome poor seal. If you feel pain, pressure, dizziness, or a loose fit, remove the earbuds and refit with another size. Keep both earbuds inserted for isolation.
Step 4: Build a Vocal-Forward Mix
Center your IEM mix on your lead vocal, starting at soundcheck by setting microphone preamp gain with enough headroom for your strongest singing. This keeps your vocal front and center without clipping when you sing at full energy. Raise the vocal channel until words and pitch feel clear at a safe, comfortable level.
Then add only enough piano, keys, bass, or other rhythmic reference to lock intonation and time; don’t let accompaniment mask your voice. Pan guitars wide left and right, and place other vocalists off center, preserving a clean center image. Use monitor EQ to reduce proximity-heavy low frequencies near 200 Hz when needed, so your voice sounds natural rather than boomy and fatiguing. Add only a touch of dark reverb for space.
Step 5: Recheck Seal Between Songs
Between songs, quickly press or adjust each IEM housing and listen for a sudden loss of low end or muffled vocal clarity, both signs that the seal has shifted. A loose seal can make you reach for more monitor level just to hear yourself, reducing efficient diaphragm engagement and increasing vocal strain. It also changes isolation and your perception of the 800 Hz to 3 kHz midrange, where vocal intelligibility and pitch reference sit.
Restore the seal before asking for level or EQ changes; otherwise, you may chase a fit issue as though it were a mix problem. If shifting happens repeatedly, test tip sizes and compare foam with silicone in rehearsal. A consistent fit from song to song helps prevent inner hum, disorientation, unclear vocals, and protects hearing.
Step 6: Lock Bodypack, Wipe Connectors
Before you go onstage, power off or unplug the transmitter, fully press-fit the IEM plug into the bodypack until it bottoms out, and secure the pack to your belt or harness.
Use the cable-routing clip or grommet to anchor the lead and keep slack away from both connectors. This prevents movement and vibration from working the plug loose while you move. Confirm the connection with a gentle tug at the strain-relief point, not the cable itself. You’ll verify a solid lock without stressing the conductors.
If reconnecting produces crackling or a disorienting inner hum, power down, fully reseat the IEM plug and bodypack connector, then check your microphone and monitor gain stages. Secure routing again before performing. Don’t continue until the connection feels stable.
Verify RF Signal Strength
With the bodypack securely connected, confirm that it receives a stable RF signal before soundcheck. Watch the receiver’s RF/Link or signal-strength indicator and keep it in the safe, green range; amber or red warnings can precede crackles or dropouts.
Check RF at center stage, downstage, and beside cable racks or metal structures, where reflections and shadowing change coverage. Keep the transmitter antenna oriented as its manufacturer specifies, often upright, and don’t block it with your body or mic stand. Scan channels for local interference, or run auto-scan, then retest after any channel change.
Once your final levels are set, perform a brief walk test while singing, laughing, and speaking to expose movement-related RF faults before performance begins and correct them with your engineer.
Dropouts: Reposition Receiver Antenna
If your IEM signal drops out, reposition the receiver antenna to give it the clearest practical path to the transmitter, often by angling it upward or outward. Keep it clear of your body, clothing, belt pack, metal, and the back of your head. Don’t tightly twist or sharply bend it; either condition can reduce range and create intermittent loss.
| Moment | What you protect |
|---|---|
| Sudden silence | Your confidence |
| Clear return | Your performance |
During soundcheck, sing at performance volume while a trusted technician watches RF behavior. Move through normal turn-and-face positions, then adjust the antenna until reception remains stable. After each change, test quiet-to-loud transitions and head movements again. Stop and correct recurring losses before performing; reliable monitoring protects your timing, pitch, and confidence onstage safely.
Inspect Cable Strain Relief Weekly
Weekly, inspect your IEM cable’s strain relief at both the earpiece and connector ends, since these bend points often fail before the rest of the cable.
Gently tug each area while monitoring for crackling, cut-outs, or housing movement. Examine the first 1 to 2 cm of relief for fraying, exposed conductors, flattened insulation, or tiny rubber splits. Route the cable behind your ears and neck with enough slack that the relief never carries tension or repeatedly folds at the connector.
If your model uses a notch or clip, confirm the cable sits fully in it; a mis-seated lead can flex internally despite looking undamaged. Don’t ignore connector play or channel dropouts when you move. Stop using the cable immediately and replace it before it fails during performance.
Conclusion
You’ll sing more confidently when your in-ear monitors provide a secure fit, a clean personalized mix, and dependable pitch reference. Sanitize and test ear tips, charge the receiver, route cables over your ears, and lock the bodypack before each set.
Confirm RF strength and keep spare tips and batteries ready. If dropouts occur, reposition the antenna or receiver immediately. Afterward, wipe connectors and inspect cable strain relief weekly to protect signal reliability and your hearing.