How to Connect a Mixer to an Audio Interface Without Noise or Feedback Loops
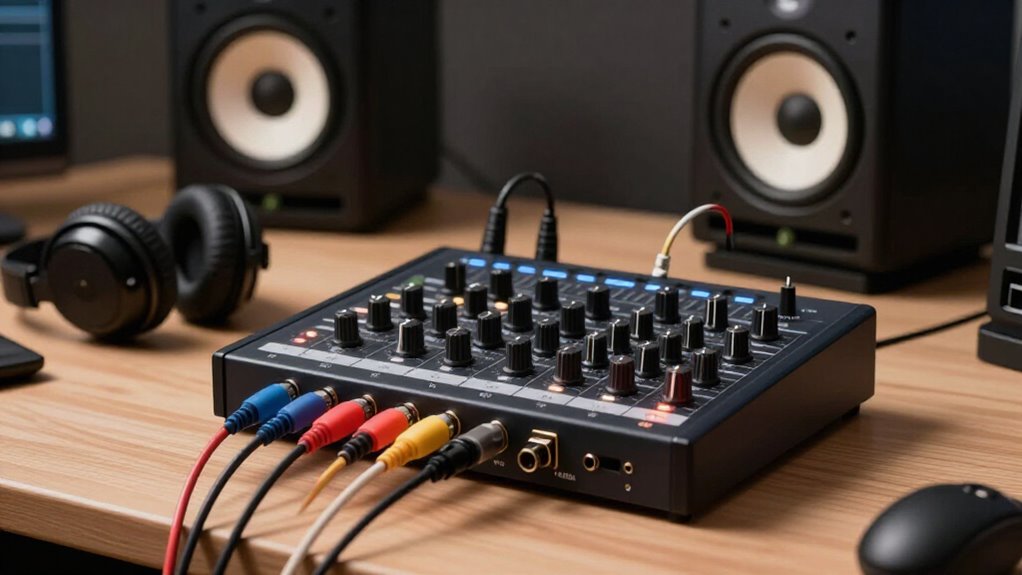
Power down equipment and lower the mixer master. Connect Main Out L/R to two interface inputs set to Line, using balanced TRS only when both ends support it. Select inputs 1/2 as a stereo pair and connect interface outputs directly to monitors.
Keep computer-return audio on a dedicated mixer channel excluded from the recording bus. Raise levels gradually, watch meters, and mute any return channel if feedback starts.
Next, check grounding, cables, and connectors for noise.
Silent Stereo Signal Routing
Route the mixer’s left and right main outputs to two separate inputs on your audio interface to retain the full stereo image. Assign the left output to interface input 1 and the right output to input 2, then select those inputs as a stereo pair in your recording software. Set the mixer’s main level and the interface preamp gains conservatively; begin low, raise levels gradually, and prevent clipping at either stage. Monitor the interface input meters while sending program material through the mixer.
Keep the interface’s playback outputs out of mixer input channels unless your workflow specifically requires return monitoring. That return path can feed the mixer’s main bus again and create a feedback loop. If hum persists, use an isolator; preserve protective grounding.
Verify Balanced TRS Cables
After confirming the stereo routing, connect the mixer’s balanced left and right outputs to the interface’s balanced inputs with balanced TRS cables. This arrangement rejects electromagnetic interference and helps reduce hum, but only when both connection points operate in balanced mode. A TRS plug doesn’t make an unbalanced jack balanced.
- Verify the mixer outputs are balanced.
- Confirm the interface inputs accept balanced TRS signals.
- Inspect plugs, contacts, and cable shielding for damage or poor contact.
- Keep runs short; test one lead against a known-good balanced cable if noise remains.
A damaged shield or intermittent connector can admit noise despite correct routing. Compare channels individually: substitute one cable at a time and note whether the noise follows it. This isolates the faulty lead quickly, reliably.
Step 1: Power Down Both Devices
Before handling any audio connections, power off both the mixer and audio interface. This prevents pops, clicks, and signal bursts from traveling through the connected signal path to monitors or speakers. Do not insert, remove, or reseat TRS cables while either unit is powered. Confirm that each connector is seated and that the cable routing is complete before restoring power.
After securing every connection, keep your speaker or monitor level low. Switch on the audio interface first, then power on the mixer. This sequence lets the interface stabilize before it receives the mixer’s output. When shutting the system down, first mute or reduce the mixer outputs. Then turn off the mixer, followed by the interface. On next startup, raise volume gradually and check noise.
Step 2: Lower Mixer Master Fader
Lower the mixer’s master fader to a low setting before sending signal to the audio interface. This prevents an unexpected high-level signal from overloading the interface when you begin setup. Raise the fader gradually while watching the interface’s input meter. Stop increasing it before the interface clips, then use the interface input control for final gain adjustment.
Aim for a healthy, stable input level that leaves headroom for peaks. The master fader controls the signal level, not electrical noise; reducing it won’t eliminate hum caused by grounding or other equipment issues. If feedback begins, immediately lower the master fader or mute the channel producing it. While setting level, keep microphones behind the main speakers to minimize feedback risk while you adjust the master fader.
Step 3: Connect Mixer Main Outputs
With both devices powered down or their levels turned down, connect the mixer’s left and right main outputs to the corresponding left and right line inputs on the audio interface using two cables. Use balanced cables when both devices support balanced connections, as they help reject hum and electromagnetic interference. If either connection is unbalanced, choose the appropriate unbalanced cable type and keep each run as short as practical.
Keep the mixer’s main output and interface input gain down; after connection, raise levels gradually to prevent loud signals. Confirm that the left output reaches the left input and the right output reaches the right input. Push every connector fully home, and inspect each cable for damaged shielding, loose plugs, or visible wear before use.
Step 4: Set Interface Inputs to Line
Do not select Mic mode. Mic mode engages additional preamp gain designed for low-level microphone signals; with a mixer feed, that gain can overload the interface and make hiss or other noise more apparent. If your interface uses a combined Line/Inst selector, choose Line, not Inst. Instrument mode is designed for lower-level, high-impedance sources such as an electric guitar, not a mixer’s Line output. Confirm the mode indicators carefully before recording.
Step 5: Match Input Gain Levels
Set the mixer’s channel gain first, using the loudest expected source material to produce a strong, clear signal without clipping. Then set the channel fader to establish the required mix level. Send the mixer output to a line-level interface input, not a microphone input, because mic preamps add gain that can distort the signal.
Begin with the interface’s input gain near minimum. Play the loudest passages you expect to record, then raise that control until the interface meter shows a healthy level without illuminating its clip indicator. Leave practical headroom for transient peaks, ensuring neither the mixer nor interface overloads. Don’t use excessive interface gain to rescue a weak mixer output: it raises the audible background-noise floor. Correct mixer gain staging preserves signal quality.
Step 6: Label Cables With Tape
Before you connect the system, label both ends of every cable with its source and destination, such as “Mixer Out L/R” and “Interface In 1/2.” Add the cable type and role—“balanced TRS,” “unbalanced TS,” return, USB, or power—and use distinct tape colors for mixer outputs, interface returns, and power connections.
Write identifiers at each end, then compare every label with the mixer jack and interface jack before you plug anything in. Keep wording short and standardized: “Aux Send 1,” “Monitor Return,” or “USB Interface.” Place tape so it remains visible after installation and doesn’t cover connector latches or strain relief. This preparation lets you trace signal routes without guessing. If you troubleshoot noise or feedback, disconnect and reconnect one labeled path at a time only.
Listen for 60 Hz Hum
With every cable labeled and connected, monitor the system at a normal listening level for a steady low-frequency hum or buzz. In 60 Hz mains regions, a persistent tone near 60 Hz often indicates a grounding problem. Briefly disconnect the USB cable linking your computer and interface. If the noise stops, the computer or USB connection likely participates in a ground loop.
Verify that your mixer, interface, and attached equipment use properly grounded outlets, particularly in older buildings with uncertain wiring. Where both devices provide balanced inputs and outputs, use balanced cables and inspect their shielding, connector contacts, and terminations. If the hum remains, identify the noisy device and insert an audio isolator or ground-lift DI box. Don’t defeat a power plug’s safety ground.
Fix Monitor Return Feedback
Route the mixer’s main outputs to the audio interface’s line inputs, then connect the interface outputs directly to your monitors. Don’t route that monitor return into a mixer channel that feeds the same interface outputs; you’ll create a loop that amplifies itself.
If you need computer audio through the mixer, use a dedicated return channel. Keep its assignment out of the recording bus.
| Check | Required setting |
|---|---|
| Return channel | Not assigned to recording bus |
| Warning sign | Rising howl or squeal |
| Immediate action | Mute or lower return |
Use balanced cables between the mixer and interface, and between the interface and monitors, whenever both ends support balanced connections. If feedback begins, mute the return channel immediately, then verify its bus assignment before restoring level at low volume.
Clean Connectors With Isopropyl
Power off the mixer and audio interface, then clean accessible plug contacts and connector surfaces using a lint-free swab or cloth lightly dampened with 90% or higher isopropyl alcohol. Don’t pour the alcohol directly into a jack or soak plastic housings. Instead, wipe exposed XLR, TRS, TS, RCA, or USB connector shells and metal contacts gently, lifting grime and light oxidation without forcing material into openings.
For recessed jacks, clean only the reachable rim; don’t push a wet swab deep inside. Replace the swab or rotate the cloth as it collects residue, so you don’t redeposit contamination. Allow every cleaned connector to dry completely in open air before reconnecting cables. Then inspect plugs for remaining discoloration, seat each cable firmly, and power the system.
Conclusion
You’ll achieve quiet, stable stereo routing when you use balanced TRS connections, set levels before powering up, and keep the mixer’s master fader low during patching. Label each cable so you can verify left, right, send, and return paths quickly. If you hear 60 Hz hum, inspect grounding and connector condition. Prevent feedback by keeping monitor returns out of their own input path. Clean contacts, retest the signal chain, and then raise gain gradually, carefully.