How to Clean Audio Jacks and Connectors to Stop Crackles and Dropouts
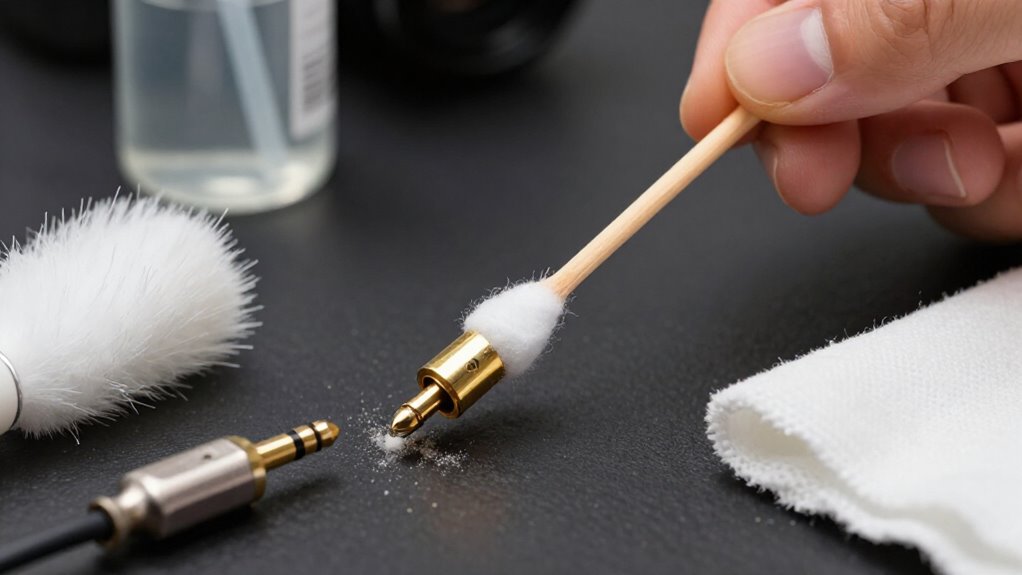
Power off your device, disconnect every cable and power source, and remove removable batteries. Wipe the unplugged plug’s accessible metal contacts with a lint-free swab lightly moistened with 90% isopropyl alcohol or residue-free contact cleaner; never spray or flood the jack.
Inspect under bright light for corrosion, pits, looseness, or bends. Let everything dry fully, then reconnect and test. If crackles return or audio changes when moved, stop and seek repair. Proper maintenance steps follow.
Clean Contacts to Prevent Oxidation
Dirt, skin oil, and oxidation residue can interrupt electrical continuity at a headphone plug or jack, causing crackling, intermittent audio, or dropouts. Power off the device and disconnect headphones before cleaning.
Apply a amount of clear, fast-evaporating, residue-free electrical contact cleaner to a lint-free swab or cloth, not directly into the equipment. Wipe the plug’s sections, keeping liquid away from housings and seams. Test the cleaner first on an inconspicuous surface.
Allow the plug and jack to dry completely before reconnecting. Then insert cleaned plug and rotate it gently times to help refresh mating contacts. Don’t sand or abrade the plug; scratches can breach protective plating and accelerate corrosion. If symptoms return when you move the plug, suspect worn contacts or a damaged cable.
Gather 90% Isopropyl Alcohol
Use 90% isopropyl alcohol to loosen oil, dirt, and residue from an audio plug that may cause crackling or dropouts. Choose alcohol labeled 90% or higher for fast evaporation and effective residue removal. Before you begin, power off the device and unplug the connector.
- Apply a small amount to a clean, lint-free swab or cloth; don’t pour liquid into the jack.
- Wipe the plug’s metal contact surfaces gently, using only enough moisture to lift contamination.
- Allow the plug to dry completely before reconnecting; trapped liquid can damage the jack or electronics.
Don’t sand the plug or use abrasive materials. Scratches can compromise its protective coating and increase corrosion risk. Keep alcohol away from ignition sources and work in ventilated space for safer vapor handling.
Clean Weekly High-Use Connectors
For connectors you use daily, inspect and clean the plug once a week to prevent dust, skin oil, and residue from degrading contact.
| Check | Method | Limit |
|---|---|---|
| Plug | Alcohol cloth | Light wipe |
| Fit | Gentle cycles | No force |
Disconnect the cable, then wipe its metal plug with a lint-free cloth lightly dampened with 90% isopropyl alcohol. Don’t pour or spray liquid into the jack. Allow the plug to dry completely. Then insert and remove the clean plug gently several times; don’t twist, force, or abrade it. Sandpaper scratches protective plating and increases corrosion risk.
Examine the tip, rings, and sleeve under light. Replace a cable if plating is pitted, loose, or visibly worn; routine cleaning can’t restore damaged contact surfaces or correct bent connector parts safely.
Power Off Before Cleaning
Before cleaning, shut down the device and disconnect its charger, external power source, headphones, and cables. Remove the battery when possible, and power off connected equipment to isolate the jack or connector. These steps help prevent accidental short circuits and component damage while you clean the contacts.
Disconnect All Power Sources
Power off the audio device, then unplug headphones, chargers, USB cables, and any other connected power source before you clean its jack or connector. This prevents the connection from being energized while you work and reduces chance of damage from contamination or electrical faults. Check charging indicators are off and remove any cable that can supply power, including adapters and powered USB hubs.
For a phone, hold the powered-off device with the jack facing downward before applying cleaning liquid. This orientation helps excess liquid drain outward instead of traveling farther into the enclosure. Use only the smallest necessary amount. Don’t reconnect accessories, attach charging cables, or switch the device on until the jack is completely dry. Some contact cleaners contain solvents beyond isopropyl alcohol.
Shut Down Connected Devices
Shut down the audio device and disconnect every attached cable, including headphones, USB leads, chargers, and powered adapters, so the jack is fully isolated. Never spray cleaner into a powered jack; live voltage can increase the chance of electrical damage or unintended faults. Verify the device is off rather than asleep, and unplug it from wall power or other external power sources.
For a phone, hold it with the headphone jack facing downward before applying a clear, fast-evaporating, residue-free electrical contact cleaner. This orientation helps excess liquid drain away instead of traveling farther inside. Use only a controlled amount, then wait until the cleaner has evaporated completely. Inspect the opening for remaining wetness before reconnecting any cable or turning the device back on again.
Remove Batteries When Possible
Once the device is fully powered off, remove any user-removable batteries to eliminate stored power while you clean the audio jack or connector. Battery removal reduces the chance that voltage reaches contacts or internal circuitry if cleaner migrates beyond the opening. Follow the battery-removal procedure, and don’t force covers, latches, or cells. Set batteries aside on a dry, nonconductive surface; inspect the compartment for leakage or corrosion, and avoid touching damaged material.
Keep the device off throughout cleaning and drying. When treating a phone jack, hold its opening downward so excess contact cleaner drains outward instead of running deeper into the enclosure. Use a minimal amount of cleaner. Allow the jack to dry completely in a ventilated area before reinstalling batteries and powering on.
Unplug Headphones And Cables
Start by powering off the device, then unplug all headphones and audio cables so you can access the jack without risking electrical damage. Switching the device off is essential before you touch the audio port, especially if you plan to use liquid contact cleaner. Pull each connector straight out by its plug body rather than tugging the cable.
Once disconnected, position the device so the jack faces downward; this orientation lets loosened debris and any cleaner drain away from the interior. Don’t reconnect anything while the port remains damp. Give the jack sufficient time to air-dry completely. Confirm that both the plug and jack are dry before restoring power and reconnecting your headphones or cables. Then play and listen for crackles, sound, or dropouts.
Prevent Accidental Short Circuits
Before you clean an audio jack or connector, power off the device and disconnect every power source, including chargers and USB cables. This prevents voltage from reaching damp contacts and reduces the chance that cleaner, debris, or a tool creates an accidental short circuit.
Don’t spray product into a powered jack. Instead, use a clear, fast-evaporating electrical contact cleaner that leaves no residue, and test it first on a surface to confirm compatibility. Apply only a amount with it unpowered.
Keep metal picks, paper clips, and conductive tools out of the jack; they can bridge contacts. After cleaning, position the device so liquid can drain, then allow the jack and connector to evaporate completely. Reconnect power and test audio only when everything is fully dry.
Clean Outdoor Gear After Moisture
After outdoor use, disconnect your gear from power, remove surface moisture and debris, and let it dry completely before storage. Inspect audio jacks and connectors for corrosion, which can cause crackling, dropouts, or unreliable detection. If cleaning is needed, use a residue-free electrical contact cleaner with the jack facing downward, then let it drain and dry fully.
Dry Gear Before Storage
Outdoor moisture can remain inside an audio jack long after the plug looks dry, so dry the plug, jack area, and surrounding gear completely before storage to reduce corrosion and unreliable contact.
Position the connector downward while it drains, preventing liquid from migrating deeper into the device. Leave the equipment in a clean, ventilated location until all exposed surfaces and openings are dry. If you use electrical contact cleaner, choose a clear, fast-evaporating, residue-free formula.
Disconnect power first, then apply only a one-second spray. Keep the jack facing downward and let the cleaner drain and evaporate fully before repeating, reconnecting cables, or placing the device in a case. Don’t rush this step: trapped liquid can corrode contacts during storage and cause intermittent sound later. Verify the device is dry before sealing it in a bag, case, or drawer.
Remove Moisture and Debris
If moisture or grit reaches an audio jack, disconnect the device and let it dry completely before reconnecting headphones, cables, or other audio gear.
After outdoor use, hold a phone with its jack facing downward. This orientation lets water, dust, and grit drain outward instead of carrying them deeper into housing. For contamination that won’t clear after drying, use only clear, fast-evaporating electrical contact cleaner labeled residue-free. Test cleaner on another surface first.
Fit the narrow tube, direct it into the jack, and spray for about one second. Let fluid drain, then repeat as needed. Keep power disconnected throughout the procedure. Don’t twist a cotton swab inside the opening: its fibers can snag, and the swab can bend delicate ring or sleeve contacts.
Inspect Connectors for Corrosion
Before reconnecting damp outdoor audio gear, unplug it and let every connector dry completely. Inspect plug’s metal contacts and jack opening under good light. You look for rust, darkening, greenish discoloration, or crusty residue; these deposits can weaken electrical contact and cause crackles or dropouts.
For light dirt or residue, apply a small amount of isopropyl alcohol or clear, fast-evaporating electrical contact cleaner to a lint-free swab or cloth. Don’t flood the jack. Let the connector air-dry fully before use. Don’t sand or scrape the plug: abrasion can damage its protective coating and accelerate corrosion.
If corrosion remains, contacts are pitted, or the jack looks damaged, stop using the gear and arrange professional repair. Forcing it together can worsen damage and create intermittent faults.
Crackles Stop After Reconnecting
When crackling disappears after you unplug and reconnect an audio plug, the plug-to-jack contact likely has dirt, oxidation, or a loose fit that briefly interrupts the signal.
Unplug the connector and inspect it under good light for residue or visible damage. Wipe the plug with a lint-free cloth lightly moistened with isopropyl alcohol; don’t sand it, because abrasives can scratch its protective coating. Let it dry completely before you firmly reseat it. Play audio and confirm that it remains clear.
If the fix lasts only briefly, gently move the plug while listening; changes can indicate an intermittent contact or cable damage near the connector. Test another headset or audio source to see whether the fault follows the connector or stays with the device’s jack.
Stop if Contacts Are Bent
Stop cleaning immediately if you can see bent ring or sleeve contacts inside the jack. A swab, brush, or rotating tool can catch a displaced contact and bend it farther, reducing spring pressure. Don’t insert a plug, toothpick, or other tool to test, straighten, or clear the damaged area. Force can deform the contact, scrape its plating, or damage adjacent insulation.
If audio returns only when you push the plug inward or move it sideways, treat that as evidence of possible jack or plug damage, not remaining dirt. Stop manipulating the connector, disconnect the equipment, and arrange an inspection. Bent contacts commonly need realignment, replacement, or jack-level repair. Continuing to clean or repeatedly reconnect the plug can turn an intermittent fault into a permanent dropout.
Never Spray Liquid Directly
Never spray contact cleaner or alcohol directly into an audio jack, because liquid can travel beyond the visible opening and reach internal contacts or nearby electronics. Even when contamination seems confined to the opening, control the cleaner rather than flooding the connector. Power off the device and unplug the connector before you begin. Use a lint-free swab lightly moistened with a clear, fast-evaporating, residue-free product; test it on another surface first.
- Apply only enough cleaner to wipe accessible metal surfaces.
- Don’t press the swab deeply, where it could carry moisture inward.
- Allow both jack and plug to dry completely before reconnecting cables or restoring power.
Drying time prevents trapped solvent from creating intermittent signals, corrosion, or unintended electrical paths during operation in sensitive audio equipment.
Inspect Plugs Under Bright Light
Under a bright light, inspect the plug’s metal tip and contact rings for dirt, residue, corrosion, scratches, or worn plating. Disconnect the device first, then rotate the plug slowly while checking each ring and the insulating bands between them. Look for dark deposits, greenish oxidation, oily film, pits, or uneven surfaces that can interrupt electrical continuity. Examine the shaft for bends or looseness; a worn or bent plug may not press evenly against the jack contacts.
If crackling changes when you gently move or twist the plug, record that clue before cleaning or replacing it. Don’t sand the metal: sanding can strip protective plating and create scratches that encourage corrosion. Use magnification if needed, and replace visibly damaged plugs rather than forcing them into equipment.
Conclusion
Clean, dry contacts give you reliable audio and help prevent oxidation, crackles, and dropouts. Power equipment off, inspect plugs under bright light, and use 90% isopropyl alcohol on a lint-free swab, never spray liquid directly. Clean high-use connectors weekly and outdoor gear after moisture exposure. Reconnect only when everything is fully dry. If you find bent, loose, or damaged contacts, stop and arrange repair rather than forcing the connection. This routine protects your equipment and sound.