How to Set Up a Home Studio Desk for Comfort, Workflow and Better Monitoring
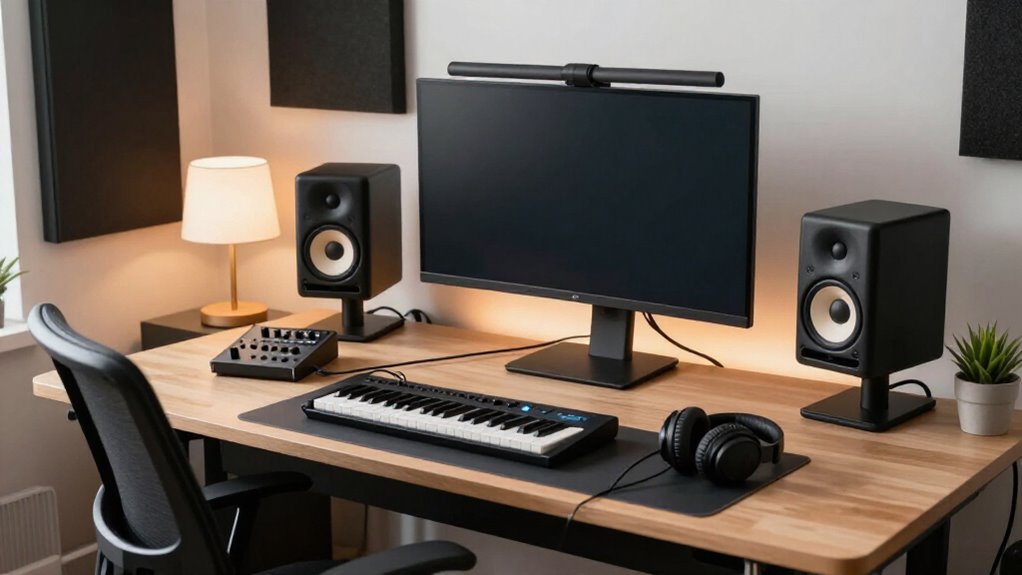
Set your monitors and listening seat in a centered equilateral triangle, with tweeters aimed at ear level and away from corners.
Adjust your chair so flat feet, near-90-degree elbows, and level forearms meet the keyboard and mouse comfortably.
Keep legroom clear, place the interface within easy reach, and separate audio from power cables by 6 inches.
Label every cable, ventilate covered gear, troubleshoot hum methodically, and check desk hardware quarterly.
Below, refine your setup further.
Centered Monitor Triangle Setup
Start by centering your listening position between the monitors, with equal left and right distances to protect stereo imaging. Then build an equilateral triangle: keep each tweeter the same distance from your head as the monitors are from one another. Angle them toward your listening position, and set tweeters at ear level, or slightly below it, while seated.
Use the shorter wall when practical, giving the desk and speakers a symmetrical front-facing layout that supports predictable early reflections. Keep both monitors clear of corners, since nearby boundaries boost bass and blur the balanced response you need for reliable decisions. This arrangement makes panning, level checks, and session adjustments faster because your mix translates from a stable, repeatable listening reference throughout your daily production workflow.
Measure Seated Elbow Height
Once your monitors are aligned, set your chair for relaxed, repeatable access to the desk. Sit with flat feet, positioning your elbows near 90°. Keep forearms parallel to the floor and measure from the floor to your elbow’s bony point, or to the underside of its support. Use that number to set keyboard and mouse surfaces, avoiding shoulder lift, hunching, and sharply bent wrists. Record it in both composing and engineering positions, then adjust desk or shelf heights. You’ll keep a stable listening posture, so control moves don’t interrupt critical mix judgments.
- Feel confident: your workspace meets you naturally.
- Let ideas flow without creeping tension.
- Trust precise edits during long sessions.
- Hear subtle balance changes with focus.
- Finish energized, not physically drained and calm.
Step 1: Clear Clutter Beneath Desk
Beneath the desk, protect legroom and chair travel by routing cables up the rear or side instead of across the floor. Use hooks, grommets, or a rear raceway to secure each run with strain relief, keeping keyboard-tray movement snag-free.
Create dedicated under-desk zones for power supplies and other hardware, using repeatable cable lengths and labels so session changes don’t become tangle fixes. Keep power lines at least 6 inches (15 cm) from balanced audio cables to lower hum and EMI risk.
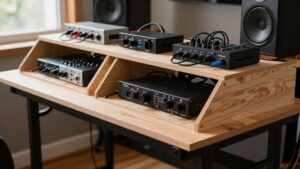
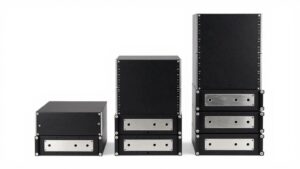
Hide power bricks and stored gear behind ventilated integrated rack covers, desktop-plug concealers, or a hinged or rollable rack front. This preserves airflow, reduces visual distraction, and prevents loose loops from becoming vibration or noise problems near your monitoring position during daily sessions.
Step 2: Place Interface Within Arm’s Reach
Place your audio interface beside your keyboard or mixing controller, within a comfortable arm arc from your main seated position. Set it at a height that lets you reach its knobs and jacks with your elbows comfortably bent between straight and 90 degrees, forearms roughly parallel to the floor. You’ll adjust gain, select inputs, and switch monitor modes without leaning, twisting, or interrupting a take.
Keep the interface in your primary workstation zone, close to the hands you use for keys and faders. If it lives in a rack behind or below the desk, mount it at the front edge or use a pull-forward tray. This preserves fast access without reaching over the keyboard or active faders.
Manage slack behind the desk for easy patching. Consistent placement reduces fatigue and supports accurate monitoring.
Step 3: Route Cables Away From Power
Route power and audio cables along separate paths from the start: keep XLR and TRS monitor/interface lines at least 6 inches (15 cm) away from monitor, interface, charger, and power-strip wiring where possible. This separation reduces EMI/RFI hum, helping you hear your monitors clearly while keeping the desk easier to service.
Use rear channels or hooks to guide signal lines on one side and power on the other, avoiding crossings that can become noise coupling points. Keep slack off the floor and behind your reach zone, so you won’t snag a lead when adjusting levels. If buzzing or whine remains, reroute the suspect pair near the desk edge or strip, then test another power-strip outlet. This quick check protects clean monitoring and uninterrupted sessions.
Step 4: Install a Keyboard Tray
Ergonomics starts with a keyboard tray sized for your controller; an 88-key model commonly needs about 58 inches wide by 16 inches deep and 6.5 inches high. Mount it so your elbows rest near 90 degrees and your forearms remain roughly parallel to the floor while you play, edit, or program parts. Keep the controller centered in your work zone, aligned with your computer keyboard and mouse, so you don’t twist or reach across the desk.
Adjust its height until your wrists stay neutral and your shoulders relax. If your hands lift or discomfort appears after a couple hours, lower the tray. Secure its slides to prevent distracting mechanical rattles during quiet takes. Leave clearance for nearby faders and knobs without leaning over the keys.
Step 5: Test Speaker Isolation Pads
With the controller positioned comfortably, test speaker isolation pads to keep monitor vibrations from traveling into the desk and coloring your mix. Place a rated pad beneath each monitor, centered under its footprint. At low frequencies, cabinets transfer energy into a desk, so decoupling can reduce boom and preserve bass decisions. Choose thickness and load capacity that support each speaker without raising it to compromise your tweeter-to-ear alignment. Don’t stack thin pads unless they’re designed for stacking.
Check that each monitor sits without rocking, then recheck symmetrical spacing, height, and horizontal aim. Knock on the desk and listen for reduced buzz or tinging. Finally, use familiar reference tracks and your normal playback checks to confirm that the bass sounds cleaner rather than merely different.
Step 6: Label Both Ends of Cables
Label both ends of every cable before you tuck it behind the desk, so you can trace connections without reaching around monitors or disturbing your setup. Use connector-size wrap-around tape or heat-shrink and keep the format consistent, even where tight routing runs beneath a dropped monitor shelf. Mark each destination clearly: “Interface→Monitor L” at the source and “Monitor L” at the speaker.
Add direction and signal type, such as “OUT 1 (LINE) → Sub Return,” to protect stereo pairing, gain staging, and rapid hum diagnosis. Match names to your DAW and I/O map, “DAW Ch 3 Out” or “Interface ADAT In,” so screen routing and physical paths don’t diverge. When you lower monitors, shift equipment, or revise the desk layout, relabel immediately. Keep sessions smooth.
Confirm Rack Ventilation Clearance
Once your cable paths are labeled, measure the rack’s real depth and preserve at least 2 to 3 inches (5 to 8 cm) of open space behind it for airflow. This gap lets preamps, compressors, and interfaces with internal power supplies pull in cooler air and release heat without stressing components or creating audible fan noise.
Leave margin above and below modules, or use vented rails and cooling cutouts, so convection and internal fans work efficiently. If your rack hinges or retracts, check clearance while it’s raised and lowered; a safe gap in one position can close in another. Keep power and balanced audio runs away from intake and exhaust vents. Consult each manufacturer’s dissipation requirements, then run a one- to two-hour session and verify temperatures stay stable.
Fix 60 Hz Ground-Loop Hum
Start by running balanced TRS or XLR cables from your interface to powered monitors, then listen for the low 60 Hz buzz at your normal seated mix position. Balanced lines reduce hum while preserving a clean monitoring reference.
| Check | Workflow move |
|---|---|
| Power | Plug interface and monitors into one strip. |
| Routing | Keep AC leads 15 cm (6 in) from audio cables. |
If buzz remains, disconnect USB drives, displays, and extra gear, then reconnect each device one at a time. This keeps troubleshooting orderly and helps you identify the offending ground path without disrupting your seated setup. Use an isolation transformer or ground-loop isolator only after these checks; it can break the loop, but may alter level or noise. Maintain clear access for fast, comfortable adjustments.
Schedule Quarterly Desk Bolt Checks
A quiet signal path won’t help much if the desk itself shifts under your hands or monitors, so put a desk bolt check on your calendar every three months. Check structural fasteners, prioritizing monitor bridge, keyboard-tray rails, and hinged or sliding rack mounts. These parts absorb repeated loads, vibration, and monitor bumps. Use a torque wrench to confirm bolts are snug; hand-tight hardware can move and compromise reach, tray level, or speaker alignment.
Look for gaps, desktop wobble, uneven tray height, and monitor aim. Retighten, level the desk on every foot, and inspect rear-rack hardware, grommets, and cable strain relief for shifting. Recheck after adjustments, then log dates and replacements, including stripped threads or worn lock washers, before instability affects posture, workflow, or monitoring.
Conclusion
Your desk works best when you treat it as one connected system: position yourself comfortably, center the monitors, and keep the listening triangle clear. Set frequently used gear within easy reach, protect airflow around racks, and separate audio from power runs.
Labeling, cable management, and periodic bolt checks save time and prevent interruptions. When hum appears, troubleshoot grounding before chasing tones. With these habits, you’ll move efficiently, listen accurately, and stay comfortable through longer sessions.